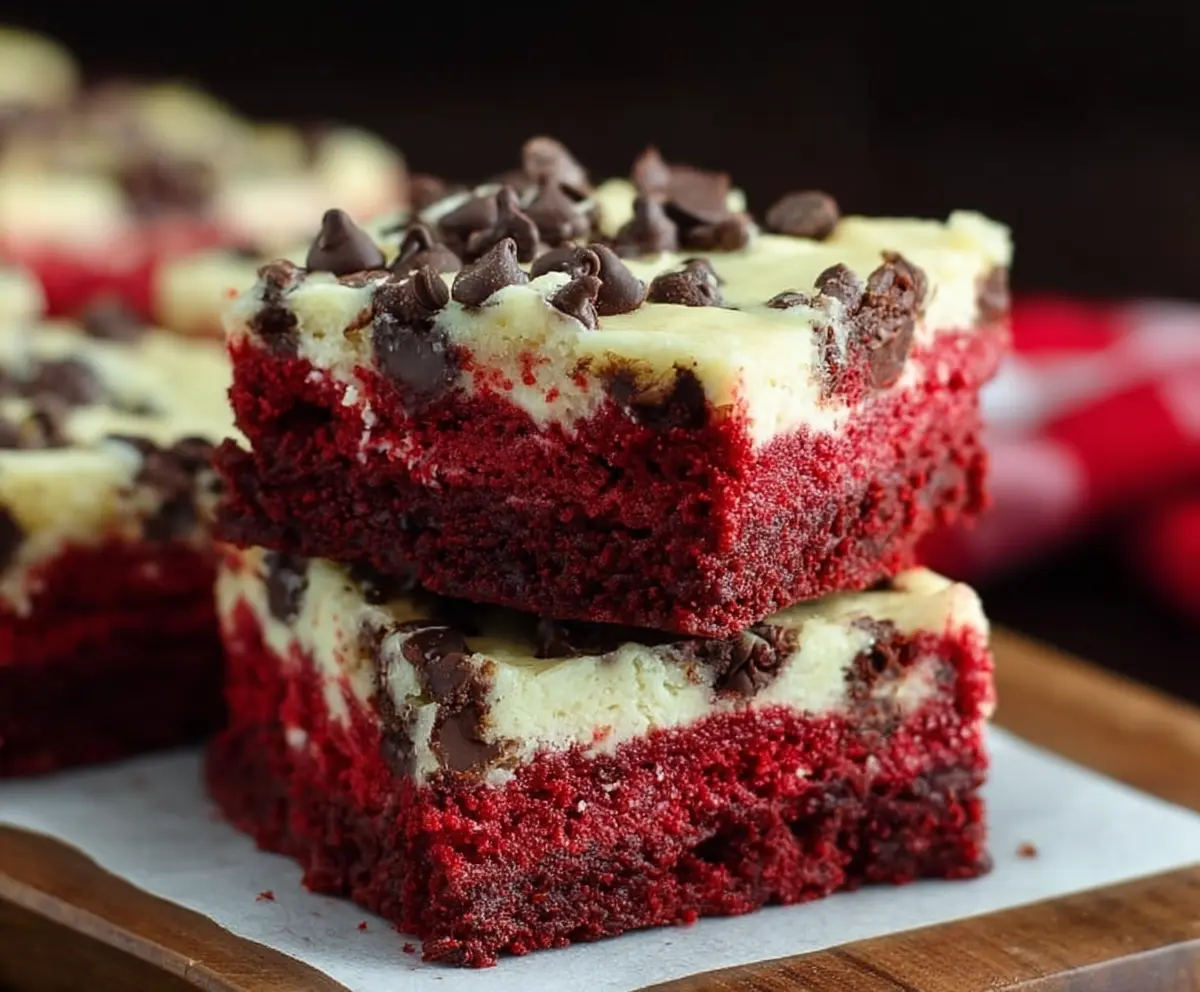
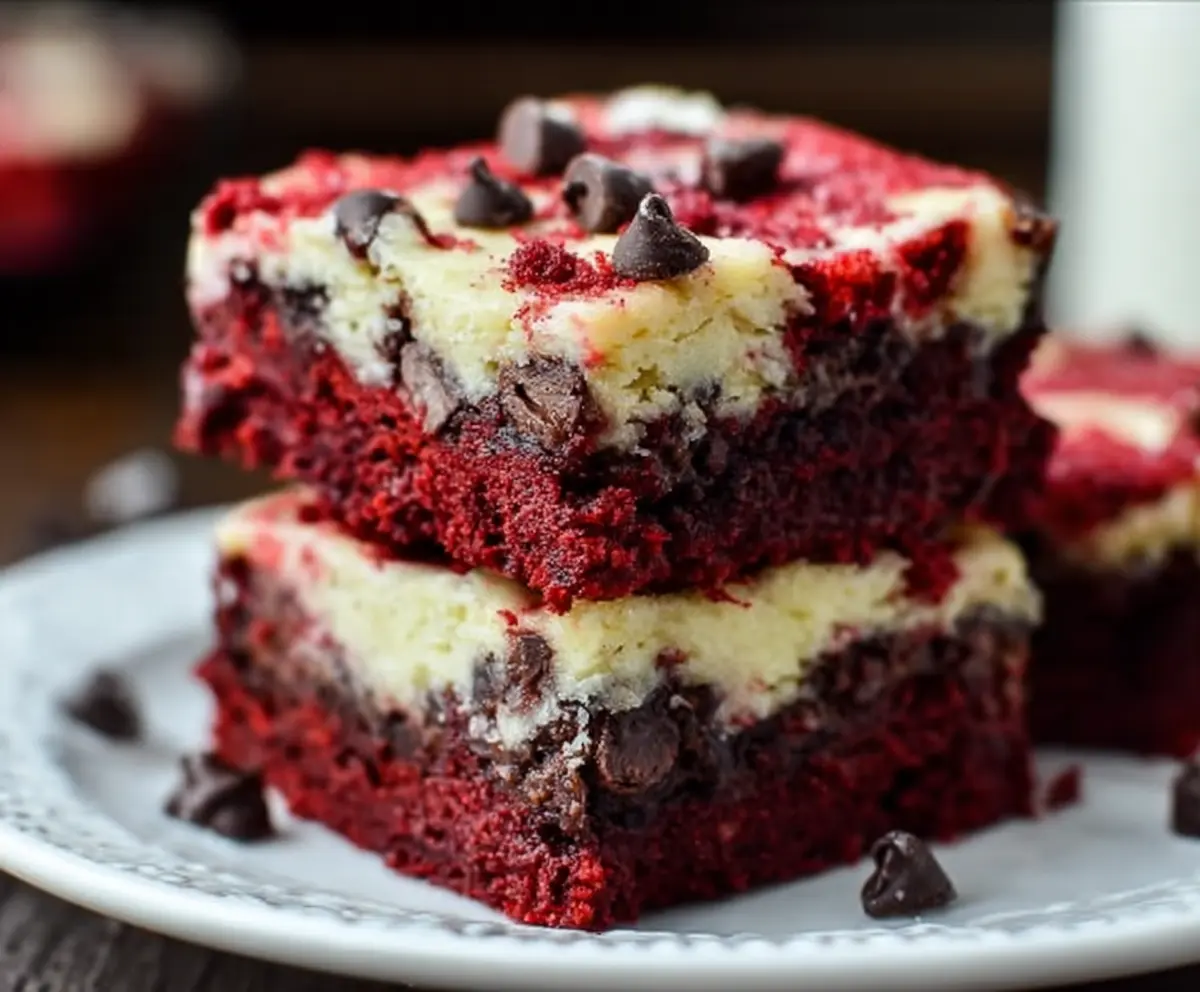
These Red Velvet Chocolate Chip Cheesecake Bars are a treat you won’t want to miss! With a rich red velvet base and creamy cheesecake topping, they are both pretty and delicious!
Who can resist the combo of red velvet and chocolate chips? I love to serve these at parties, and watch everyone enjoy the gorgeous colors and flavors. They really brighten up any dessert table!
Key Ingredients & Substitutions
All-Purpose Flour: This is essential for the structure of your bars. If you need a gluten-free option, you can substitute it with a cup-for-cup gluten-free flour blend, which works wonders!
Buttermilk: This helps keep the bars moist and tender. If you don’t have buttermilk, you can make your own by mixing 1 cup of milk with 1 tablespoon of lemon juice or vinegar. Let it sit for about 5 minutes to sour.
Red Food Coloring: For the classic red velvet color, I prefer gel food coloring as it gives a vibrant hue without adding too much liquid. If you want a natural alternative, beet juice can work, though the color might vary.
Cream Cheese: The key to the creamy cheesecake layer! If you want a lighter version, you can use Neufchâtel cheese, which is lower in fat but still creamy.
Semi-Sweet Chocolate Chips: I love using Ghirardelli chips for their rich chocolate flavor. If you want to mix things up, milk chocolate or white chocolate chips can add a different twist!
How Do I Successfully Layer the Cheesecake and Red Velvet Batter?
Layering can be the trickiest part, but it’s essential for that lovely marbled effect. Here’s how to do it right:
- Start by pouring half of the red velvet batter in the prepared pan. Use a spatula to spread it evenly across the bottom.
- Next, carefully spoon the cheesecake mixture on top, ensuring it doesn’t disturb the red velvet layer too much.
- Pour the remaining red velvet batter over the cheesecake layer. It helps to dollop the batter in several spots rather than pouring it in one go to keep the layers intact.
- Finally, take a knife and gently swirl through the layers to create that beautiful marbled look. Just a few gentle strokes will do the trick!
Make sure to keep your movements light—this will help avoid mixing the layers too much!
How to Make Red Velvet Chocolate Chip Cheesecake Bars?
Ingredients You’ll Need:
For the Red Velvet Cake Layer:
- 2 cups all-purpose flour
- 1 ½ cups granulated sugar
- 1 teaspoon baking soda
- 1 teaspoon cocoa powder
- 1 teaspoon salt
- 1 cup vegetable oil
- 1 cup buttermilk, room temperature
- 2 large eggs, room temperature
- 2 tablespoons red food coloring
- 1 teaspoon white vinegar
- 1 teaspoon vanilla extract
For the Cheesecake Layer:
- 16 oz (2 packages) cream cheese, softened
- ⅔ cup granulated sugar
- 2 large eggs
- 1 teaspoon vanilla extract
- 1 cup semi-sweet chocolate chips (plus extra for topping)
How Much Time Will You Need?
This recipe takes about 20 minutes to prep, plus 40-45 minutes for baking, and a mandatory cooling time of at least 3 hours (or preferably overnight) in the fridge. So all together, you’re looking at about 4-5 hours including cooling time!
Step-by-Step Instructions:
1. Prepping the Oven and Pan:
First, preheat your oven to 350°F (175°C). Next, line a 9×13 inch baking pan with parchment paper. Make sure some of the parchment hangs over the edges—this will help you lift the bars out later. Lightly grease the parchment paper for easier removal.
2. Making the Red Velvet Batter:
In a large bowl, whisk together the flour, sugar, baking soda, cocoa powder, and salt until combined. In another bowl, mix the vegetable oil, buttermilk, eggs, red food coloring, vinegar, and vanilla extract until smooth. Slowly add the wet ingredients to the dry mix, stirring gently until everything is just combined and there are no lumps. Set this aside for now.
3. Preparing the Cheesecake Layer:
In a large mixing bowl, beat the softened cream cheese with sugar until it’s creamy and smooth. Add the eggs one at a time, mixing well after each addition. It’s important to incorporate air into this layer; it makes it fluffy! Finally, mix in the vanilla extract and gently fold in the chocolate chips.
4. Layering the Mixtures:
Pour half of the red velvet batter into the prepared pan and gently spread it to cover the bottom. Next, take the cheesecake mixture and spoon it over the red velvet layer, spreading it evenly. Now, pour the remaining red velvet batter over the cheesecake. If you want a beautiful marbled effect, use a knife or spatula to gently swirl the two mixtures together. Be careful not to mix them too much!
5. Baking Time!
Before you pop it in the oven, sprinkle some extra chocolate chips over the top layer for that chocolatey goodness! Bake in the preheated oven for 40-45 minutes or until the cheesecake layer is set and the edges have a light golden brown color. Test with a toothpick in the center—it should come out mostly clean with just a few moist crumbs.
6. Cooling and Serving:
Once they’re baked, remove them from the oven and allow them to cool on a wire rack for about 1 hour. After they cool, transfer them to the fridge for at least 3 hours to set completely, or overnight if you can wait! When you’re ready to serve, use the edges of the parchment paper to lift the bars out of the pan and slice them into squares.
Enjoy your beautiful, delicious Red Velvet Chocolate Chip Cheesecake Bars! They are perfect for sharing with friends, family, or indulging yourself with a delightful treat!
Can I Use a Different Type of Food Coloring?
Yes! While traditional red food coloring is standard for red velvet, you can use gel food coloring for a more vibrant color without adding much liquid. Alternatively, beet juice can provide a natural color, although the hue may differ slightly.
What If I Don’t Have Buttermilk?
No worries! You can easily make your own buttermilk by mixing 1 cup of milk with 1 tablespoon of vinegar or lemon juice. Let it sit for about 5 minutes, and it’s ready to use as a substitute!
Can I Make These Bars Gluten-Free?
Absolutely! To make these bars gluten-free, substitute all-purpose flour with a cup-for-cup gluten-free flour blend. Ensure it’s one that works well for baking to maintain texture and flavor.
How Should I Store Leftover Cheesecake Bars?
Store any leftovers in an airtight container in the refrigerator for up to 5 days. They also freeze well! Wrap them tightly in plastic wrap and place them in an airtight container; they can last up to 3 months in the freezer. Just thaw in the fridge before enjoying!