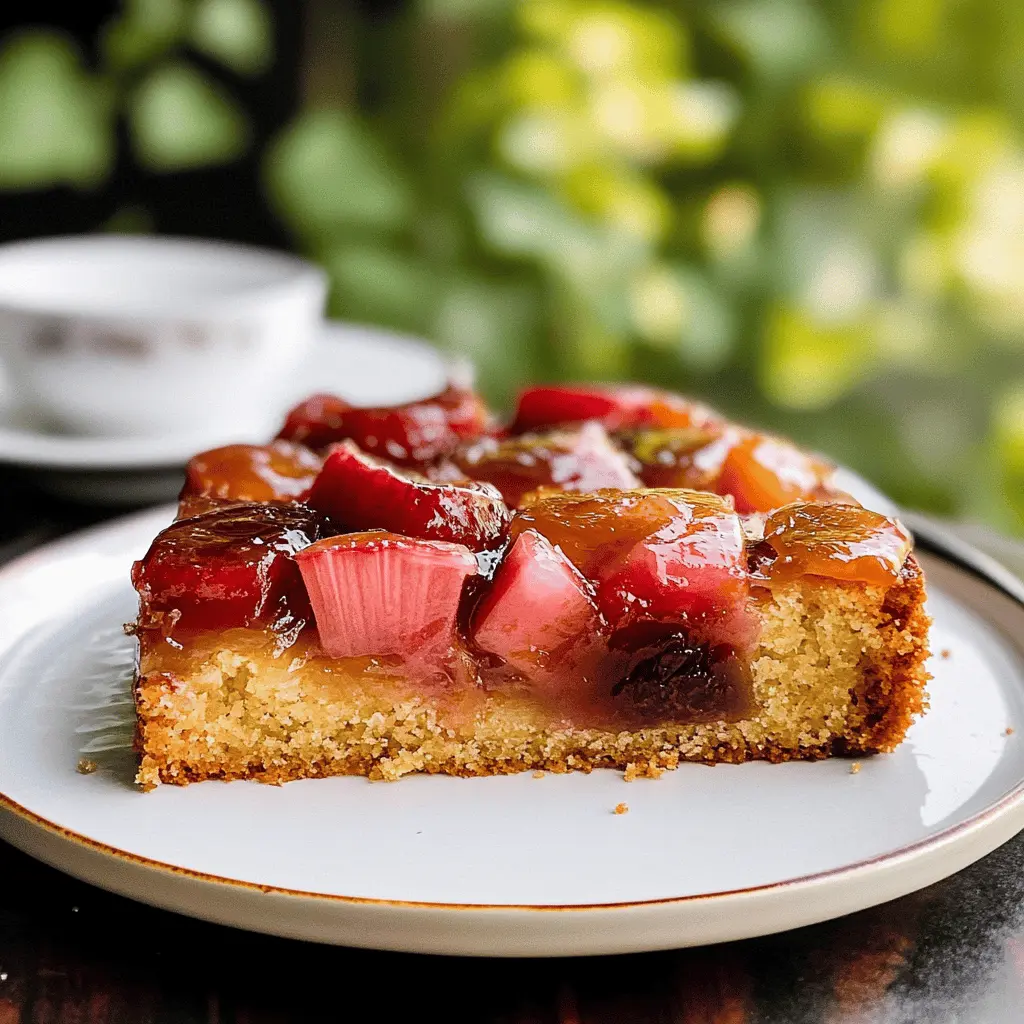
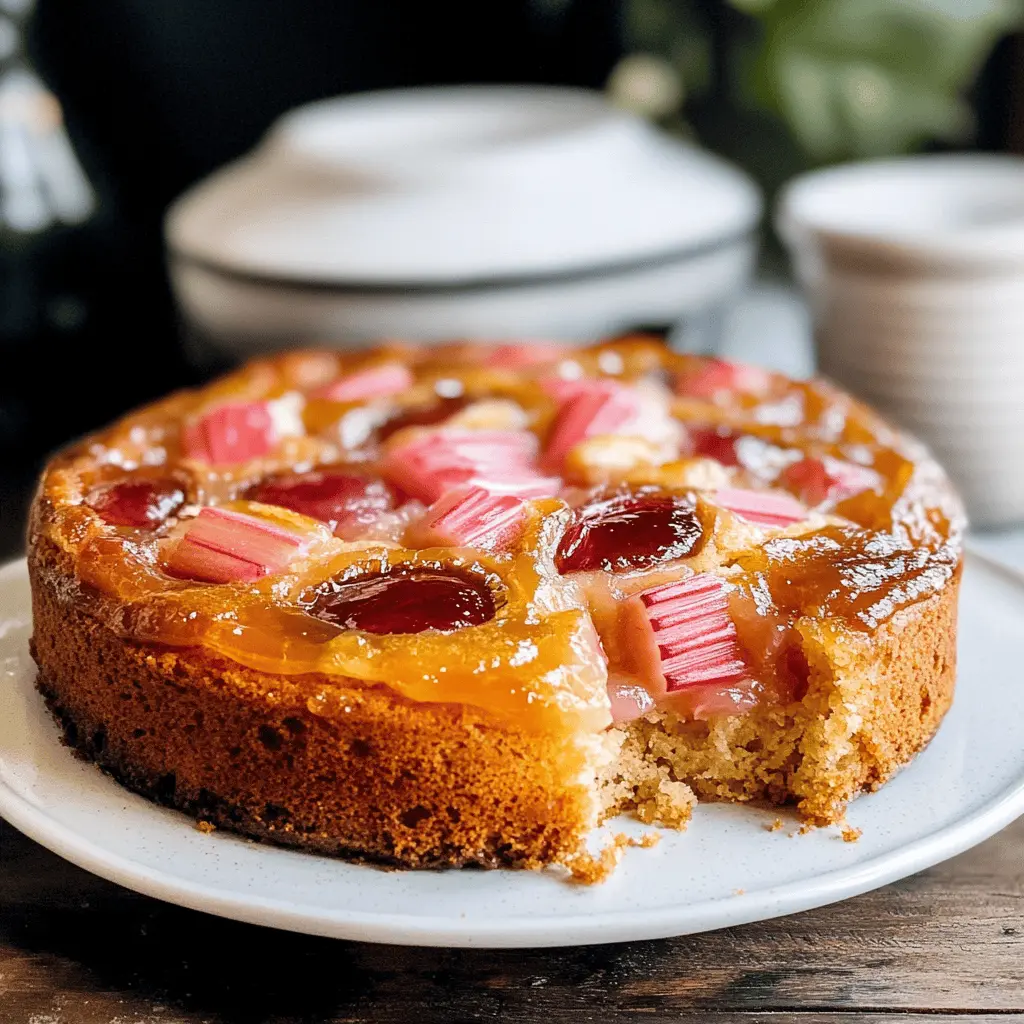
This Rhubarb Upside-down Cake is a fun twist on the classic cake! With tart rhubarb on top and a sweet, fluffy cake underneath, it’s both pretty and tasty!
Making cakes is my happy place, and this one is no exception! The best part? When you flip it over, everyone is amazed at the beautiful rhubarb design. It’s a sure showstopper! 🎂
Key Ingredients & Substitutions
Rhubarb: Rhubarb adds a tangy flavor. If it’s out of season, you can substitute it with tart apples or sour cherries for a different twist.
Granulated Sugar: You use sugar to sweeten the rhubarb and the cake. If you prefer, use brown sugar for a richer flavor. You can also choose a sugar substitute to reduce calories.
Unsalted Butter: This helps to create a tender cake. If you’re dairy-free, coconut oil or vegan butter works well instead.
All-Purpose Flour: If you’re gluten-free, try a gluten-free flour blend, but ensure it contains xanthan gum for texture. I prefer unbleached flour for a more natural taste.
Milk: Any milk works here, but almond or oat milk can be good alternatives if you need a non-dairy option.
How Do I Ensure My Cake Is Moist and Fluffy?
To get a moist and fluffy cake, focus on creaming the butter and sugar properly. This incorporates air, which makes your cake light. Here’s how:
- Make sure your butter is softened; it should be pliable but not melted.
- Beat the butter and sugar for about 3-5 minutes until the mixture is light and fluffy.
- Add eggs one at a time, ensuring each is well combined before adding the next.
- When mixing in the flour and milk, go gently. Overmixing can make the cake dense.
How to Make Rhubarb Upside-Down Cake?
Ingredients You’ll Need:
For the Rhubarb Layer:
- 2 cups rhubarb, chopped into 1-inch pieces
- 1 cup granulated sugar, divided (½ cup for rhubarb layer, ½ cup for cake batter)
- 1/4 cup unsalted butter
For the Cake Batter:
- 1 cup all-purpose flour
- 1 1/2 teaspoons baking powder
- 1/4 teaspoon salt
- 1/2 cup unsalted butter, softened
- 2 large eggs
- 1 teaspoon vanilla extract
- 1/2 cup milk
For Serving:
- Whipped cream or ice cream (optional)
How Much Time Will You Need?
This rhubarb upside-down cake takes about 15 minutes to prepare and 30-35 minutes to bake. After baking, you’ll want to let it cool for a few minutes before serving, bringing the total to roughly 1 hour. Perfect for sharing with family or friends!
Step-by-Step Instructions:
1. Preheat and Prepare Your Pan:
First, set your oven to 350°F (175°C) to preheat. While it’s heating, take a 9-inch round cake pan and grease it well to ensure your cake comes out easily later on.
2. Make the Rhubarb Layer:
In a medium saucepan, melt 1/4 cup of butter over medium heat. Once melted, add 1/2 cup of sugar, mixing it in until it’s well combined. Toss in the chopped rhubarb, stirring to coat it. Cook this mixture for about 2-3 minutes, just until the rhubarb starts to soften, but be careful not to let it get mushy. Once done, pour the rhubarb mixture into the prepared cake pan, spreading it out evenly.
3. Prepare the Dry Ingredients:
In a mixing bowl, whisk together the flour, baking powder, and salt. This step is important to evenly distribute the baking powder and salt throughout the flour. Set this bowl aside for now.
4. Cream the Butter and Sugar:
In another bowl, take the softened butter (1/2 cup) and add the remaining 1/2 cup of sugar. Cream these together using a hand mixer until the mixture is light and fluffy. Next, add the eggs one at a time, mixing well after each addition. Don’t forget to stir in the vanilla extract for extra flavor!
5. Combine Wet and Dry Ingredients:
Now, gradually mix the flour mixture into your butter and sugar mixture, alternating with the milk. Start and end with the flour mixture. Be gentle and mix until just combined; you don’t want to overmix or your cake could end up tough!
6. Assemble the Cake:
Pour the prepared cake batter over the rhubarb layer in the cake pan. Use a spatula to spread it out evenly. It’s looking delicious already!
7. Bake the Cake:
Pop the cake into your preheated oven and bake for about 30-35 minutes. You’ll know it’s ready when a toothpick inserted in the center comes out clean. Your kitchen should smell amazing by now!
8. Cool and Invert:
Once baked, let the cake cool in the pan for about 10 minutes. This part is important because it helps it hold together when you flip it. After cooling, carefully invert the cake onto a serving plate so that the rhubarb layer is on top!
9. Serve and Enjoy:
Your rhubarb upside-down cake is now ready to be served! Enjoy it warm on its own or with a dollop of whipped cream or a scoop of ice cream for an extra treat. Enjoy every delicious bite!
Can I Use Different Fruits Instead of Rhubarb?
Absolutely! While rhubarb adds a nice tartness, you can substitute with fruits like strawberries, peaches, or apples. Just remember that fruits with higher water content might make the cake a bit soggier, so you can adjust the sugar slightly to balance sweetness.
What If I Don’t Have Unsalted Butter?
No worries! You can use salted butter instead. Just reduce or omit the added salt in the recipe to keep the flavors balanced. It will still yield a delicious cake!
How to Store Leftover Cake?
Store any leftover cake in an airtight container at room temperature for up to 3 days. If you want to keep it longer, it can be frozen for up to 3 months. Just wrap it tightly in plastic wrap and then place it in a freezer bag. Thaw in the fridge overnight before serving.
Can I Make This Cake Gluten-Free?
Yes, you can! Substitute all-purpose flour with a gluten-free baking blend. Make sure the blend contains xanthan gum, or add it according to the package instructions for the best texture. The baking time may remain the same, so keep an eye on it!