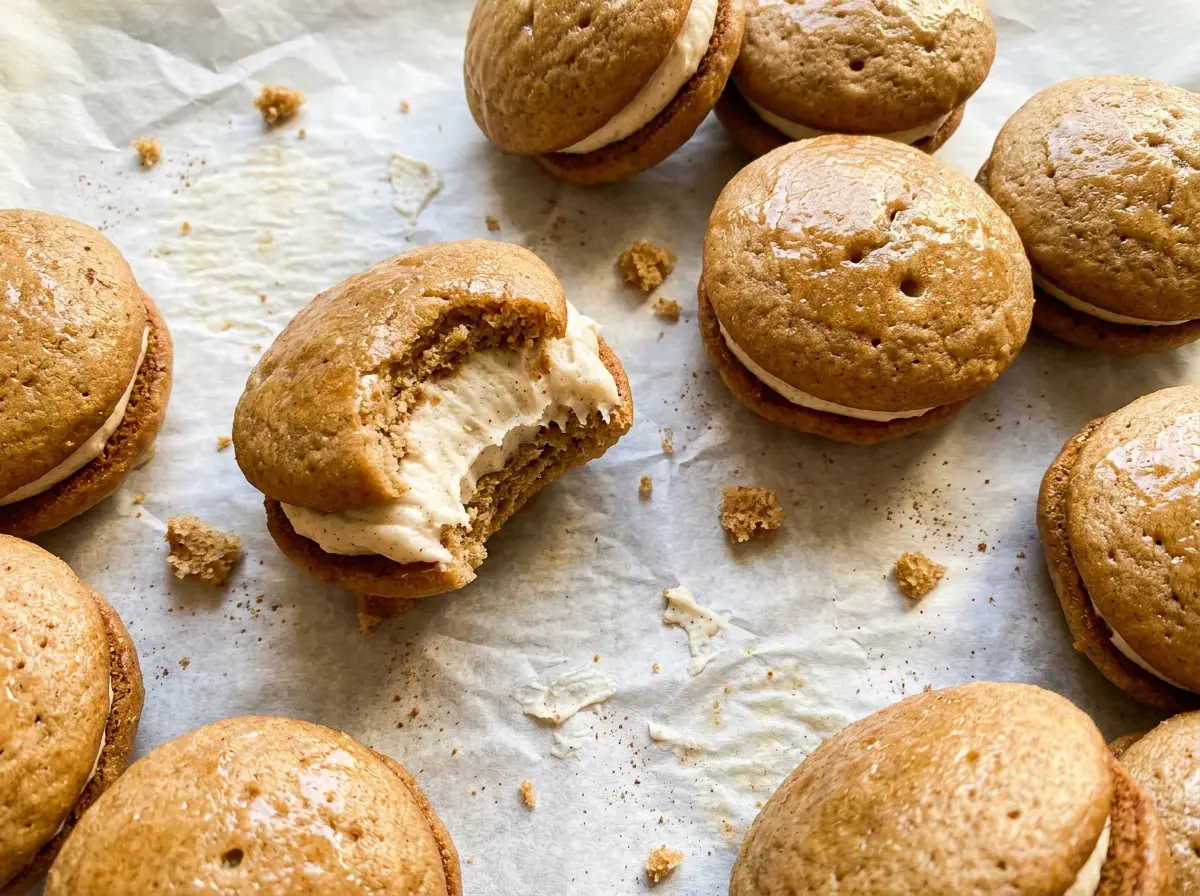
On the first tray, these little cakes should rise into soft rounds with tops that spring back lightly under your fingertip. That cue matters: leave them in too long and the edges dry out before the centers have a chance to stay tender. Apple Cider Whoopie Pies bring that soft, spiced cake together with a fluffy marshmallow filling, so every bite has a little tang from the cider and a sweet, creamy middle.
I like how the cakes feel sturdy enough to sandwich but still give when you bite into them. The batter is easy to portion with a measuring spoon, and the filling comes together in one bowl after the cakes cool. Keep the finished pies simple and let the cinnamon, ginger, and nutmeg do their quiet work alongside the apple.
Kitchen Note
Let the half-sheet pan cool before the second round goes in. A warm pan can start setting the bottoms of the next cakes before the tops bake through, so I give it time to cool rather than rushing the batches.
Save these Apple Cider Whoopie Pies for a bake when you want soft, warmly spiced cakes with a fluffy marshmallow center.
Why the cider has to shrink before it reaches the batter
Apple cider brings water as well as flavor, and the batter needs a concentrated apple note without the extra liquid of a full pour. Simmering the cider from two cups down to three-quarters of a cup keeps the cake mixture balanced while concentrating what makes these pies taste like cider, not just spice cake. Skipping the reduction would leave the batter looser and the apple flavor less pronounced.
Measure the reduced cider rather than relying only on how it looks in the saucepan. The finished quantity is the useful checkpoint, especially because the rate of evaporation changes with the pan and burner. Pour it into a heatproof measuring cup once it reaches that amount, then let it cool completely before mixing it in. Warm cider can soften the butter in the bowl and change how the batter comes together.
This is a small bit of extra attention before the mixing starts, but it pays off in cakes that hold their shape and taste distinctly of apple. The cider reduction is also easy to prepare while you gather and measure the other ingredients.
What makes the apple and spice flavors come through

- Apple cider — It provides the unmistakable apple character and the liquid for the cake batter. Choose cider with an apple flavor you enjoy, since simmering concentrates it; an ordinary grocery-store cider works well, so there’s no need to seek out a specialty bottle.
- Ground cinnamon, ginger, and nutmeg — Together they give the cakes their warm spice without covering up the cider. Fresh, fragrant spices make a noticeable difference; if the jars in your cupboard still smell lively, they’re perfectly good to use.
- Light brown sugar — Its molasses notes deepen the cake flavor and help keep the crumb tender. A fresh, soft brown sugar is easiest to cream smoothly with the butter; there’s no need for a premium brand.
- Unsalted butter and the egg — Softened butter creams with the sugar to build a light base, while a room-temperature egg blends into it more evenly than a cold one. Regular grocery-store butter and eggs are all you need here.
- All-purpose flour and the leaveners — Flour gives the cakes enough structure to hold a filling, while baking powder and baking soda help them rise. Measure flour without packing it into the cup; too much can make the cakes dense.
- Marshmallow creme — This gives the filling its light, stretchy texture that a plain butter-and-sugar frosting won’t quite match. Use the jarred creme called for here; marshmallows don’t blend into the filling in the same way.
- Confectioners’ sugar and vanilla — The sugar thickens the filling and the vanilla rounds out its sweetness. Sift the sugar if it has clumps, which makes it easier to beat the filling smooth.
From cider reduction to neat little cake sandwiches
Reduce the cider and let it cool
Simmer the cider in a small saucepan over medium heat until it measures three-quarters of a cup, which takes about 15–20 minutes. Pour it into a heatproof measuring cup and leave it to cool completely. Measuring gives you a clear endpoint, instead of guessing from the appearance of the liquid. Don’t add it to the batter while it’s warm.
Whisk the dry ingredients and cream the butter
Heat the oven to 350°F and line a half-sheet pan with parchment paper. Whisk the flour, baking powder, baking soda, cinnamon, ginger, nutmeg, and salt in a medium bowl so the leaveners and spices are distributed through the flour. In a large bowl, beat the softened butter and brown sugar with an electric mixer for about two minutes, until light and fluffy. That even, creamy base gives the cakes a better start than butter and sugar that are still streaky.
Mix the batter without overworking it
Beat the egg and vanilla into the butter mixture, then mix in the cooled cider until combined. Add the flour mixture and mix on low just until no dry streaks remain. Stop there; continuing to beat after the flour disappears can make the cakes tougher. The finished batter should be evenly mixed, with no visible pockets of flour.
Scoop and bake until the tops spring back
Scoop 24 portions of about 1 1/2 tablespoons each, spacing them about two inches apart on the pan. Bake 12 at a time for 10–12 minutes, until the tops spring back lightly when touched. If the surface still feels wet, give the batch a little more time within that range rather than pulling it early. Cool the cakes on the pan for five minutes, then move them to a wire rack; let the pan cool before baking the remaining batter.
Beat the filling and sandwich the cakes
Beat the softened butter, confectioners’ sugar, salt, and vanilla in a medium bowl for about two minutes, until smooth and fluffy. Beat in the marshmallow creme until it’s evenly combined, scraping the bowl if you see streaks. Spread about two tablespoons of filling on the flat side of half the completely cooled cakes. Top each with another cake, flat side down, and press gently so the filling reaches the edges without squeezing out.
Two small changes that give these pies a different feel
Use dark brown sugar for a deeper cake
Swap dark brown sugar for the light brown sugar in the cakes, using the same measure. The extra molasses character makes the spice taste a little deeper and gives the cakes a darker color, while keeping the same basic mixing method.
Make a gluten-free batch
Replace the all-purpose flour with a cup-for-cup gluten-free baking blend formulated for cakes, ideally one that includes xanthan gum. The cakes may be a touch more delicate, so let them cool fully before lifting and filling them.
Storage and Reheating
- Refrigerator: Keep the assembled pies in an airtight container for up to 4 days. The cakes firm up when cold, so let them soften before serving.
- Freezer: Freeze assembled pies in a single layer until firm, then transfer them to an airtight container for up to 1 month. Thaw them in the refrigerator.
- Reheating: These are best unheated; let chilled pies come toward room temperature before eating. Microwaving can make the marshmallow filling overly soft and messy.
Questions that come up while making these whoopie pies
Apple Cider Whoopie Pies
Ingredients
Equipment
Method
- Simmer the apple cider in a small saucepan over medium heat until reduced to 3/4 cup, about 15–20 minutes. Pour it into a heatproof measuring cup and cool completely.
- Heat the oven to 350°F and line a half-sheet pan with parchment paper.
- Whisk the flour, baking powder, baking soda, cinnamon, ginger, nutmeg, and salt together in a medium bowl.
- Beat the butter and brown sugar in a large bowl with an electric mixer until light and fluffy, about 2 minutes.
- Beat in the egg and vanilla, then mix in the cooled cider until combined.
- Add the flour mixture and mix on low just until no dry streaks remain.
- Scoop the batter into 24 portions of about 1 1/2 tablespoons each, spacing them about 2 inches apart and baking 12 at a time.
- Bake the first batch for 10–12 minutes, until the tops spring back lightly when touched.
- Cool the cakes on the pan for 5 minutes, then transfer them to a wire rack to cool completely.
- Let the pan cool before baking the remaining batter for 10–12 minutes, until the tops spring back lightly when touched.
- Cool the remaining cakes on the pan for 5 minutes, then transfer them to a wire rack to cool completely.
- Beat the butter, confectioners’ sugar, salt, and vanilla in a medium bowl until smooth and fluffy, about 2 minutes.
- Beat in the marshmallow creme until evenly combined.
- Spread about 2 tablespoons of filling on the flat side of half the cakes.
- Top each filled cake with a remaining cake, flat side down, and press gently to sandwich.