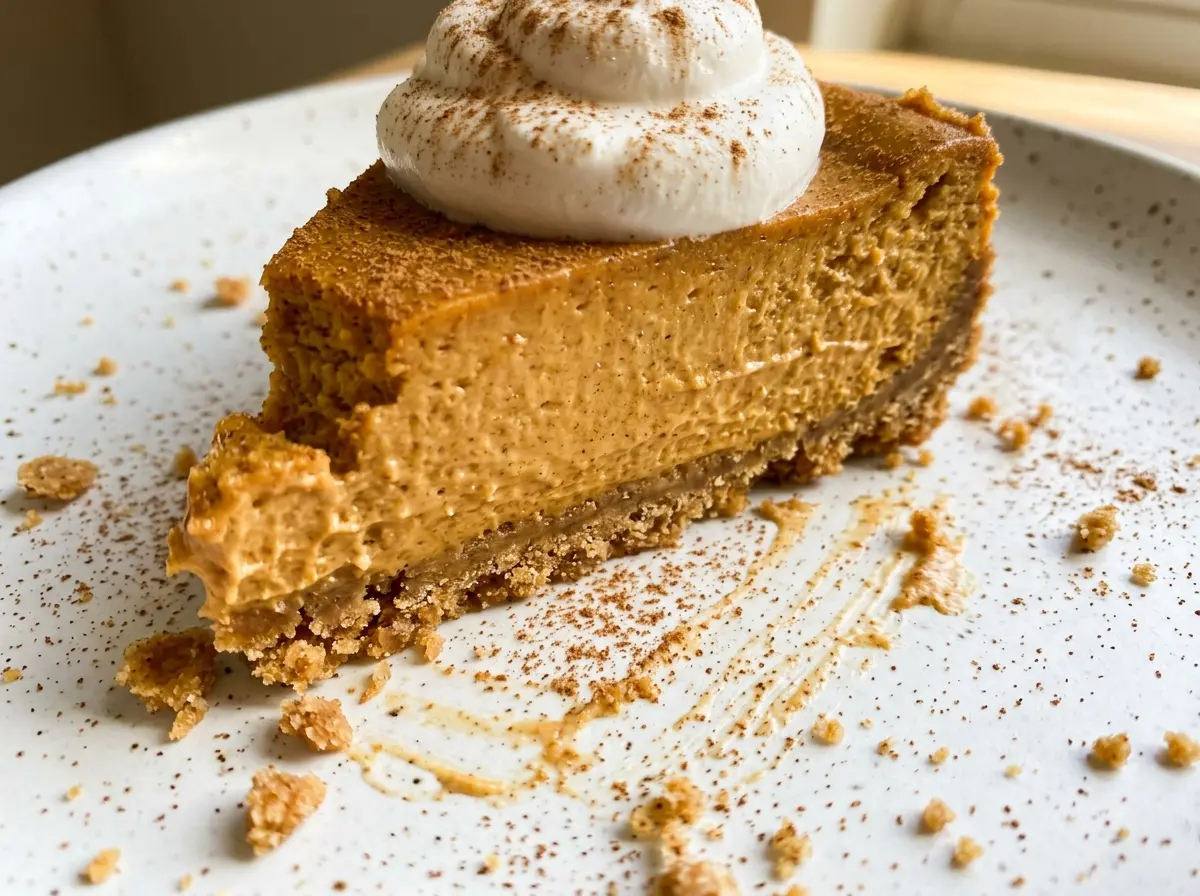
When the gingersnap crust comes out of the oven, the kitchen already smells like cinnamon and ginger. I used to expect the filling to bake like a plain cheesecake, but pumpkin makes the center behave differently: it needs a gentle bake and time to settle before slicing. This autumn cheesecake brings canned pumpkin, warm spices, and a crisp, buttery cookie crust together without making the pumpkin flavor too heavy.
I soften the cream cheese first, then add the eggs at the end and mix them on low just until they disappear into the filling. That keeps the batter smooth without whipping in extra air. A water bath cushions the heat around the springform pan, and the slow cooldown helps the middle finish setting without a sudden temperature change. After a long chill, each slice is creamy, softly spiced, and edged with gingersnap crunch.
Kitchen Note
Set the roasting pan on the oven rack before pouring in the hot water. A filled water bath is awkward to carry, and keeping it in place helps prevent water from sloshing toward the springform pan.
Save this autumn cheesecake for a bake with creamy pumpkin filling, warm spices, and a crisp gingersnap crust.
Why the Water Bath Matters More Than a Higher Oven Temperature
A cheesecake can look nearly set around the edge while its center still needs time. With pumpkin in the filling, rushing the bake with stronger heat is a poor trade: the outside can firm up before the middle has a chance to set evenly. The water bath surrounds the springform pan with hot water, moderating the heat and helping the filling bake more gently from edge to center.
That steady heat also gives you a wider window to catch the right texture. The edges should look set, while the center keeps a small, soft wobble; it will continue settling as the cheesecake cools. Turning off the oven and leaving the door cracked for an hour eases the temperature down gradually. Skipping that slow transition can make a cheesecake more prone to cracking, while pulling it out hot can leave the center unsettled. The goal isn’t a rigid center in the oven; it’s a gently set cheesecake that finishes firming during its long chill.
Pumpkin Purée and Gingersnaps Set the Flavor Before the Spices Do

- Canned pumpkin purée — Choose plain pumpkin, not pumpkin pie filling, which is already sweetened and spiced. The plain purée lets you control the seasoning and keeps the filling’s flavor balanced. Don’t use pumpkin pie filling as a one-for-one replacement.
- Gingersnap cookies — Their baked-in spice gives the crust a deeper ginger note than a plain cookie crust. Crush them finely so the butter can bind the crumbs into a compact base; a few large pieces can make the crust crumbly when you slice it. For a milder crust, graham crackers work as a swap.
- Cream cheese — Let it soften before beating. Cream cheese that’s still cold is more likely to leave small lumps in the filling, and those lumps won’t disappear easily after you add the pumpkin.
- All-purpose flour — A little flour helps give this pumpkin-rich filling structure as it bakes. For a gluten-free version, use a gluten-free 1:1 baking flour blend rather than leaving the flour out.
- Sour cream — It adds a gentle tang that keeps the filling from tasting flat or overly sweet. Plain, full-fat Greek yogurt is a workable same-amount swap, though the filling may taste a touch tangier.
- Eggs — Room-temperature eggs blend more evenly into the cream cheese mixture. Add them individually at the end rather than beating them in with the other filling ingredients.
From a Firm Gingersnap Base to a Slowly Cooled Center
Press and Prebake the Crust
Heat the oven to 325°F and grease a 9-inch springform pan. Stir the finely crushed gingersnaps with the melted butter and sugar until the crumbs are evenly coated, then press them firmly over the bottom of the pan. Bake the crust for 10 minutes, then set it aside to cool while you prepare the filling. Wrap the pan’s bottom and sides in two layers of heavy-duty foil; a snug wrap helps keep water out during the bath.
Mix the Filling Until Smooth
Beat the softened cream cheese in a large bowl until smooth before adding the sugar, flour, cinnamon, ginger, nutmeg, and salt. Beat in the pumpkin purée, sour cream, and vanilla until no streaks remain. Scrape the bowl if you see cream cheese clinging to the sides, since unmixed bits can leave the batter uneven. The filling should look cohesive and creamy before the eggs go in.
Add the Eggs and Set Up the Water Bath
Add the room-temperature eggs one at a time, mixing on low just until each one is incorporated. Stop as soon as the last egg disappears; prolonged mixing can add excess air to the batter. Pour the filling over the cooled crust, then set the springform pan in a large roasting pan. Pour hot water into the roasting pan until it reaches halfway up the springform pan’s sides.
Bake, Cool, and Chill Before Slicing
Bake at 325°F for 80 to 100 minutes. Look for set edges and a center that’s just barely wobbly, and check the center with an instant-read thermometer; it should register 160°F. Turn off the oven, crack the door open, and leave the cheesecake inside for 1 hour. Lift the springform pan out of the water bath, remove the foil, and cool it on a rack to room temperature; refrigerate for at least 6 hours before releasing the sides and slicing.
Easy Swaps for a Different Crust or a Gluten-Free Cheesecake
Make a Milder Graham Cracker Crust
Replace the gingersnap crumbs with the same amount of finely crushed graham crackers, keeping the butter and sugar amounts unchanged. The crust will have a gentler, less gingery flavor, so the pumpkin and cinnamon come through more clearly.
Make the Cheesecake Gluten-Free
Use gluten-free gingersnap cookies for the crust and a gluten-free 1:1 baking flour blend in the filling. The spice and creamy texture stay close to the original, though the crust’s texture depends on the particular cookies; check packaged ingredients for gluten-containing additions.
Swap the Sour Cream for Greek Yogurt
Use plain, full-fat Greek yogurt in the same amount as the sour cream. It keeps a similar tang and creamy quality, with a slightly sharper dairy note in the finished filling.
Storage and Serving
- Refrigerator: Cover and refrigerate leftovers for 3 to 4 days. The crust softens gradually as it sits, but the filling stays creamy.
- Freezer: Freeze individual slices until firm, then wrap them well and store in an airtight container for up to 1 month for best quality. Thaw slices overnight in the refrigerator.
- Serving: Serve chilled. Don’t leave cheesecake sitting out for an extended stretch; return leftovers to the refrigerator promptly.
Questions That Come Up When Baking Autumn Cheesecake
Autumn Cheesecake
Ingredients
Equipment
Method
- Heat the oven to 325°F and grease a 9-inch springform pan.
- Stir the gingersnap crumbs, melted butter, and sugar together.
- Press the mixture firmly over the bottom of the pan.
- Bake the crust for 10 minutes, then cool it while you make the filling.
- Wrap the pan’s bottom and sides in two layers of heavy-duty foil.
- Beat the cream cheese in a large bowl until smooth.
- Beat in the sugar, flour, cinnamon, ginger, nutmeg, and salt.
- Beat in the pumpkin, sour cream, and vanilla until smooth.
- Add the eggs one at a time, mixing on low just until each is incorporated.
- Pour the filling over the cooled crust.
- Set the springform pan in a large roasting pan and pour hot water into the roasting pan until it reaches halfway up the springform pan’s sides.
- Bake at 325°F for 80 to 100 minutes, until the edges are set, the center is just barely wobbly, and an instant-read thermometer inserted into the center registers 160°F.
- Turn off the oven, crack the door open, and leave the cheesecake inside for 1 hour.
- Lift the springform pan out of the water bath, remove the foil, and cool the cheesecake on a rack until it reaches room temperature.
- Refrigerate for at least 6 hours before releasing the sides of the springform pan and slicing.