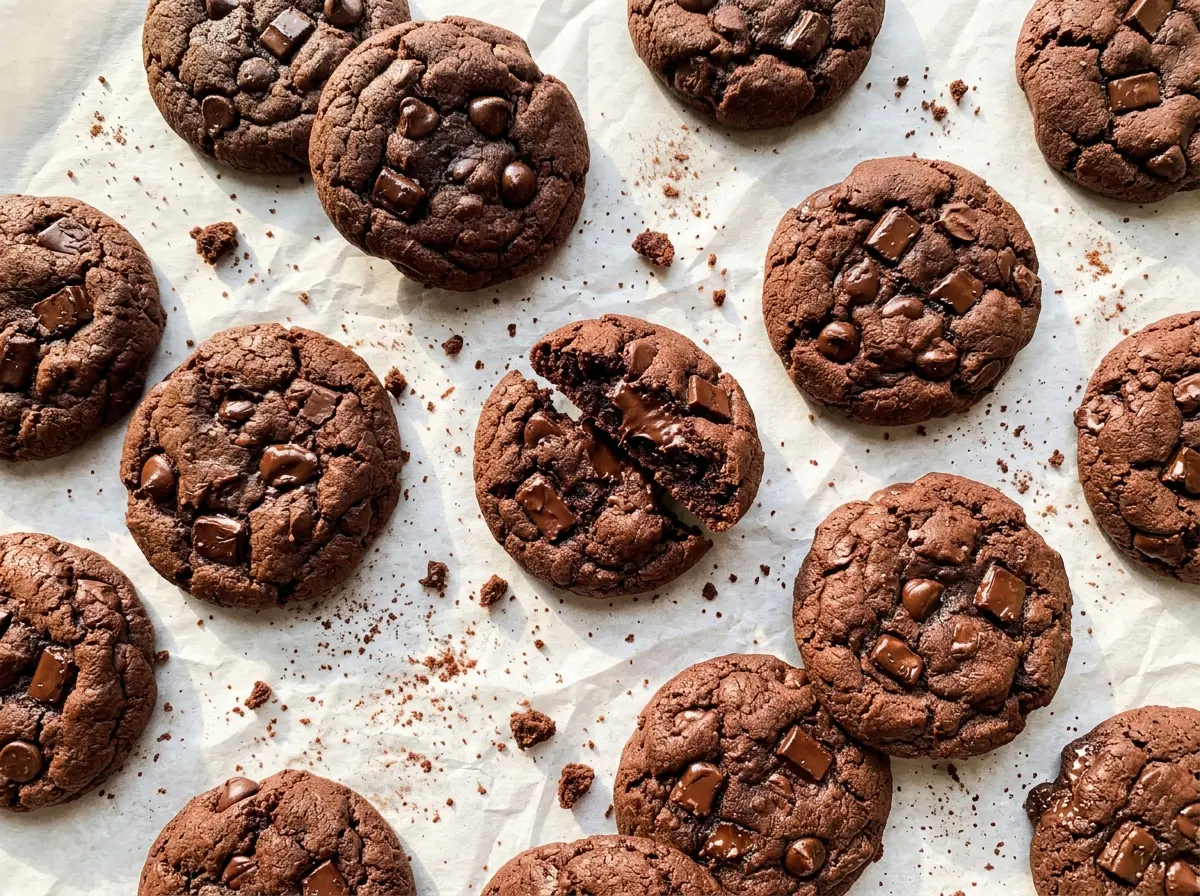
When the first tray comes out, the centers can look a little too soft to be finished. That’s exactly the point: these chewy chocolate cookies need a few minutes on the hot baking sheet to settle, and pulling them before they look firm keeps the middles tender instead of dry. I learned not to wait for a deep brown edge; cocoa makes that cue hard to read.
The dough gets its chew from a combination of packed brown sugar and an extra egg yolk, while a short chill firms it enough to scoop neatly. I mix the dry ingredients separately so the baking soda doesn’t collect in one spot, then stop mixing as soon as the last flour streak disappears. The result is a rich chocolate cookie with set edges and a soft center, not a crumbly little cake.
Kitchen Note
Scrape the bowl before the flour goes in, especially around the bottom where soft butter can cling. It’s much easier to get an even dough at that point than to chase a butter streak after the dry ingredients are mixed in.
Save these chewy chocolate cookies for the next chocolate craving: soft centers, set edges, and a dough that’s easy to portion after chilling.
Why Cocoa Cookies Turn Dry Before They Look Overbaked
Chocolate dough hides visual clues. The surface is dark from the start, so waiting for a clearly browned top usually means the cookies have stayed in the oven too long. The edges tell you more than the color: they should look set, while the middle still appears a touch soft when you pull the pan out. Carryover heat finishes the center as the cookies rest on the sheet.
Dryness can also start before the bowl reaches the mixer. Flour and cocoa both take up space in a measuring cup, and packing either one in can leave you with more dry ingredients than the dough can comfortably absorb. Spoon each into the cup, then level it off rather than scooping straight from the bag. That small measuring habit matters especially in a chocolate cookie, where the cocoa can make a dough seem firm even when it’s already correctly balanced.
The brown sugar and extra yolk bring moisture and tenderness, but they can’t compensate for an overfilled cup or an extra few minutes in the oven. Keep the dough measurement level and use the edges—not a brown top—as your doneness cue.
What the Cocoa, Brown Sugar, and Extra Yolk Contribute

- Unsweetened cocoa powder — This brings the chocolate flavor and makes the dough look darker than it will taste. Use a cocoa you enjoy eating; a fresh container with a clean chocolate aroma is worth choosing here. For this batch, stick with unsweetened cocoa rather than sweetened drinking mix, which has added sugar and won’t behave the same way.
- All-purpose flour — It gives the cookies enough structure to hold their shape without making them cakey when measured lightly. A cup-for-cup gluten-free baking blend designed to replace all-purpose flour is the most useful swap; choose one that includes a binder, and expect a slightly different texture depending on the blend.
- Light brown sugar and granulated sugar — The brown sugar supplies moisture and a gentle molasses note, while granulated sugar helps balance the sweetness and structure. Keep the brown sugar packed as measured. Dark brown sugar can stand in equally, though its stronger molasses flavor will come through more.
- Unsalted butter — Softened butter creams evenly with the sugars; melted butter would change the dough and how it spreads. If you need a dairy-free version, use unsalted plant-based baking sticks in the same amount, not the soft spread sold in a tub. The cookies may have a slightly different spread and buttery flavor.
- Egg and egg yolk — The whole egg binds the dough, and the extra yolk adds richness without adding the extra white that could make the crumb firmer. Keep both at the listed sizes for the intended texture; replacing them with one egg changes the balance.
- Baking soda and vanilla — Baking soda helps the cookies rise and spread, so measure it carefully rather than estimating. Vanilla rounds out the cocoa; pure or imitation extract both work, though the aroma differs slightly.
From Creamed Butter to Set Edges: The Cues That Matter
Whisk the Dry Ingredients Evenly
Whisk the flour, cocoa powder, baking soda, and salt together in a medium bowl before they meet the butter mixture. Break up any cocoa clumps as you whisk so there aren’t pale flour pockets or concentrated baking soda in the finished dough. A uniform, dark dry mixture is what you want. Set it aside while you cream the butter and sugars.
Cream Until Light, Then Add the Eggs
Beat the softened butter with both sugars on medium speed for 2 to 3 minutes, until the mixture looks lighter and fluffy rather than dense and greasy. Add the egg, yolk, and vanilla, then beat just until combined. Scrape down the bowl so the mixture is even from top to bottom. If it looks a little uneven before the flour goes in, scrape once more instead of extending the mixing time.
Mix Gently and Give the Dough Its Chill
Add the flour mixture and mix on low just until no dry streaks remain. Stop as soon as the dough comes together; continued mixing can make a cocoa cookie tougher. Cover the bowl and chill the dough for 30 minutes, which firms the softened butter and makes the portions easier to handle. Don’t add extra flour if the dough feels soft before chilling.
Bake for Soft Centers, Then Let Them Set
Heat the oven to 350°F and line two large baking sheets with parchment. Scoop rounded 1 1/2-tablespoon portions, leaving about 2 inches between them, and bake for 10 to 12 minutes. Halfway through, switch the sheets between racks and rotate each one from front to back so they bake more evenly. Take them out when the edges are set but the centers still look slightly soft; cool them on the sheets for 5 minutes, then move them to a wire rack to cool completely.
Two Useful Swaps for Chewy Chocolate Cookies
Make Them Gluten-Free with a Cup-for-Cup Blend
Replace the all-purpose flour with the same amount of a gluten-free baking blend labeled for cup-for-cup use. A blend with a binder is the better choice for cookies that need to hold together; the centers may be a little more tender or slightly grainy compared with the original.
Make a Dairy-Free Batch with Baking Sticks
Use the same amount of unsalted plant-based baking sticks in place of the butter. Choose sticks rather than tub margarine, which contains more water and can make the dough spread unpredictably. The chocolate stays front and center, but the cookies may have a less buttery finish.
Storage and Reheating
- Refrigerator: Store fully cooled cookies in an airtight container for up to 4 days. They’ll firm up as they chill, so let one return to room temperature for a softer bite.
- Freezer: Freeze fully cooled cookies in a freezer-safe container with parchment between layers for up to 2 months. Thaw at room temperature while still covered to help keep them from drying out.
- Reheating: Warm one cookie in the microwave for about 5 to 8 seconds if you want a softer center. Longer heating can make it tough once it cools, so use short bursts.
Questions That Come Up with Chocolate Cookie Dough
Chewy Chocolate Cookies
Ingredients
Equipment
Method
- Preheat the oven to 350°F.
- Line two large baking sheets with parchment paper.
- Whisk the flour, cocoa powder, baking soda, and salt together in a medium bowl.
- Beat the butter, brown sugar, and granulated sugar in a large bowl with an electric mixer on medium speed for 2 to 3 minutes, until light and fluffy.
- Beat in the egg, egg yolk, and vanilla until combined, scraping down the bowl as needed.
- Add the flour mixture and mix on low just until no dry streaks remain.
- Cover and chill the dough for 30 minutes.
- Scoop the dough into rounded 1 1/2-tablespoon portions.
- Arrange the portions about 2 inches apart on the prepared baking sheets.
- Bake for 10 to 12 minutes, switching the sheets between racks and rotating them front to back halfway through, until the edges are set and the centers still look slightly soft.
- Let the cookies cool on the baking sheets for 5 minutes.
- Transfer them to a wire rack to cool completely.