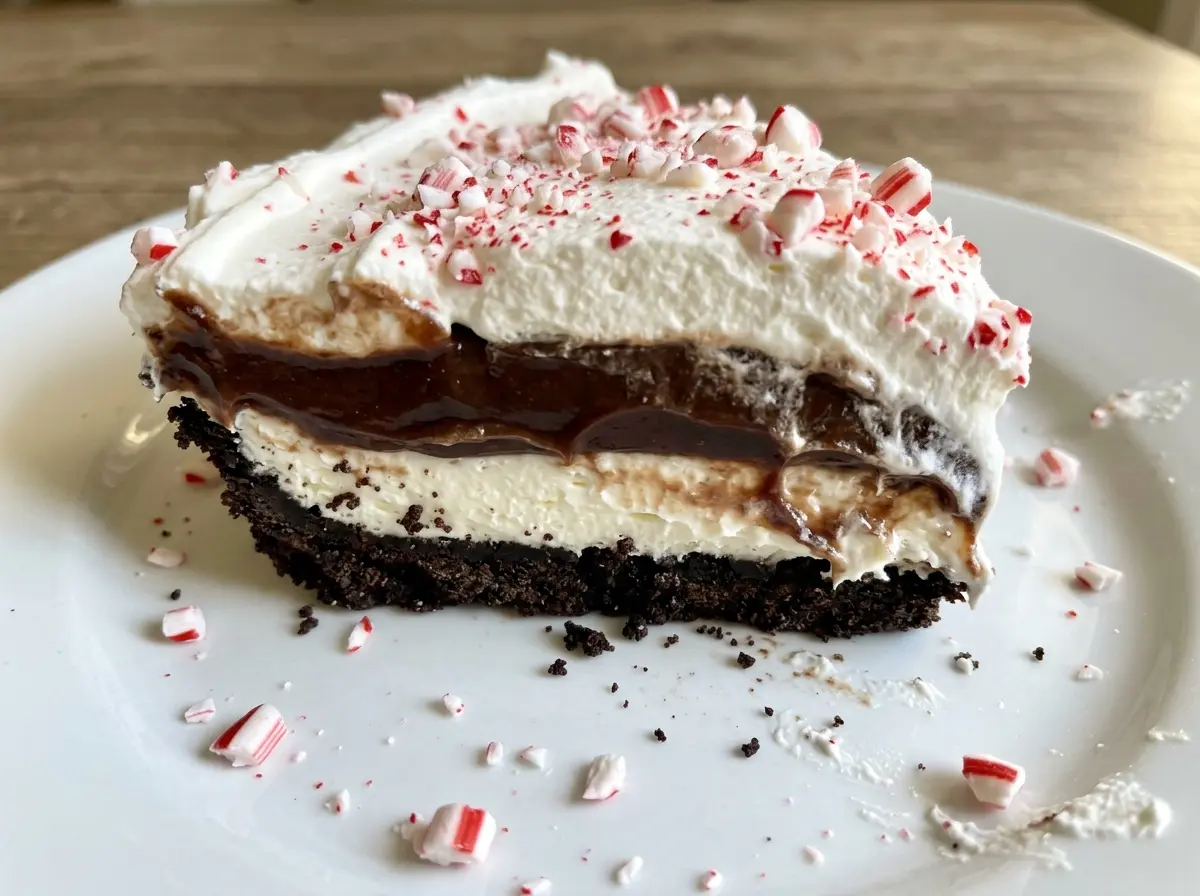
When the chocolate-cookie crust comes out of the oven, the butter has pulled the crumbs into one dark, firm layer. It still needs to cool completely before anything goes on top. Rushing that wait can soften the peppermint layer and blur the distinct stripes that make Chocolate Peppermint Lush such a satisfying chilled dessert.
I like how each layer brings a different texture: a crisp, buttery base, a soft peppermint cream cheese filling, and thick chocolate pudding under a cloud of whipped topping. The method is straightforward, but the order matters. Let the crust cool, give the pudding time to thicken, and the layers stay easy to see when you cut into the pan.
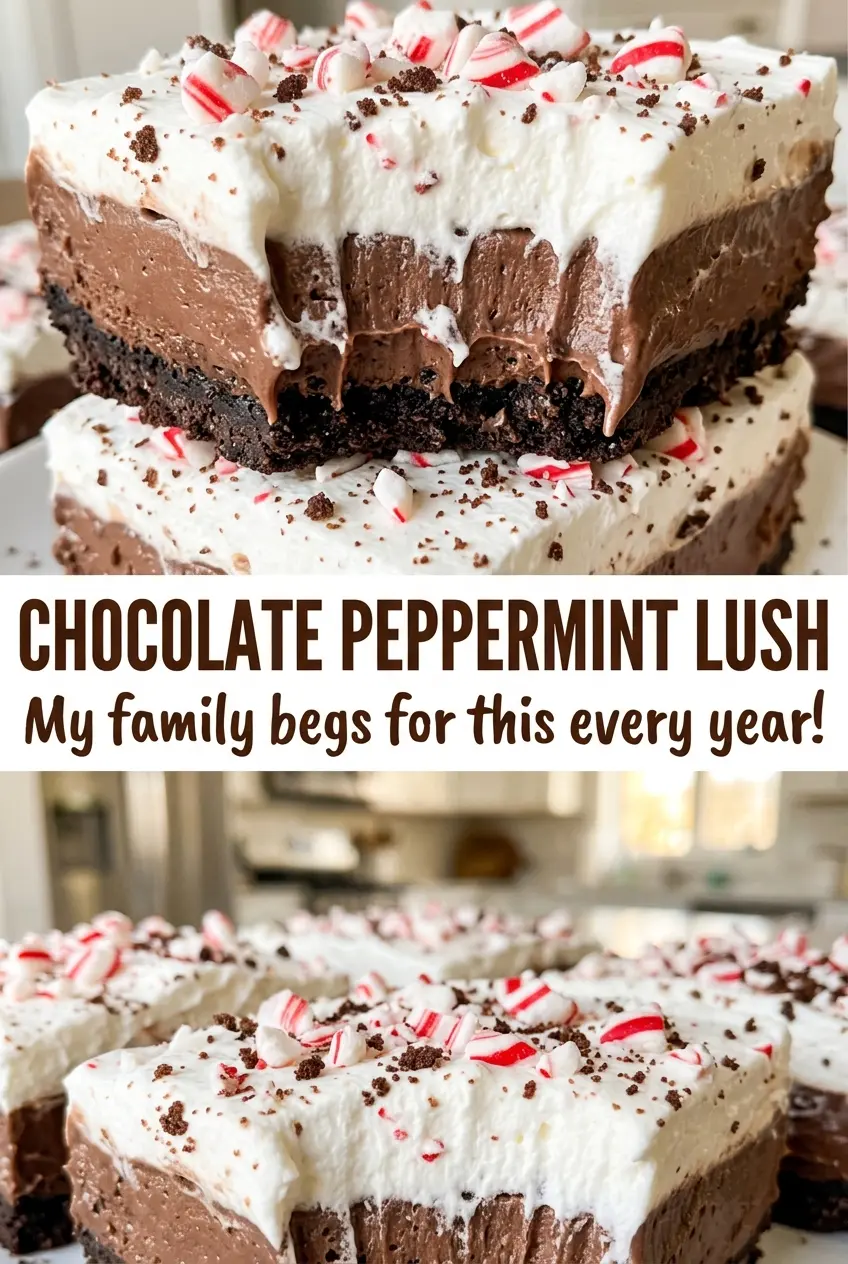
Crushed peppermint candies go on just before serving, so their bright crunch contrasts with the cool, creamy center. Each square is rich without needing a large slice, and the chocolate-and-mint combination comes through in every layer.
Kitchen Note
Peppermint extract is concentrated, so I measure it instead of pouring by eye. Keeping to the measured amount gives the filling a clear mint note without letting it take over the chocolate.
Save Chocolate Peppermint Lush for a make-ahead dessert with cool chocolate layers and a crisp peppermint finish.
Why a Warm Cookie Crust Makes the Peppermint Layer Slide
The crust is the only part of this dessert that goes into the oven, and that short bake gives the cookie crumbs and melted butter a chance to form a cohesive base. But a baked crust holds its shape best after it has cooled completely. Spread the cream cheese mixture over a warm base and the filling can soften at the edges, making it harder to keep the layers distinct.
There’s a second texture cue to watch: each layer should be spread gently rather than pressed down. The peppermint filling is light because the whipped topping is folded into the smooth cream cheese mixture. The pudding thickens separately before it goes on top, so it can be spread in an even layer without sinking into the filling. Take your time as you add each one; that’s what gives the finished pan its clean bands of cookie, mint, and chocolate.
What Each Layer Needs from Its Ingredients
- Chocolate sandwich cookies — These give the crust its chocolate flavor and fine, compact crumb. A standard package works well; there’s no need to seek out a specialty brand. Crush the cookies finely so the melted butter can coat the crumbs evenly and help them press into a solid base.
- Unsalted butter — Melted butter binds the cookie crumbs. Unsalted butter keeps the crust from picking up extra salt, and an ordinary grocery-store brand is fine. The crumb texture matters more than buying premium butter.
- Cream cheese and powdered sugar — Cream cheese gives the peppermint layer its tang and structure, while powdered sugar blends smoothly into it. Let the cream cheese soften before beating; a cold block is harder to smooth out. Regular cream cheese gives a firmer, richer layer than reduced-fat cream cheese, which may leave the filling softer.
- Peppermint extract — This is what makes the middle layer taste distinctly minty. Keep to the measured amount in the recipe; adding extra can make the mint taste sharp. Peppermint extract is not interchangeable with a different flavor of extract if you want the same result.
- Frozen whipped topping — The first tub lightens the cream cheese filling, and the second creates the soft top layer. Thaw both in the refrigerator before using so they fold and spread evenly. A standard tub is all you need; changing to a different topping changes the texture and stability.
- Instant chocolate pudding mix — Instant pudding thickens with cold milk, which makes it practical for this no-cook layer. Check the package type: cook-and-serve pudding needs a different preparation and won’t set the same way here. A regular store brand of instant chocolate pudding works.
- Cold whole milk — Whole milk gives the pudding layer the richness and body this dessert needs. Lower-fat milk can make the set softer, so stick with cold whole milk for the most reliable texture.
- Crushed peppermint candies — These add a crisp finish and a little extra peppermint flavor. Any plain peppermint candy that crushes cleanly will do; scatter it over the dessert at serving time to keep the pieces crunchy.
Build the Layers Without Smearing Them Together
Press and bake the chocolate-cookie base
Heat the oven to 350°F and lightly grease a 9×13-inch baking dish. Crush the chocolate sandwich cookies into fine crumbs, stir in the melted butter, and press the mixture firmly across the bottom of the dish. Bake the crust for 10 minutes; it should look set rather than loose and sandy. Let it cool completely before adding the filling, or the warm base can soften the layer above it.
Beat a smooth peppermint filling
Beat the softened cream cheese with the powdered sugar and peppermint extract until the mixture is smooth. Stop to scrape the bowl if you see cream cheese clinging to the sides, since small lumps are harder to smooth out once the topping is folded in. Fold in the thawed whipped topping until the filling is evenly combined. Spread it gently over the cooled crust in an even layer.
Let the chocolate pudding thicken in the bowl
Whisk the instant chocolate pudding mixes with cold whole milk for 2 minutes. The mixture will still be settling into its final thickness, so let it stand for 5 minutes before spreading it over the peppermint layer. It should look thickened and hold its shape better than it did just after whisking. Spread it evenly without pushing down into the layer underneath.
Top, chill, and finish with peppermint crunch
Spread the second tub of thawed whipped topping over the pudding, then cover the dish and refrigerate it for at least 4 hours, until the layers are set. The long chill gives the dessert time to firm up for serving; don’t rush to cut it while the center is still soft. Sprinkle the crushed peppermint candies over the top just before serving. Cut the dessert into squares.
Two Easy Ways to Change the Mint and Chocolate Balance
A Softer Peppermint Finish
Leave the crushed peppermint candies off the top and keep the measured peppermint extract in the filling. The dessert still has a clear mint layer, but you lose the candy’s crunchy texture and the extra mint on top.
Chocolate Lush Without the Peppermint
For a chocolate-forward version, leave out both the peppermint extract and the crushed peppermint candies. Keep the cream cheese, powdered sugar, whipped topping, cookie crust, and chocolate pudding layers as they are for a cool, creamy dessert without the mint.
Storage and Reheating
- Refrigerator: Cover and refrigerate leftovers for up to 3 days. The layers stay creamy, though the cookie crust softens as it sits.
- Freezer: Freeze the dessert tightly covered without the peppermint candy topping for up to 1 month. Thaw it in the refrigerator; the layers may be softer after thawing.
- Reheating: This dessert is served cold, so don’t reheat it. Return any uneaten squares to the refrigerator rather than leaving them out.
Questions That Come Up When Making Chocolate Peppermint Lush
Chocolate Peppermint Lush
Ingredients
Equipment
Method
- Heat the oven to 350°F.
- Lightly grease a 9x13-inch baking dish.
- Crush the chocolate sandwich cookies into fine crumbs.
- Stir in the melted butter.
- Press the mixture firmly into the bottom of the dish.
- Bake for 10 minutes.
- Cool completely.
- Beat the softened cream cheese, powdered sugar, and peppermint extract in a medium bowl until smooth.
- Fold in the thawed whipped topping.
- Spread the mixture evenly over the cooled crust.
- Whisk the pudding mixes and cold milk in a large bowl for 2 minutes.
- Let stand for 5 minutes until thickened.
- Spread the pudding evenly over the peppermint layer.
- Spread the thawed whipped topping over the pudding layer.
- Cover and refrigerate for at least 4 hours until set.
- Sprinkle with crushed peppermint candies just before serving.
- Cut into squares.