The dough for these cookies feels soft and a little sticky after mixing, which can make it tempting to scoop it straight onto the pans. I learned to give it a short rest in the refrigerator first: the chilled dough holds its shape better, and the cookies bake up with tender centers instead of spreading too thin. That pause is easy to fit in while the oven heats.
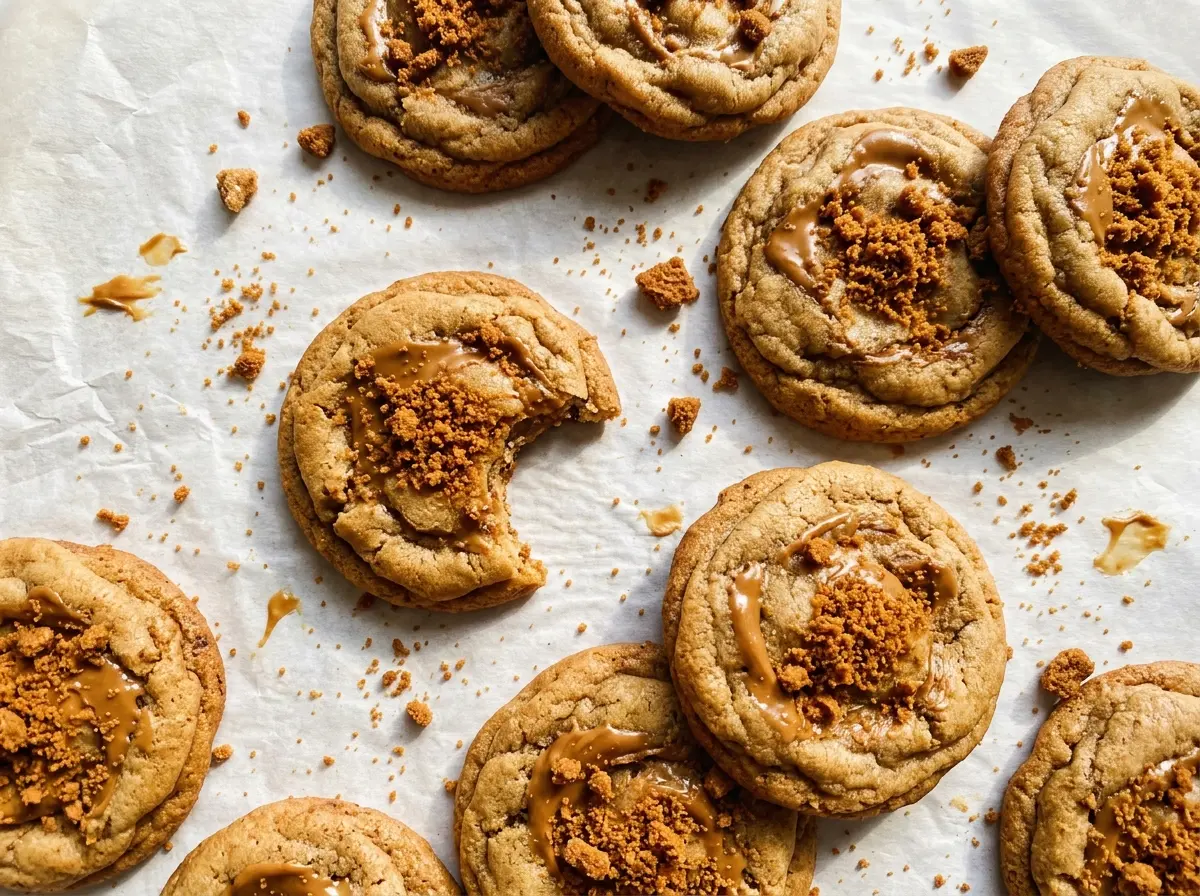
Cookie butter already brings a deep, spiced-cookie flavor, so these don’t need extra mix-ins to taste special. I cream it with softened butter and two kinds of sugar, then stop mixing as soon as the flour disappears. The result is a batch of Cookie Butter Cookies with lightly browned edges, soft middles, and plenty of that familiar cookie butter flavor in every bite.
Kitchen Note
With two pans in the oven, switching their rack positions and rotating them front to back halfway through helps both sheets bake evenly. Keep the movement quick so the oven doesn’t lose much heat.
Save these Cookie Butter Cookies for a bake with soft centers and warm cookie butter flavor, made with a quick chill before baking.
Why Cookie Butter Cookies Spread More When the Dough Goes Straight Into the Oven
Cookie butter is a smooth, spreadable ingredient, and it joins softened butter in this dough. Before chilling, the mixture is supple enough to spread quickly once it meets the heat. Refrigerating the covered dough for 30 minutes gives it time to firm up, which helps each portion keep a thicker shape as it bakes.
That short chill also makes the dough easier to portion neatly. You don’t need to roll it into perfect balls or press it flat; scoop it and set each portion on the lined pan. Keep the portions spaced apart, because cookies still spread as they bake. If the dough feels firm when it comes out of the refrigerator, a few minutes on the counter makes scooping easier without skipping the chill.
There’s no need to leave the dough in the refrigerator for hours to get the benefit. The 30-minute rest is enough to take the edge off the softness while keeping the dough easy to scoop, and it fits neatly into the time you need to preheat the oven and prepare the pans.
What Each Ingredient Brings to Cookie Butter Cookies

- Cookie butter — This is the defining flavor and adds richness as well as sweetness. A smooth, familiar brand is a reliable choice; a crunchy version works too, though little cookie pieces will interrupt the otherwise even texture.
- Unsalted butter — Softened butter creams smoothly with the sugars and helps create a tender cookie. Let it soften until it yields when pressed, but don’t melt it; melted butter makes the dough greasy and changes how it spreads.
- Light brown sugar — Its moisture helps keep the centers tender, while its molasses notes deepen the cookie’s caramel-like flavor. Pack it into the measuring cup so the amount stays consistent.
- Granulated sugar — Alongside the brown sugar, it balances the dough’s sweetness and helps the edges set. Keeping both sugars gives the cookies a more rounded texture than relying on only one.
- Egg and vanilla — A room-temperature egg blends into the creamed butter more readily than a cold one, and vanilla rounds out the cookie butter’s spiced flavor. If you forget to take out the egg early, set it in a bowl of warm tap water while you prepare the other ingredients.
- All-purpose flour — Flour gives the dough its structure. Measure without packing it into the cup, then mix only until the last dry streaks disappear; too much flour or extra mixing can leave the cookies dense.
- Baking soda and fine salt — Baking soda helps the cookies rise and spread, while fine salt keeps the sweetness from tasting flat. Whisk them evenly through the flour so you don’t get concentrated salty or bitter spots.
From Creamed Dough to Soft-Centered Cookies
Prepare the pans and cream the butter mixture
Heat the oven to 350°F and line two large baking sheets with parchment paper. In a large bowl, beat the softened butter, cookie butter, packed light brown sugar, and granulated sugar until creamy, about 2 minutes. Scrape down the bowl if the mixture clings high on the sides, then continue until it looks evenly blended. It should look creamy rather than oily or separated.
Mix in the egg, vanilla, and dry ingredients
Beat in the room-temperature egg and vanilla until combined. In a medium bowl, whisk the flour, baking soda, and fine salt together so the leavening is distributed before it reaches the dough. Add the dry mixture to the butter mixture and mix just until no dry flour remains. Stop there; a smooth, heavily beaten dough can make the baked cookies tougher.
Chill and portion the dough
Cover the bowl and refrigerate the dough for 30 minutes. Scoop it into 2-tablespoon portions, arranging 12 on each prepared baking sheet with about 2 inches between them. Leave the portions rounded rather than pressing them down. The space gives the cookies room to spread without merging at the edges.
Bake until the edges set, then cool
Bake both sheets for 10–12 minutes, switching their rack positions and rotating them front to back halfway through. Look for edges that are set and lightly browned while the centers still look soft; they’ll finish setting as they cool. Leave the cookies on the baking sheets for 5 minutes, then transfer them to a wire rack to cool completely. Moving them off the hot pans too early can make soft cookies break.
Two Useful Ways to Adapt the Dough
Make the cookies a little crispier
For a less tender, slightly crisper cookie, use 1/2 cup packed light brown sugar and 1/2 cup granulated sugar instead of the original sugar amounts. The total sugar stays the same, but the lower proportion of brown sugar gives up some of the soft, moist center in favor of crisper edges.
Make a dairy-free batch
Replace the unsalted butter with an equal amount of stick-style dairy-free butter, and choose cookie butter that contains no dairy. The spread’s ingredients vary by brand, so the dairy-free version depends on both products. The cookies keep their cookie butter character, though the plant-based butter may give the dough a slightly different feel.
Storage and Reheating
- Refrigerator: Store cooled cookies in an airtight container at room temperature for up to 4 days. They’ll gradually lose some of their fresh-baked softness.
- Freezer: Freeze fully cooled cookies in an airtight freezer-safe container for up to 2 months, separating layers with parchment. Thaw at room temperature before eating.
- Reheating: Warm a cookie briefly in the microwave, just until soft and warm. Long heating can dry it out and make the edges tough.
Questions That Come Up When Baking Cookie Butter Cookies
Cookie Butter Cookies
Ingredients
Equipment
Method
- Heat the oven to 350°F.
- Line two large baking sheets with parchment paper.
- In a large bowl, beat the softened unsalted butter, cookie butter, packed light brown sugar, and granulated sugar until creamy, about 2 minutes.
- Beat in the egg and vanilla extract until combined.
- In a medium bowl, whisk together the all-purpose flour, baking soda, and fine salt.
- Mix the dry ingredients into the butter mixture just until no dry flour remains.
- Cover the dough and refrigerate for 30 minutes.
- Scoop the dough into 2-tablespoon portions and arrange 12 on each prepared baking sheet, spacing them about 2 inches apart.
- Bake both sheets for 10–12 minutes, switching their rack positions and rotating them front to back halfway through, until the edges are set and lightly browned and the centers still look soft.
- Cool the cookies on the baking sheets for 5 minutes.
- Transfer the cookies to a wire rack to cool completely.