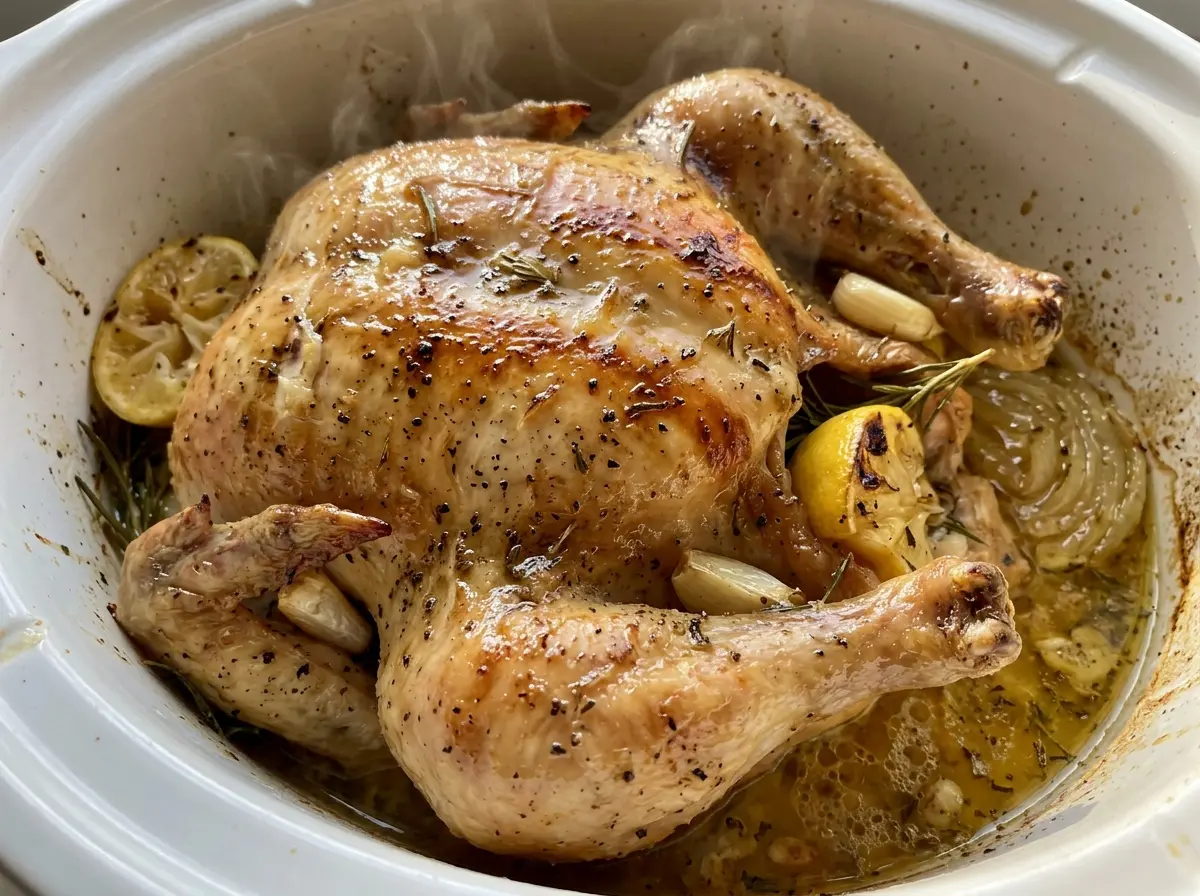
The first thing you notice when you lift the lid is how much the chicken has settled into the onions. The meat is tender, but the skin hasn’t browned the way it would in an oven—that’s the tradeoff with a covered slow cooker. I make this Crockpot Whole Chicken when I want a simple, hands-off way to cook a whole bird without heating up the kitchen or juggling a roasting pan.
The prep is straightforward: dry the chicken well, rub it with olive oil and a few pantry seasonings, and set it breast-side up over thick onion slices. The onions create a bed beneath the bird, while the slow, covered cooking gives the meat time to turn tender. A thermometer matters more than the clock here, because a four-pound chicken and a five-pound chicken won’t finish at exactly the same moment. Once the thickest breast and innermost thigh are cooked through, a short rest makes the bird easier to carve, with juicy slices and soft onions underneath.
Kitchen Note
Pat the chicken dry inside and out before adding the oil and seasonings. If the surface is damp, the rub turns slick and patchy instead of coating the bird evenly.
Save this Crockpot Whole Chicken for a low-fuss dinner with tender meat, savory onions, and a simple thyme-paprika rub.
Why Slow-Cooker Chicken Skin Stays Pale
A slow cooker is excellent at gently cooking a whole chicken, but it won’t give you the browned, crisp skin of a roast. The covered pot holds in moisture, so the skin softens as the chicken cooks. That isn’t a sign that something went wrong; it’s the texture this method produces. Expect tender meat and soft skin, not crackly skin.
That distinction helps set the right expectation before you start. If crisp skin is the main reason you’re cooking a whole chicken, a slow cooker isn’t the best fit. Here, the payoff is a bird that cooks in its own covered environment while you get on with other things. The onion slices sit between the chicken and the bottom of the cooker, giving the bird a bed instead of leaving it directly against the pot. The seasoning is deliberately simple, too: paprika and thyme give the outside a savory, gently herbal character without hiding the taste of the chicken.
The breast-up position is useful for keeping the bird settled in the cooker, but don’t judge doneness by the surface color or by whether the legs look loose. A whole chicken has different thicknesses, and the breast and thigh need separate temperature checks. That quick check is more reliable than assuming the shorter cooking time will work for every bird.
What the Onion and Simple Rub Bring to the Chicken

- Whole chicken — Choose a bird in the four-to-five-pound range with the giblets removed. The size matters because the cooking time and fit are based on a whole bird in a six-quart cooker. A standard grocery-store chicken works well; there’s no need to seek out a specialty bird.
- Yellow onion — Thick slices make a stable layer under the chicken and add a mellow savory note as everything cooks. Slice it thickly so the pieces don’t disappear as readily into the cooking juices. Yellow onion is a good fit for its balanced flavor; a thinly sliced onion won’t make as sturdy a bed.
- Olive oil — A light coating helps the dry seasonings cling to the chicken’s surface and inside the cavity. Use an everyday olive oil rather than a special finishing oil; its subtlety is more useful here than a pronounced, delicate flavor.
- Paprika and dried thyme — Paprika colors the seasoning rub and brings a mild earthy note, while dried thyme contributes a concentrated herbal flavor that spreads evenly through the mixture. Dried thyme is handy in this slow-cooker rub because it’s ready to mix straight from the jar.
- Kosher salt and black pepper — These season the chicken itself rather than just the juices at the bottom of the pot. Mix them with the other dry seasonings first, which makes it easier to distribute the rub over the whole bird and inside the cavity.
Build the Onion Bed, Season the Bird, and Let It Cook
Set Up the Slow Cooker
Arrange the thick onion slices across the bottom of a six-quart slow cooker. Remove the giblets if they’re inside the chicken, then pat the bird dry inside and out with paper towels. Drying gives the oil and rub a better surface to cling to. Keep the chicken whole for this method rather than cutting it into pieces, since the timing is for a whole bird.
Coat the Chicken Evenly
Stir the kosher salt, black pepper, paprika, and dried thyme together in a small bowl so you don’t get a concentrated patch of one seasoning. Rub the chicken all over and inside the cavity with the olive oil and seasoning mixture. Work the seasoning across the breast, legs, and sides instead of leaving most of it on top. If it gathers in a few spots, spread it with your fingers before setting the chicken in the cooker.
Cook Until Both Checks Pass
Set the chicken breast-side up on the onions, cover the cooker, and cook on LOW for 6 to 7 hours or HIGH for 3 to 4 hours. Insert an instant-read thermometer into the thickest part of the breast and the innermost part of the thigh, taking care not to touch bone; both readings need to reach 165°F. A temperature below that means it needs more cooking time, even if the outside looks ready. Check near the shorter end of the range, especially when you’re cooking a smaller bird.
Rest Before Carving
Transfer the cooked chicken to a cutting board and leave it undisturbed for 10 minutes before carving. The rest gives the juices a chance to settle instead of running out immediately when you cut into the breast. Use a stable board and a sharp carving knife, and start by separating the legs from the body. The onions will be soft from cooking, so lift them carefully if you want to keep larger pieces intact.
Two Easy Ways to Change the Final Texture
Pull the cooked meat instead of slicing it
After the chicken has rested, remove the meat from the bones and pull it into bite-size strands rather than carving neat slices. The seasoning stays the same, but the texture is softer and easier to portion. Keep the meat and onions together if you want some of the cooked onion in each serving.
Carve into larger, bone-in pieces
For a more rustic presentation, separate the legs and wings at their joints and leave the breast in larger portions rather than slicing it thinly. This changes the way the chicken is portioned, not how it cooks, so keep the same doneness checks and resting time. The larger pieces feel hearty on the plate, while thin breast slices are easier to serve in smaller portions.
Storage and Reheating
- Refrigerator: Store cooked chicken in a covered container for 3 to 4 days. The skin softens further in storage, and the meat may firm up when chilled.
- Freezer: Freeze carved or shredded meat in a tightly sealed freezer-safe container for up to 4 months for best quality. Thaw it in the refrigerator before reheating.
- Reheating: Warm portions covered in a microwave-safe dish or covered oven dish with a spoonful of the cooking juices to reduce drying. Reheat leftovers to 165°F, and avoid repeated heating and cooling of the same batch.
Questions That Come Up When Cooking a Whole Chicken
Crockpot Whole Chicken
Ingredients
Equipment
Method
- Arrange the thickly sliced onion in the bottom of a 6-quart slow cooker.
- Pat the chicken dry inside and out with paper towels.
- Mix the salt, black pepper, paprika, and thyme in a small bowl.
- Rub the chicken all over and inside the cavity with the olive oil and seasoning mixture.
- Set the chicken breast-side up on the onion and cover.
- Cook on LOW for 6 to 7 hours or HIGH for 3 to 4 hours, until a thermometer reads 165°F in the thickest part of the breast and the innermost part of the thigh without touching bone.
- Transfer the chicken to a cutting board and rest for 10 minutes before carving.