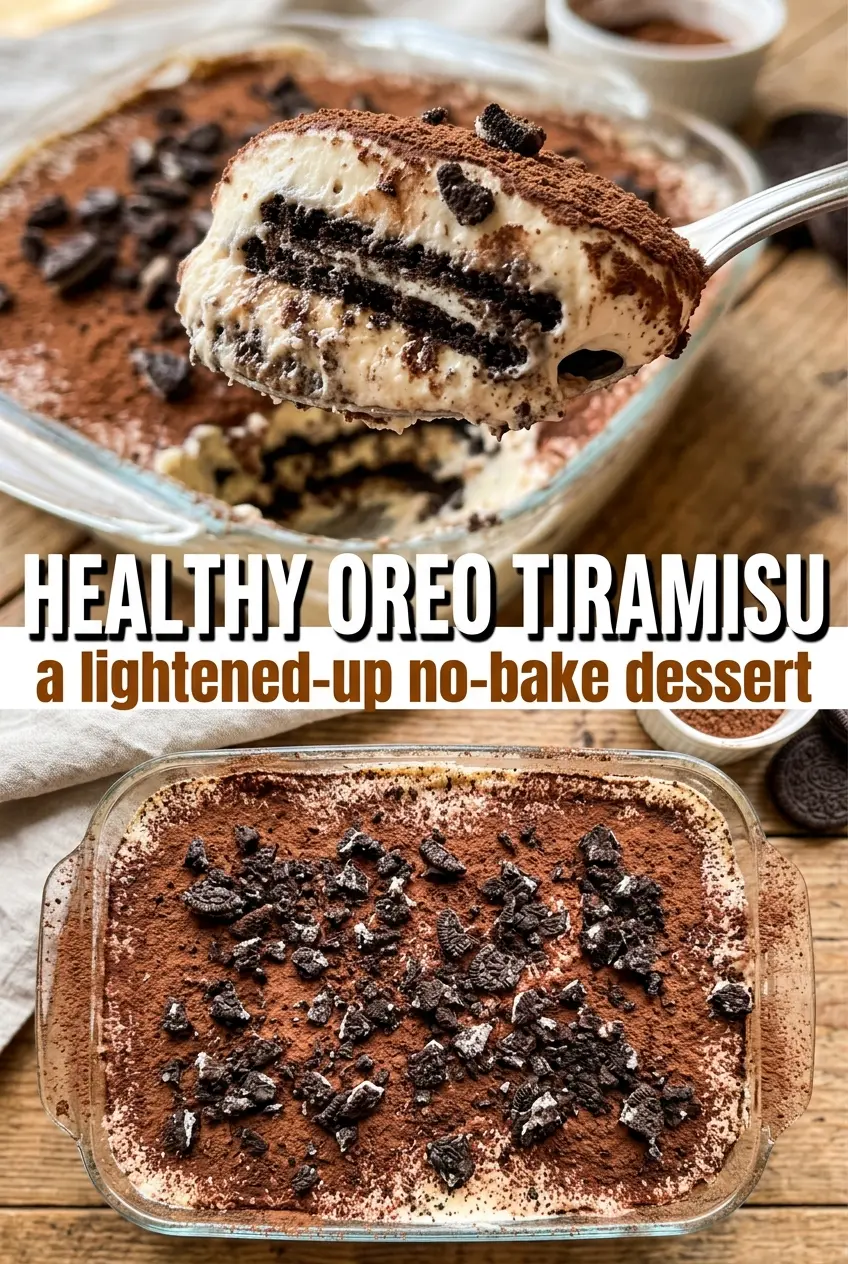
Healthy Oreo tiramisu keeps everything people love about tiramisu — the creamy layers, the coffee-kissed cookies, the cocoa finish — and makes it a little lighter without tasting like a compromise. The filling stays plush and spoonable, but the Greek yogurt brings a clean tang and enough body that the dessert still feels rich after chilling. Then the Oreos do what Oreos do best: they soften just enough to turn into a dark, chocolatey layer with a little bite left in the middle.
The trick is balance. Cream cheese gives the filling structure, Greek yogurt keeps it from feeling heavy, and the whipped topping loosens everything into that classic tiramisu texture. The coffee dip needs to stay brief or the cookies turn mushy before the layers even hit the fridge. A quick dip is enough — you want the Oreo to taste like coffee, not dissolve into it.
Below you’ll find the small details that make this dessert work, from the right dip time to the chill window that gives the layers their proper set. Once you get the rhythm, it comes together fast and slices beautifully after a few hours in the fridge.
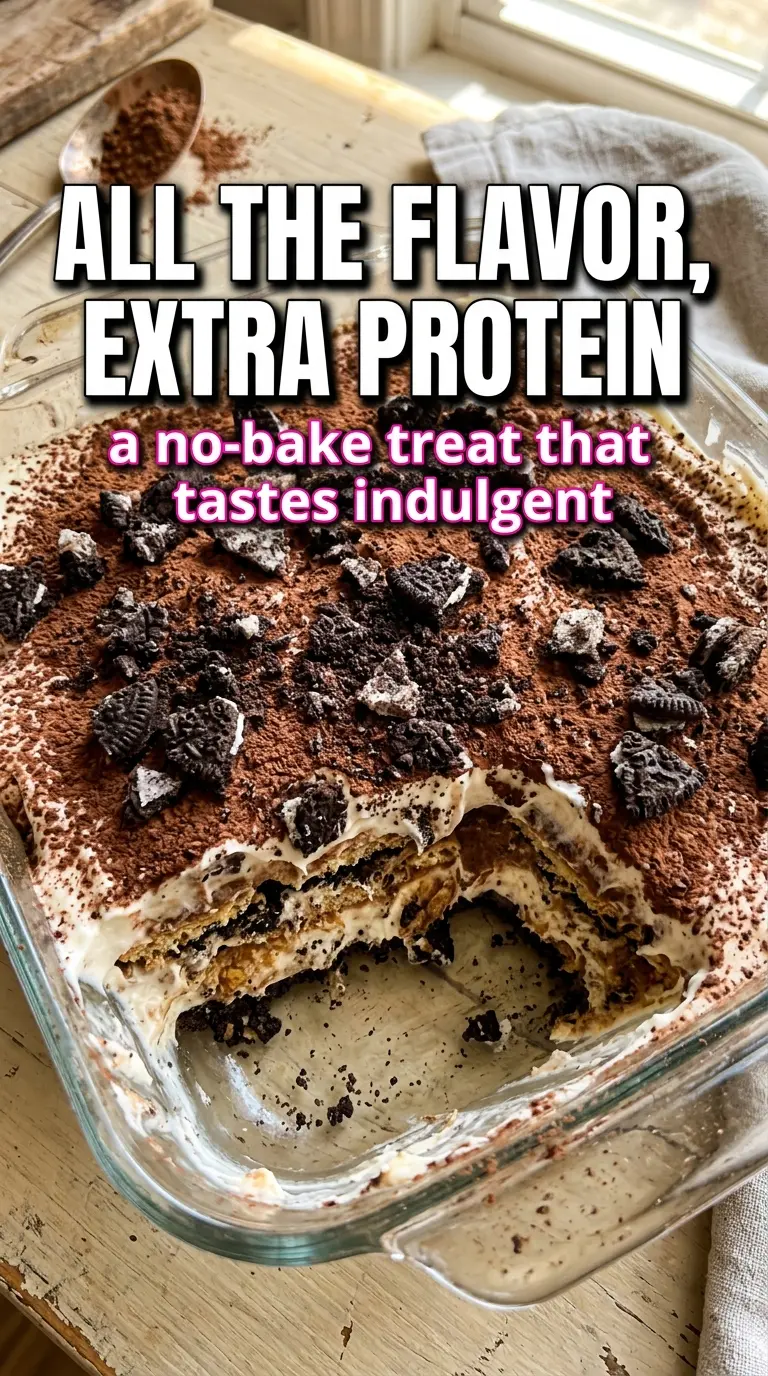
The coffee-dipped Oreos softened into perfect layers, and the filling stayed light instead of getting dense. I chilled it overnight and the top dusting of cocoa made it taste just like tiramisu with a cookies-and-cream twist.
Save this healthy Oreo tiramisu for when you want a chilled, no-bake dessert with creamy layers and real Oreo flavor.
The Reason the Oreo Layers Stay Cookie-Like Instead of Turning to Mush
The difference between a neat, sliceable tiramisu and a collapsed cookie puddle comes down to the coffee dip. Oreos absorb liquid fast, and once they cross that line, there is no fixing the texture. A one- to two-second dip per side is enough to soften the cookie and flavor it through without flooding the filling underneath.
The other thing that matters is chilling time. The dessert needs those hours in the fridge for the filling to firm up and for the cookies to settle into the cream without losing all their structure. If you cut into it too soon, the layers slide. Give it at least four hours, and overnight is even better if you want clean squares.
- Quick coffee dip: Strong brewed coffee works because it brings bitterness that balances the sweet filling. Espresso is fine too. Just keep the dip brief.
- Greek yogurt: This adds tang and body, and it is what keeps the filling from feeling heavy. Full-fat Greek yogurt gives the best texture, but plain low-fat works too if that is what you have.
- Light cream cheese: This is the structure in the filling. If you skip it, the dessert turns loose and almost mousse-like instead of holding those distinct layers.
- Whipped topping: Fold it in gently after the base is smooth. Stirring hard knocks out the air and leaves the filling dense.
What Each Ingredient Is Actually Doing in This Dessert
- Oreos: These are the whole point of the recipe. They soften just enough in the coffee to mimic the ladyfinger layers in classic tiramisu, but they keep their chocolate-cookie identity. Use regular Oreos, not double-stuf, because the extra filling makes the layers too sweet.
- Greek yogurt: This lightens the filling without making it thin. The tang also keeps the dessert from tasting flat. If your yogurt is very loose, let it sit in a strainer for 10 to 15 minutes first.
- Light cream cheese: This gives the filling its sliceable body and that mild cheesecake-like richness. Let it soften fully before mixing, or you will end up with little cream cheese lumps that never smooth out.
- Honey or maple syrup: Either sweetener works. Honey tastes a little warmer and more floral, while maple brings a deeper note that plays nicely with the coffee. Start with the listed amount, then taste the filling before folding in the whipped topping.
- Vanilla extract: This rounds out the tang from the yogurt and cream cheese. It does not disappear here; it makes the whole dessert taste more finished.
- Light whipped topping: This is what keeps the filling airy. If you use real whipped cream instead, fold in freshly whipped cream that has soft peaks, not stiff ones, so the mixture stays smooth.
- Cocoa powder: Dust it on at the end, after chilling, so it stays dark and clean on the surface instead of melting into the top layer.
Building the Layers Without Breaking the Texture
Mix the filling until it turns completely smooth
Beat the Greek yogurt, softened cream cheese, honey or maple syrup, and vanilla until the mixture looks glossy and no streaks of cream cheese remain. If you start folding in the whipped topping before the base is smooth, the lumps stay there and show up in every bite. The filling should look thick but spreadable, like a soft frosting.
Dip the Oreos for just long enough to perfume them
Work with one cookie at a time and dip it quickly into the cooled coffee, about one to two seconds per side. The cookie should darken a little, not fall apart in your fingers. If the coffee is warm or the dip lasts too long, the cookies go past soft and straight to soggy.
Spread the layers and stop pressing so hard
Arrange the dipped Oreos in a single layer, then spread half the filling over them without pushing down aggressively. You want to cover the cookies, not crush them into the base. Repeat with the second layer and finish with the reserved crushed Oreos and cocoa powder.
Chill until the filling sets into clean slices
Refrigerate the dessert for at least four hours, but overnight gives the best texture. During that time, the cookies absorb enough moisture to soften into cake-like layers while the filling firms up around them. If you try to serve it too early, the layers will slump as soon as you scoop or slice.
Three Ways to Adjust It Without Losing the Point
Dairy-Free Version
Use a thick dairy-free yogurt and a dairy-free cream cheese that can hold its shape after chilling. The texture will be a little softer, but you still get the layered Oreo-and-coffee effect. Use a coconut-based whipped topping if you want the filling to stay airy.
Higher-Protein Dessert
Use a thicker Greek yogurt, ideally full-fat or 2%, and choose a whipped topping with less sugar. The dessert stays creamy and a little more substantial, and the tang from the yogurt gets a chance to come forward instead of being buried under sweetness.
Less Sweet, More Coffee-Forward
Cut the honey or maple syrup back by a tablespoon and use a very strong coffee dip. That shifts the balance toward a more grown-up tiramisu flavor and keeps the Oreos from reading like a candy bar inside a cream dessert.
Storage and Reheating
- Refrigerator: Keep covered for up to 3 days. The cookies soften more each day, so the dessert turns a little more cake-like by day two.
- Freezer: It freezes better than you might expect, but the filling gets a little denser after thawing. Freeze in an airtight container for up to 1 month and thaw in the refrigerator, not on the counter.
- Reheating: Don’t reheat this dessert. Serve it cold straight from the fridge. If it has been frozen, let it thaw slowly until the center is no longer icy.
The Questions People Ask Before They Make This
Healthy Oreo Tiramisu
Ingredients
Method
- Beat the plain Greek yogurt, light cream cheese, honey or maple syrup, and vanilla extract until smooth, then fold in the light whipped topping.
- Continue mixing only until no streaks remain, keeping the mixture thick and uniform with a smooth surface.
- Crush 6 Oreo cookies and set aside for topping.
- Quickly dip the remaining Oreo cookies into the cooled strong brewed coffee for no more than 1–2 seconds per side.
- Arrange the coffee-dipped Oreos in a single layer in a dish so they overlap as needed but stay even.
- Spread half of the yogurt mixture over the coffee-dipped Oreos, leveling it to the edges for even layers.
- Repeat with a second layer of coffee-dipped Oreos, then spread the remaining yogurt mixture over the top.
- Sprinkle the crushed Oreos over the top and dust generously with cocoa powder.
- Refrigerate for at least 4 hours, or overnight, for the best texture before serving.