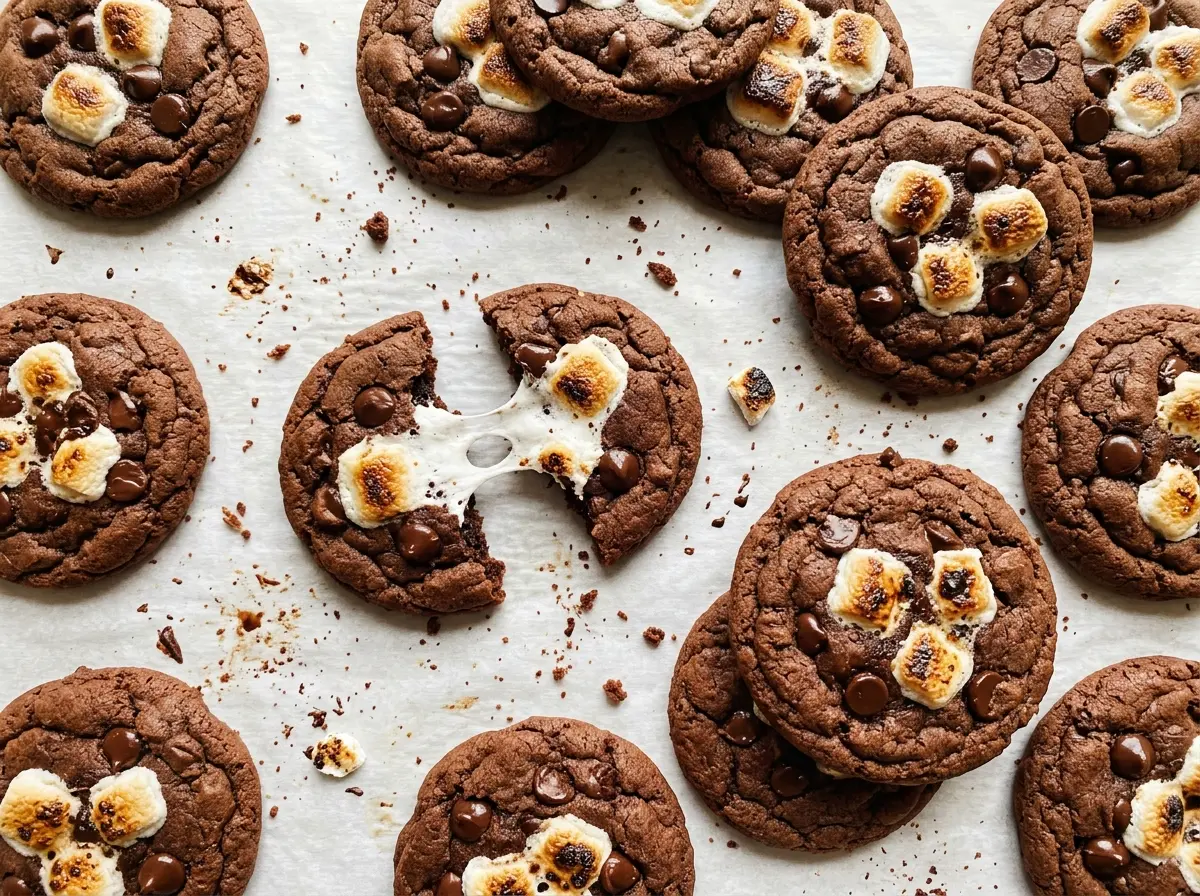
The marshmallow halves go onto the cookies while the centers still look soft, then puff into little caps during their short return to the oven. That timing gives these Hot Cocoa Cookies a chewy middle without baking the chocolate base until it turns dry.
I like the contrast here: semisweet chips melt into the cocoa dough, while the marshmallow softens on top instead of disappearing into it. Keep the marshmallow pieces cut-side down, and give each baking sheet its turn in the oven. You’ll get cookies with set edges, soft centers, and a warm, pillowy topping.
Kitchen Note
Press each marshmallow half onto the cookie cut-side down, just firmly enough for it to sit in place. If you mash it flat, you lose that soft, rounded top.
Save these Hot Cocoa Cookies for their soft cocoa centers and pillowy marshmallow tops.
Why Hot Cocoa Mix Can’t Stand In for the Cocoa Powder
The cocoa powder in these cookies needs to be unsweetened. Hot cocoa mix may look like an easy shortcut, but it already contains sugar and often other ingredients, so swapping it in changes more than the chocolate flavor. The dough can turn sweeter and behave differently as it bakes. Use unsweetened cocoa powder for the deep, straightforward cocoa taste that balances the marshmallow topping.
There’s another reason the dough tastes like hot cocoa without being a cup of hot chocolate in cookie form: the chocolate comes from two places. Cocoa powder flavors the dough throughout, and semisweet chips leave little melted pockets in each bite. The marshmallow goes on only after the cookie has begun baking, so it stays a distinct topping rather than blending into the dough. Keeping those jobs separate is what gives each layer its own texture.
That first bake is deliberately short. The edges should look set, but the centers will still appear soft when you add the marshmallow. They get a little more oven time afterward, and the cookies continue to settle as they cool on the baking sheets.
What Each Ingredient Brings to the Cookie and Its Marshmallow Top

- Butter and sugars — Softened butter creams with the granulated and brown sugars, helping create a tender cookie rather than a dense, greasy one. Packed light brown sugar brings moisture and a gentle caramel note. Dark brown sugar is a workable one-for-one swap if you want a more pronounced molasses flavor; the cookies will taste a little deeper.
- Flour — All-purpose flour gives the dough enough structure to hold the chocolate chips and marshmallow without making the cookie cakey. For a gluten-free version, use a cup-for-cup gluten-free baking blend intended to replace wheat flour; the texture may be a touch more delicate, so handle the cooled cookies gently.
- Egg — The egg binds the dough and helps keep the centers soft. Use a large egg, as a smaller one can leave the dough drier and harder to bring together. There isn’t a simple swap that keeps this cookie’s texture the same.
- Semisweet chocolate chips — Their mild bitterness keeps the cookie from tasting sugary beside the marshmallow. Milk chocolate chips work in the same quantity for a sweeter, softer chocolate note; a standard bag is fine, so there’s no need to seek out specialty chips.
- Large marshmallows — Cutting them crosswise creates a broad surface that softens into a cap over each cookie. Fresh, pliable marshmallows puff more readily than dried-out ones. Cut them shortly before topping the cookies so the exposed sides stay soft.
Bake the Cocoa Cookies First, Then Give the Marshmallows Their Own Turn
Set Up the Oven and Pans
Heat the oven to 350°F and line two 18×13-inch rimmed baking sheets with parchment paper. The cookies bake one sheet at a time, which leaves you room to top each warm batch before the next one goes in. Cut the marshmallows in half crosswise while you’re getting organized. Having them ready nearby means the cookies won’t sit waiting after their first bake.
Cream the Butter, Sugar, and Egg
Beat the softened butter with both sugars on medium speed until the mixture looks fluffy, about 2 minutes. It should look lighter and aerated, not oily or melted. Beat in the egg and vanilla until smooth; if the mixture looks slightly uneven before the egg is fully incorporated, keep mixing until it comes together. Butter that’s too firm won’t cream well, while melted butter won’t trap the same air.
Mix the Dough and Portion It Evenly
Whisk the flour, cocoa powder, baking soda, and salt in a medium bowl so the cocoa is distributed before it meets the wet mixture. Add the dry ingredients to the butter mixture and mix on low just until combined; stop when no dry streaks remain, then stir in the chocolate chips. Scoop the dough into 24 rounded tablespoon-size portions and arrange 12 on each prepared sheet, leaving about 2 inches between them. Crowding the portions can leave too little space for the cookies to spread.
Bake, Top, and Cool
Bake one sheet at a time for 8 minutes, until the edges are set and the centers still look soft. Remove that sheet and press a marshmallow half, cut-side down, onto each cookie, then return it to the oven for 2 to 3 minutes, just until the marshmallows puff and soften. Repeat the same sequence with the second sheet rather than leaving the first batch to cool while you bake the next. Let each batch cool on its baking sheet for 5 minutes before moving the cookies to a wire rack; they’re delicate while hot.
Two Changes That Keep the Cookie’s Character
Make the Batch Dairy-Free
Use dairy-free baking sticks in place of the butter, along with dairy-free semisweet chocolate chips and dairy-free marshmallows. Choose baking sticks rather than soft tub spread, which has more water and can change how the cookies spread. The finished cookies will still have the same cocoa-and-marshmallow idea, though the chocolate may taste a little different by brand.
Leave Off the Marshmallow for a Simpler Cocoa Cookie
Skip the topping and bake the cookies without returning them to the oven for the marshmallow finish. You’ll have a straightforward chocolate cookie with melted semisweet chips instead of a soft, pillowy cap. Keep an eye on the centers, since the marshmallow stage is normally part of the full bake.
Storage and Reheating
- Refrigerator: Store the cooled cookies in an airtight container for up to 5 days. The cookies and marshmallow will firm up when chilled, so let them come to room temperature before serving for a softer bite.
- Freezer: Freeze fully cooled cookies in a single layer until firm, then transfer them to an airtight container for up to 2 months. The marshmallows may be chewier after thawing.
- Reheating: Warm one cookie in the microwave for about 5 seconds, then add a few seconds only if needed. Longer heating can make the marshmallow overly soft and sticky.
Questions That Come Up While Baking Hot Cocoa Cookies
Hot Cocoa Cookies
Ingredients
Equipment
Method
- Heat the oven to 350°F and line two 18x13-inch rimmed baking sheets with parchment paper.
- Beat the softened butter, granulated sugar, and packed light brown sugar in a large bowl with an electric mixer on medium speed until fluffy, about 2 minutes.
- Beat in the egg and vanilla extract until smooth.
- Whisk the all-purpose flour, unsweetened cocoa powder, baking soda, and salt in a medium bowl.
- Add the flour mixture to the butter mixture and mix on low just until combined.
- Stir in the semisweet chocolate chips.
- Scoop the dough into 24 rounded tablespoon-size portions.
- Arrange 12 portions on each baking sheet, spacing them about 2 inches apart.
- Bake one sheet at a time for 8 minutes, until the edges are set and the centers still look soft; top that batch before baking the next sheet.
- Remove the sheet from the oven and press a marshmallow half, cut side down, onto each cookie.
- Return the sheet to the oven for 2 to 3 minutes, until the marshmallows puff and soften, then repeat with the second sheet.
- Cool the cookies on the baking sheets for 5 minutes.
- Transfer the cookies to a wire rack to cool.