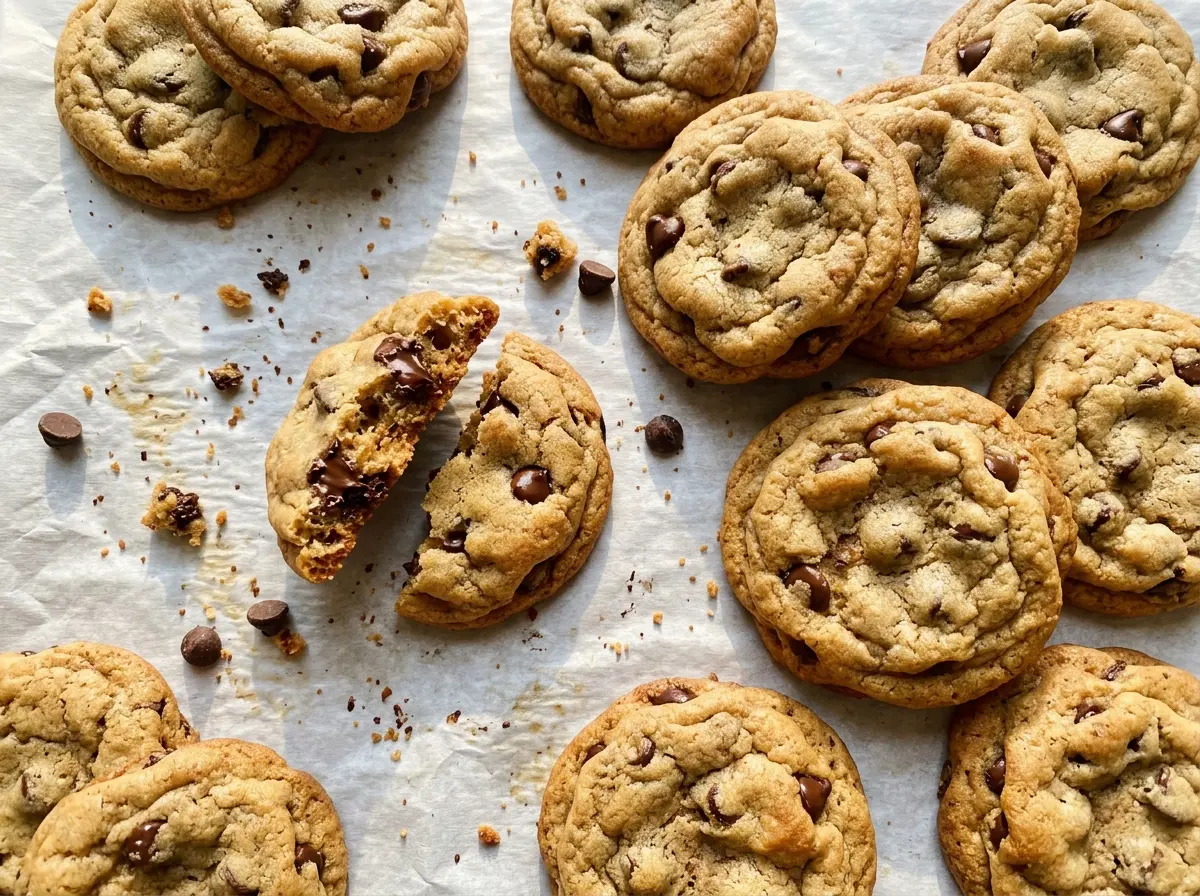
The first sheet comes out of the oven with golden edges while the centers still look soft, and that’s the moment I watch most closely. Leave them on the hot baking sheet for two minutes and they settle into that familiar balance: lightly crisp around the outside, tender in the middle. These Original Toll House Chocolate Chip Cookies use a straightforward creaming method, but a few small details make the difference between even, golden cookies and a crowded sheet that bakes unevenly.
I beat the softened butter with both sugars until creamy, then add the eggs one at a time before the flour goes in. That order keeps the dough easy to mix without working it more than necessary. The chocolate morsels go in at the end, with chopped walnuts if you want them. Scoop the dough about two inches apart, rotate the baking sheets halfway through, and you’ll have a batch of classic cookies with chocolate in every bite.
Kitchen Note
Add the eggs one at a time and beat well after each addition. I wait until the first is fully mixed in before adding the second, so the butter mixture stays smooth and cohesive.
Save these Original Toll House Chocolate Chip Cookies for a classic bake: golden edges, soft centers, and an optional walnut crunch.
Why These Cookies Need Two Inches of Space on the Baking Sheet
Cookie dough spreads as it bakes, so the space between scoops is doing more than keeping the cookies from touching. Give each rounded tablespoonful about two inches of room and the edges have space to turn golden without merging into the cookie beside them. Crowded dough can bake into joined edges, making it harder to lift individual cookies cleanly.
The two ungreased 18×13-inch baking sheets also give the dough room to spread into consistent rounds. Keep the portions roughly alike; a much larger scoop takes longer to bake than a smaller one, so the edges can brown before the center is ready. If you’re working in batches, leave the remaining dough in the bowl while the first sheets bake. A little care with spacing makes the finished batch easier to handle and gives each cookie its own edge.
What the Butter, Sugars, and Chocolate Bring to the Dough

- All-purpose flour — It gives the cookies their structure. Spoon it into the measuring cup and level it rather than packing it down; too much flour can make the dough stiff and the baked cookies dense. For this classic texture, stick with all-purpose flour.
- Unsalted butter — Softened butter creams with the sugars and brings the rich, buttery base. It should give slightly when pressed but shouldn’t look melted or greasy. A fresh, ordinary butter works well here; there isn’t a direct replacement that gives the same flavor and texture.
- Granulated and brown sugars — Using both gives the dough its characteristic sweetness and helps balance a crisp edge with a softer middle. Pack the brown sugar when measuring. If it’s dry and hard, break up the lumps before mixing so they don’t leave pockets in the dough.
- Large eggs and vanilla extract — The eggs bind the dough, while vanilla rounds out the chocolate and butter. Use large eggs for the intended balance. Good-quality vanilla is noticeable, but the amount is small enough that a standard extract works just fine.
- Semi-sweet chocolate morsels — Their sweetness is balanced against the sugars in the dough, and morsels hold their shape in the oven. Use the specified semi-sweet kind for the familiar result; changing to a different chocolate changes the sweetness and the way the chocolate melts.
- Chopped walnuts — These are optional and add a firm, nutty bite alongside the soft dough and chocolate. Use them chopped so they’re distributed through the cookies, or leave them out for a walnut-free batch. There’s no need to replace them.
- Baking soda and salt — Baking soda helps the cookies spread and brown, while salt keeps the sweetness from tasting flat. Measure both carefully; neither is a good ingredient to skip if you want the intended balance.
Mixing and Baking the Dough Without Overworking It
Whisk the Dry Ingredients First
Whisk the flour, baking soda, and salt together in a medium bowl until the leavening and salt are dispersed. This quick step helps avoid a concentrated patch of baking soda in one part of the dough. Set the bowl aside before you start creaming the butter and sugars, so the dry mixture is ready when you need it.
Cream the Butter and Sugars Until Creamy
Beat the softened butter with the granulated sugar, brown sugar, and vanilla in a large bowl until the mixture looks creamy. Scrape the bowl if butter or sugar clings to the sides, then add the eggs one at a time and mix well after each. The mixture should look blended before you start adding flour.
Fold in the Flour, Morsels, and Walnuts
Gradually mix in the flour mixture and stop once it’s just combined; a few seconds too much mixing can make the cookies tougher. Stir in the semi-sweet chocolate morsels and the chopped walnuts if you’re using them. The finished dough should be thick enough to hold a rounded tablespoonful, with chocolate distributed throughout rather than gathered at the bottom.
Bake Until the Edges Turn Golden
Heat the oven to 375°F and drop rounded tablespoonfuls onto two ungreased 18×13-inch baking sheets, spacing them about two inches apart. Bake for 9 to 11 minutes, rotating the sheets’ positions halfway through so both bake evenly. Look for golden edges; the centers may still appear soft when you take the sheets out.
Let the Cookies Set Before Moving Them
Leave the cookies on the baking sheets for two minutes after baking. They’re delicate while hot, and that brief rest lets them firm enough to transfer without breaking. Move them to wire racks and let them cool completely before storing.
Two Easy Ways to Choose Your Toll House Cookie Texture
Leave Out the Walnuts for a Walnut-Free Batch
Skip the optional chopped walnuts and keep the dough focused on the chocolate and buttery cookie. The result has a smoother bite, with no nut pieces interrupting the soft center. If you’re baking for someone with a walnut allergy, use clean bowls and utensils that haven’t touched walnuts.
Add the Walnuts for a More Textured Cookie
Stir in the chopped walnuts along with the chocolate morsels for a firmer, nutty crunch in each bite. The walnuts add texture without changing the basic dough or baking method. Chop them before you mix them in so they’re easy to distribute through the batch.
Storage and Reheating
- Room temperature: Once completely cool, store the cookies in an airtight container for up to 4 days. They’ll soften a little as they sit.
- Freezer: Freeze cooled cookies in an airtight container for up to 2 months, separating layers with parchment paper. Thaw at room temperature.
- Reheating: Warm a cookie in a 300°F oven for 3 to 5 minutes. Don’t leave it in until it feels crisp; it firms more as it cools.
Questions That Come Up While Baking These Cookies
Original Toll House Chocolate Chip Cookies
Ingredients
Equipment
Method
- Preheat the oven to 375°F.
- Whisk the flour, baking soda, and salt together in a medium bowl.
- Beat the butter, granulated sugar, brown sugar, and vanilla in a large bowl until creamy.
- Beat in the eggs one at a time, mixing well after each addition.
- Gradually mix in the flour mixture until just combined.
- Stir in the chocolate morsels and walnuts, if using.
- Drop rounded tablespoonfuls of dough about 2 inches apart onto two ungreased 18x13-inch baking sheets.
- Bake for 9 to 11 minutes, rotating the sheets’ positions halfway through, until the cookies are golden around the edges.
- Let the cookies rest on the baking sheets for 2 minutes.
- Transfer them to wire racks to cool completely.