Cold, creamy layers and a buttery cookie crust give this ice cream cake the kind of clean slice that disappears fast at a party. The vanilla base stays mellow and sturdy, the berry layer adds that bright strawberry note, and the whipped topping on top keeps the whole thing from feeling heavy. It looks like a celebration dessert, but the real appeal is how straightforward it is to build.
The crust works because vanilla sandwich cookies bring both sweetness and structure, and the melted butter helps them pack tightly enough to hold the ice cream without turning sandy. The trick is to let each layer firm up before adding the next one. If you rush it, the colors blur together and the cake loses that neat striped look when you cut it.
Below you’ll find the timing that keeps each layer separate, the best way to get a clean release from the springform pan, and a few easy swaps if you want to change the cookie base or make the cake ahead for a crowd.
The layers held their shape even after sitting out a few minutes, and the cookie crust stayed firm instead of crumbling when I sliced it. My kids kept asking for the berry layer on top because it tasted like strawberry shortcake ice cream cake.
The red, white, and blue layers stay sharp in this ice cream cake when you freeze each one before adding the next.
The Freezer Time That Keeps the Layers Separate
The biggest mistake with an ice cream cake is building it before the base has enough time to set. Soft ice cream looks cooperative in the pan, but it melts into the crust and smears the edge of the next layer. A short freeze between layers gives you those clean, defined stripes that still hold when you slice into the cake.
This cake also depends on using softened ice cream instead of fully melted ice cream. You want it spreadable, not runny. If it pours, it will puddle at the edges and make the finished cake dense instead of layered. The goal is a smooth top with distinct layers underneath, not a mixed-up ice cream pie.
What Each Ingredient Is Doing in This Cake

- Vanilla sandwich cookies — These form a sturdy, sweet crust that tastes like part of the dessert instead of just a base. Regular vanilla cookies work better than graham crackers here because they hold their shape under frozen layers and echo the vanilla ice cream.
- Unsalted butter — Butter binds the crumbs together and helps the crust firm up in the freezer. Salted butter can work in a pinch, but unsalted keeps the flavor cleaner and leaves the berry layers in charge.
- Vanilla ice cream — This is the anchor layer, so pick one that tastes good on its own. A high-quality vanilla gives the cake a creamier finish, while a bargain brand can taste flat once it’s frozen solid.
- Strawberry or mixed berry ice cream — Strawberry gives the most classic red-white-and-blue look, but mixed berry brings a little more tartness. Let it soften until it spreads easily; if it’s too cold, you’ll tear up the vanilla layer underneath.
- Blueberries and sliced strawberries — Fresh fruit adds brightness and keeps the top from feeling one-note. Dry the berries well before arranging them, or extra moisture will slide around on the whipped topping.
- Whipped topping or whipped cream — This finishes the cake with a light, fluffy layer that helps the fruit stay in place. Whipped cream tastes a little fresher, while whipped topping holds up a touch longer if the cake sits out for serving.
- Patriotic sprinkles — These are for the final bit of color and crunch. Add them right before serving so they stay crisp instead of bleeding into the whipped topping.
Building the Cake So It Slices Cleanly
Pressing the Crust Hard Enough
Mix the cookie crumbs with melted butter until the mixture looks like damp sand, then press it firmly into the bottom of the springform pan. Use the flat bottom of a measuring cup to pack it down so the crust doesn’t fall apart when you lift the first slice. Freeze it for 15 minutes before adding anything on top. If the crust feels loose, the ice cream will pull crumbs through the layers later.
Setting the Vanilla Layer First
Spread the softened vanilla ice cream in an even layer and smooth it all the way to the edges. If the ice cream is too soft, chill the bowl for a few minutes and stir once more before spreading. Freeze this layer until it feels firm to the touch. That pause matters because the berry layer needs a solid surface or the colors will blend together.
Finishing with the Berry Layer and Topping
Add the berry ice cream only after the vanilla layer is fully set, then smooth the top with an offset spatula. Freeze the whole cake for at least 4 hours, or overnight if you want the cleanest slices. When you’re ready to serve, warm a knife under hot water and wipe it dry between cuts. That keeps the blade from dragging through the frozen layers and leaving ragged edges.
Chocolate Cookie Crust Swap
Use chocolate sandwich cookies instead of vanilla if you want a deeper, more dessert-forward crust. The cake turns a little less bright in color, but the flavor gets closer to an ice cream sandwich and works especially well with strawberry ice cream.
Dairy-Free Version
Swap in dairy-free vanilla and berry ice cream, plant-based whipped topping, and a dairy-free cookie that holds up when frozen. The texture will be a little less rich, but the layering method stays the same and the cake still slices well once fully frozen.
Fruit Ribbon Instead of a Full Berry Layer
If you want a less sweet cake, use vanilla ice cream for both layers and scatter the strawberries and blueberries over the whipped topping instead. You lose the strong red middle stripe, but the cake tastes lighter and lets the cookie crust come through more clearly.
Storage and Reheating
- Refrigerator: Not ideal for more than 20 to 30 minutes before serving. The cake softens fast and the layers start to slump.
- Freezer: Freeze tightly wrapped for up to 1 week. After that, the ice cream can pick up freezer flavor and the crust starts to dry out.
- Reheating: No reheating needed. Let the cake sit at room temperature for 5 to 10 minutes before slicing so the knife can move through cleanly without shattering the layers.
The Questions Worth Asking Before You Start
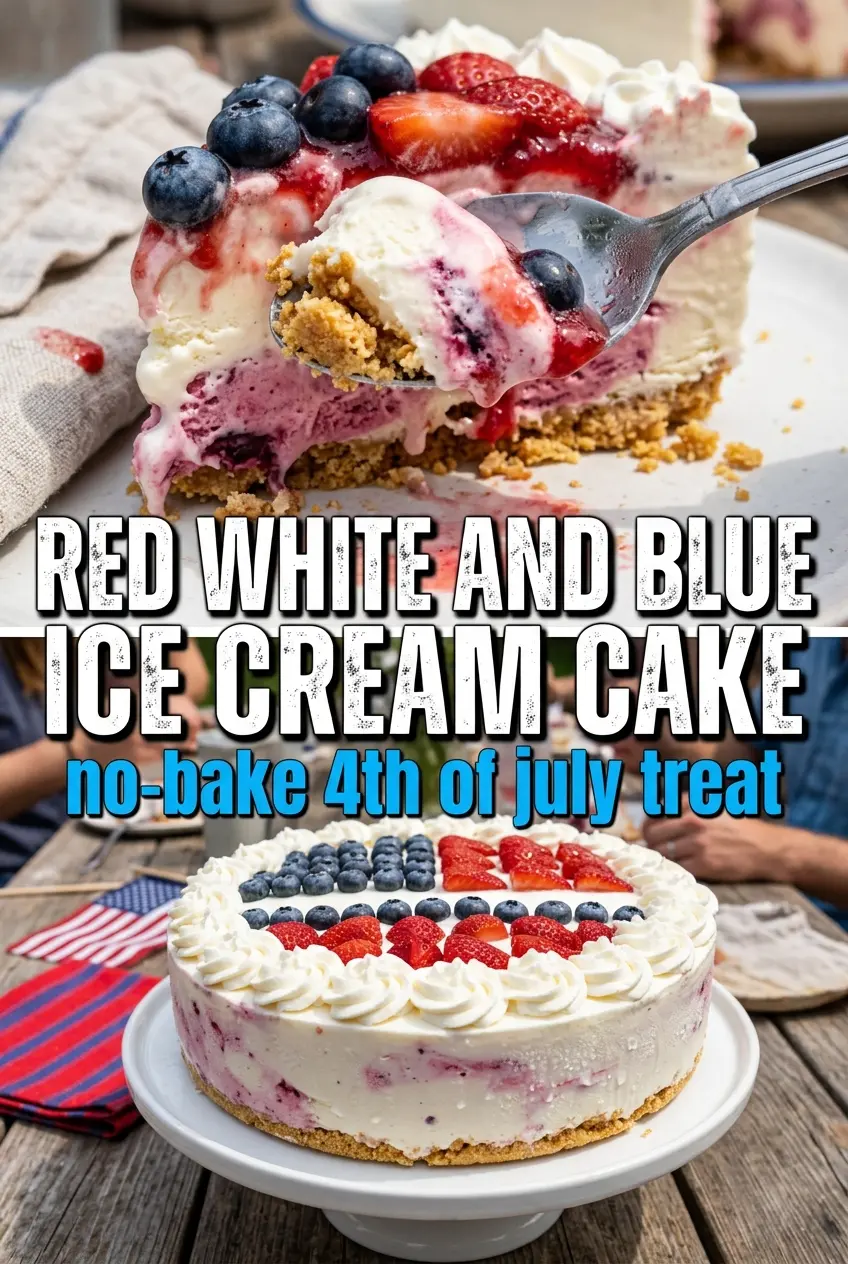
Red White and Blue Ice Cream Cake
Ingredients
Equipment
Method
- Mix the crushed vanilla sandwich cookies with melted unsalted butter, then press firmly into the bottom of a 9-inch springform pan. Freeze for 15 minutes to set, until the crust looks set and holds together.
- Spread the softened vanilla ice cream evenly over the crust, smoothing it into an even layer. Freeze for 1 hour, until firm to the touch.
- Spread the berry ice cream over the vanilla layer and smooth the top for a level surface. Freeze for at least 4 hours, or until solid.
- Run a warm knife around the edge of the pan and release the springform ring. Stop once the ring comes away cleanly without tearing the edges.
- Top the cake with whipped topping, spreading it to cover the surface. Keep a smooth top so the fruit pattern stays crisp.
- Arrange the blueberries and sliced strawberries in a flag-inspired pattern on top. Place berries firmly so they adhere as the cake starts to soften.
- Finish with patriotic sprinkles and serve immediately, slicing with a knife dipped in warm water for clean cuts. Wipe the knife between slices if needed for neat edges.