When you lift the foil after the first bake, the sweet potatoes have softened, but the center still needs time in the oven. That covered stretch gives the thin slices a chance to cook gently in the cream sauce; the uncovered finish lets the sauce bubble while a knife-soft center tells you the potatoes are ready. Scalloped Sweet Potatoes are all about that balance: tender layers held together by a smooth, savory sauce.
I make the sauce on the stovetop before it goes into the baking dish. Cooking the flour briefly in butter, then whisking in the milk and cream, gives the sauce a head start thickening instead of leaving the potatoes surrounded by thin liquid. Garlic and a little nutmeg keep the cream from tasting flat, while black pepper adds a quiet bite. The finished casserole is rich without needing a cheese topping, with soft slices tucked into every spoonful.

Kitchen Note
Give the casserole its full 15-minute rest before serving. The sauce settles around the slices, so portions hold together better instead of sliding apart while you scoop.
Save these scalloped sweet potatoes for a cozy side dish with tender layers and a garlic cream sauce.
Why This Scalloped Pan Has a Creamy Top, Not a Cheese Crust
Scalloped sweet potatoes often get treated like a gratin, but this version gets its body from a flour-thickened cream sauce, not a blanket of cheese. That changes what to look for at the end: the sauce should bubble, and a knife should pass easily through the middle. You aren’t waiting for a browned cheese layer to announce that it’s done.
The sauce needs to be thick enough to coat a spoon before it goes over the potatoes. That stovetop step matters because the casserole isn’t relying on cheese to thicken the liquid as it bakes. If the sauce is still watery in the saucepan, it hasn’t reached the right consistency yet; let it simmer while whisking until it clings to the spoon. Once it’s poured over the overlapping slices, the covered bake helps the potatoes cook through without the top drying out. The final uncovered bake gives the sauce time to bubble around the edges and finish reducing.
There’s no need to chase a deeply browned surface. The useful doneness cue is in the center, where the slices take longest to soften. A knife that slides in easily matters more than color on top, and the sauce will thicken a little as the casserole stands.
How the Sweet Potatoes, Flour, and Cream Build the Sauce
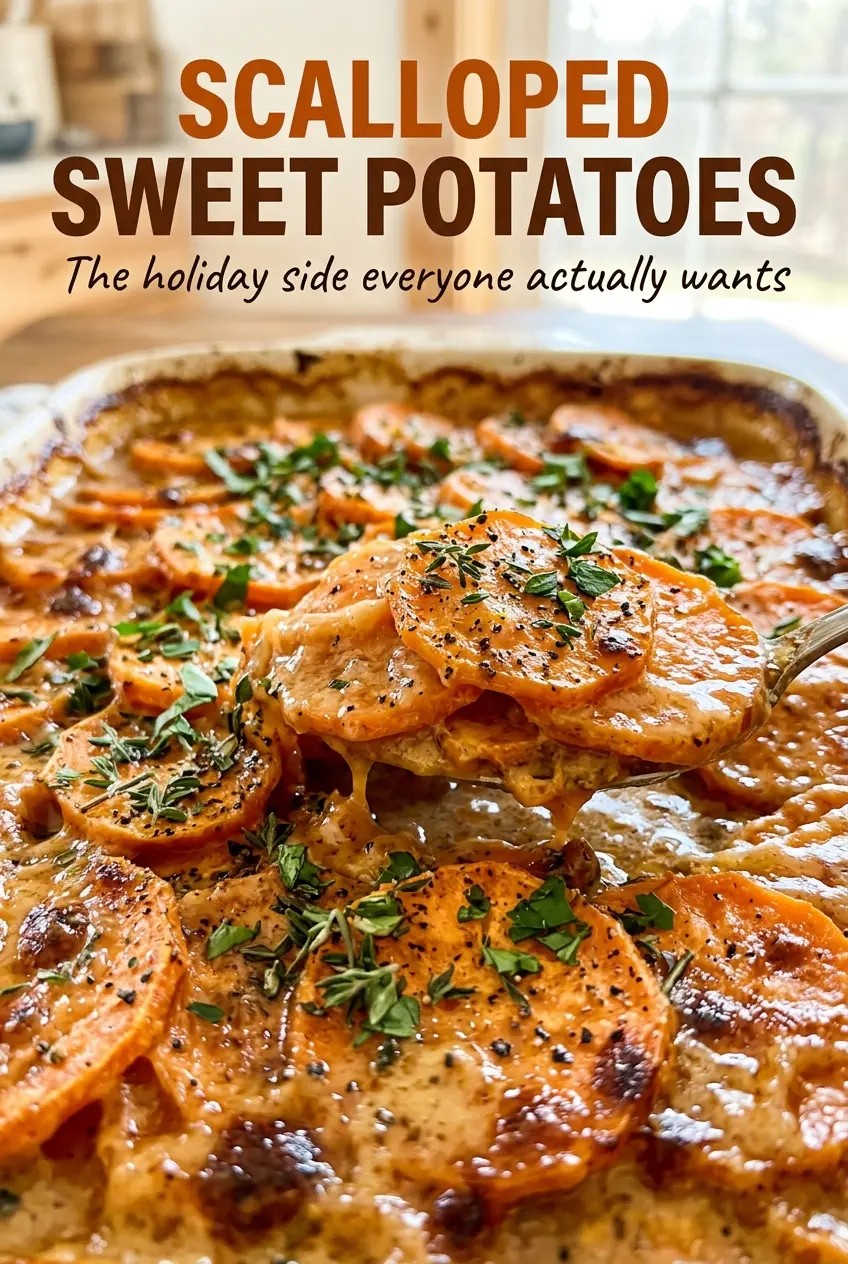
- Sweet potatoes — Choose firm potatoes without soft spots so the slices hold their shape through the long bake. Peeling them gives the casserole a consistent tender texture, and cutting them into even slices helps the center cook at the same pace as the edges.
- Unsalted butter — Butter carries the garlic and gives the flour a base to cook in. Unsalted butter lets the kosher salt do the seasoning, while a standard grocery-store butter works well here; there’s no need for a specialty variety.
- Garlic — Fresh minced cloves give the cream sauce a rounded savory note. Mince them finely so they disperse through the sauce rather than leaving large pieces in a bite. The brief cook in butter softens their raw edge without taking them anywhere near browned.
- All-purpose flour — Flour thickens the dairy into a sauce that can coat the potato slices. It needs that short cook in butter before the liquid goes in; adding milk and cream gradually helps the mixture stay smooth.
- Whole milk and heavy cream — The combination gives the sauce body and richness without making it as heavy as cream alone. Whole milk keeps the mixture creamy, while heavy cream contributes a fuller texture. Use fresh dairy, but an everyday brand is perfectly suitable.
- Nutmeg and black pepper — Nutmeg is a quiet background note that works particularly well with sweet potatoes and cream. Black pepper keeps the sauce savory. Ground nutmeg is convenient and appropriate here; it doesn’t need to be freshly grated.
Build the Sauce First, Then Give the Slices Time to Soften
Cut and Layer the Sweet Potatoes
Heat the oven to 375°F and grease a 9×13-inch baking dish with 1 tablespoon of butter. Peel the sweet potatoes, then slice them 1/8 inch thick; a consistent cut helps keep some pieces from turning mushy while thicker ones remain firm. Arrange the slices in overlapping layers across the dish, filling the base rather than leaving wide gaps. Keep the layers reasonably even so the sauce can flow through the casserole.
Cook the Garlic and Flour in Butter
Melt the remaining butter in a medium saucepan over medium heat. Stir in the minced garlic and cook it for 30 seconds, just until fragrant; if it starts to brown, lower the heat so it doesn’t turn bitter. Whisk in the flour and cook for 1 minute, stirring so no dry pockets remain. This brief cooking step gives the sauce its thickening base.
Whisk in the Dairy Until the Sauce Coats a Spoon
Pour in the milk and heavy cream gradually while whisking, rather than adding all the liquid at once. Stir in the kosher salt, black pepper, and nutmeg, then bring the sauce to a gentle simmer. Keep whisking as it cooks for 2 to 3 minutes; it’s ready when it thickens enough to coat a spoon. A rolling boil isn’t needed, and steady whisking helps prevent lumps from forming.
Bake Covered, Then Check the Center
Pour the sauce evenly over the layered potatoes and cover the dish tightly with foil. Bake for 40 minutes, then remove the foil and bake for another 20 to 30 minutes. Look for bubbling sauce and test the center with a knife; it should slide easily into the potatoes. If the center still feels firm, keep baking until that cue is there rather than relying on the edges alone.
Three Practical Ways to Adapt This Sweet Potato Casserole
Make It Gluten-Free With a Cornstarch Slurry
Replace the flour with 2 tablespoons of cornstarch. Skip cooking flour in the butter; instead, whisk the cornstarch into some of the cold milk until smooth, then add that mixture to the saucepan with the remaining milk and cream after cooking the garlic in butter. Simmer while whisking until the sauce coats a spoon, then continue with the casserole. The sauce will be glossy and a little less roux-like; use cornstarch labeled gluten-free if you’re cooking for someone who needs to avoid gluten.
Make a Milder, Garlic-Free Pan
Leave out the minced garlic and proceed with the butter and flour. The sauce will taste simpler and more dairy-forward, with the nutmeg and pepper coming through more clearly. This is a useful adjustment for anyone who prefers a quieter savory flavor, and it doesn’t require changing the baking process.
Scale It Down for a Smaller Meal
Halve each ingredient and bake the smaller batch in a suitably sized oven-safe dish. Keep the sweet potato slices at the same thickness and the oven at 375°F, but begin checking for tenderness before the full baking time has passed; a shallower layer cooks differently from the full 9×13-inch pan. Use bubbling sauce and an easy-sliding knife as your cues rather than assuming the bake time will be exactly half.
Storage and Reheating
- Refrigerator: Store covered in the refrigerator for 3 to 4 days. The sauce firms up when cold, then loosens as it heats.
- Freezer: Freeze cooled portions in airtight containers for up to 2 months. Thaw overnight in the refrigerator; the sweet potatoes may be a little softer after freezing.
- Reheating: Reheat covered in a 350°F oven until the center reaches 165°F. Keeping it covered helps the edges from drying before the middle is hot; uncover only near the end if you want the surface less moist.
Questions That Come Up When Baking Scalloped Sweet Potatoes
Scalloped Sweet Potatoes
Ingredients
Equipment
Method
- Heat the oven to 375°F.
- Grease a 9x13-inch baking dish with 1 tablespoon of the butter.
- Arrange the sweet potato slices in overlapping layers in the baking dish.
- Melt the remaining 4 tablespoons butter in a medium saucepan over medium heat.
- Add the garlic and cook for 30 seconds.
- Whisk in the flour and cook for 1 minute.
- Gradually whisk in the milk and heavy cream.
- Add the salt, pepper, and nutmeg, then bring to a gentle simmer.
- Cook, whisking, for 2 to 3 minutes, until the sauce thickens enough to coat a spoon.
- Pour the sauce evenly over the sweet potatoes.
- Cover the dish tightly with foil.
- Bake for 40 minutes.
- Remove the foil.
- Bake for 20 to 30 minutes more, until the sauce is bubbling and a knife slides easily into the center of the potatoes.
- Let the dish rest for 15 minutes before serving.