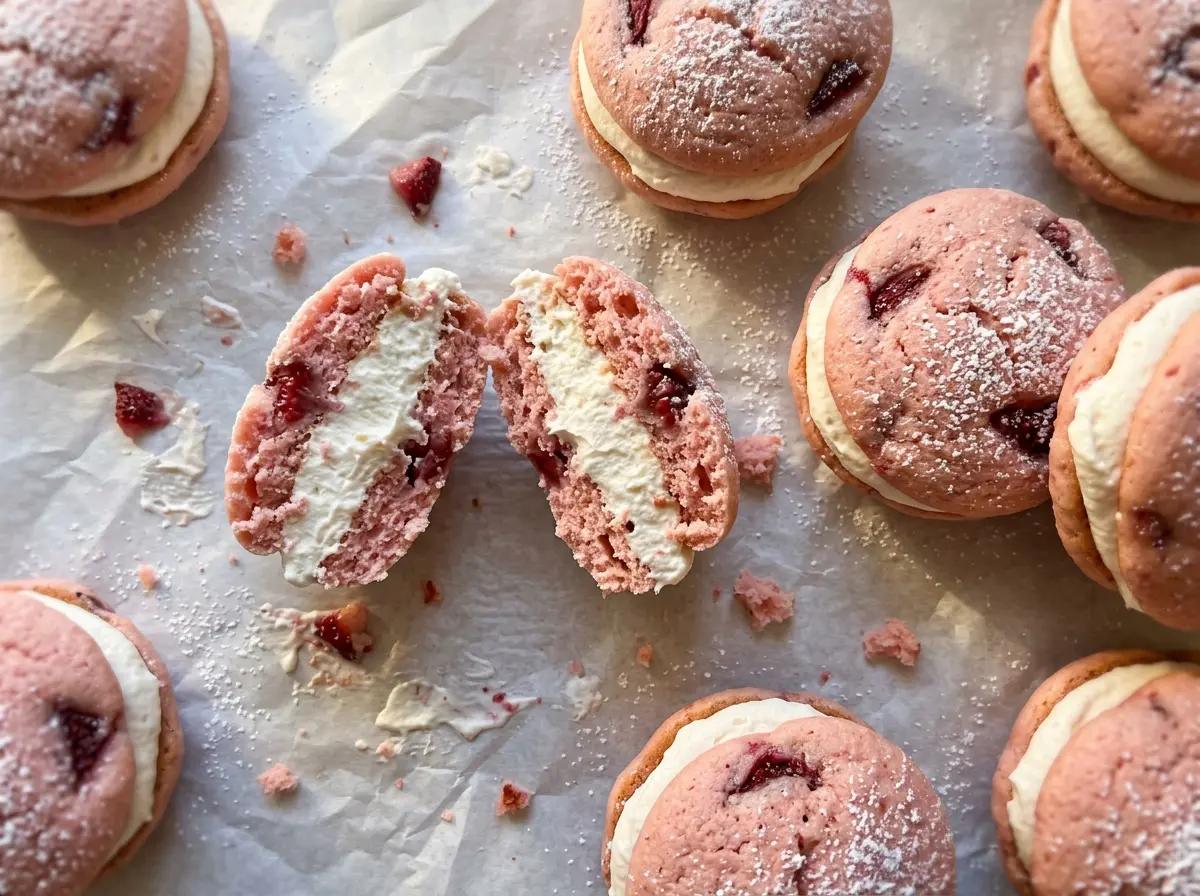
When the little strawberry cakes come out of the oven, their tops spring back under a light touch and the kitchen smells faintly fruity. These strawberries and cream whoopie pies get their color and flavor from freeze-dried berries, so the cakes stay tender without fresh fruit adding extra moisture to the batter.
I grind the berries to a fine powder and whisk them with the dry ingredients before they meet the butter and sugar. That spreads the strawberry flavor through every cake instead of leaving a few wet pockets. Once the shells are cool, a fluffy cream cheese filling goes between them, and a short chill helps the sandwiches hold together. The finished pies are soft, creamy, and unmistakably strawberry.
Kitchen Note
Let the cakes cool completely before you fill them. Even slightly warm cakes soften the cream cheese filling, which makes the tops slide when you pick up a pie.
Save these strawberries and cream whoopie pies for a bake with tender strawberry cakes and a tangy, fluffy cream cheese center.
Why Fresh Strawberries Can Make These Cakes Heavy
Fresh berries seem like the obvious way to bring strawberry flavor to a cake, but they carry plenty of water. In a small, soft cake like this, that extra moisture can make the batter uneven and the baked shells damp or dense. Freeze-dried strawberries solve that problem: once ground, they add concentrated berry flavor without the juice.
The powder also mixes into the flour instead of clumping through the batter. That matters in whoopie pies, where you want two tender cakes with a similar texture and enough structure to hold the filling. Whisking the strawberry powder with the flour, baking powder, baking soda, and salt distributes it before the wet ingredients go in. Keep the powder fine; large chewy bits won’t blend as evenly and can interrupt the soft cake crumb.
This is why fresh strawberries aren’t a straight swap here. Save them for serving, or use freeze-dried fruit in the batter when you want a different berry flavor without changing the moisture balance.
What the Strawberry Powder and Buttermilk Do in the Batter

- Freeze-dried strawberries — They provide strawberry flavor without adding liquid. Choose berries that grind easily into powder; a few larger pieces can be ground again before mixing. Freeze-dried raspberries are the closest fruit swap, though they’ll give the cakes a sharper berry taste.
- Buttermilk — Its gentle acidity works with the baking soda, while its thickness keeps the batter from turning loose. Plain kefir is a useful substitute in the same volume; the cakes may have a slightly different tang.
- Unsalted butter — Softened butter creams with the sugar and helps give the cakes their tender, light texture. Use butter that’s pliable but not melted. Salted butter works in a pinch, but it adds salt beyond the measured amount in the batter.
- Cream cheese — This gives the filling its tang and body, which keeps it from tasting like plain buttercream. Full-fat cream cheese makes the sturdiest filling; a lower-fat Neufchâtel-style cheese can make it softer.
- Powdered sugar and heavy cream — Powdered sugar sweetens and thickens the filling, while heavy cream helps it beat up fluffy. Don’t replace powdered sugar with granulated sugar; it won’t dissolve into the same smooth texture.
From Fine Berry Powder to a Set Cream-Filled Sandwich
Grind the berries and whisk the dry ingredients
Heat the oven to 350°F and line two 18×13-inch rimmed baking sheets with parchment. Grind the freeze-dried strawberries into a fine powder, then whisk them with the flour, baking powder, baking soda, and salt in a medium bowl. Break up any clumps before you set the bowl aside. An even mix now helps the strawberry flavor carry through each cake.
Cream the butter, sugar, egg, and vanilla
Beat the softened butter and granulated sugar in a large bowl for about 2 minutes, until the mixture looks light and fluffy. Scrape the bowl if butter is sticking to the sides instead of joining the mixture. Beat in the room-temperature egg and vanilla until combined. If the egg is cold, the butter mixture may look less cohesive, so room-temperature ingredients make this stage smoother.
Alternate the flour mixture and buttermilk
Add the flour mixture in three additions, alternating with the buttermilk in two additions, and mix on low. Begin and end with the flour mixture, adding each portion after the previous one is mostly incorporated. Stop as soon as the batter comes together; beating past that point can make the cakes less tender. The finished batter should look evenly pink, with no dry flour streaks.
Portion, bake, and cool the cake rounds
Drop the batter in 1 1/2-tablespoon portions onto the prepared sheets, leaving about 2 inches between portions. Bake for 11–13 minutes, switching the sheets between oven racks halfway through. The tops should spring back when touched lightly; don’t wait for deep browning as your only doneness cue. Cool the cakes on the sheets for 5 minutes, then move them to a wire rack to cool completely.
Beat the filling and assemble the pies
Beat the softened cream cheese and butter in a medium bowl until smooth, then beat in the powdered sugar and vanilla. Add the heavy cream and beat until the filling is fluffy. Spread or pipe filling onto the flat side of half the cooled cakes, then top with the remaining cakes. Refrigerate the assembled whoopie pies for 30 minutes so the filling sets.
Two Easy Ways to Adapt the Strawberry Whoopie Pies
Swap in freeze-dried raspberries
Replace the freeze-dried strawberries with the same weight of freeze-dried raspberries and grind them into powder the same way. The cakes will have a brighter, tart berry flavor and a deeper pink hue, while keeping the dry-fruit approach that works for this batter.
Make a gluten-free batch
Replace the all-purpose flour with an equal amount of a cup-for-cup gluten-free baking blend that includes xanthan gum. The cakes may bake up a little more delicate, so cool them fully on the parchment before moving them to the rack. The cream cheese filling stays the same.
Storage and Serving
- Refrigerator: Keep leftover whoopie pies covered and refrigerated for up to 4 days. The cakes may become a little firmer as they chill.
- Freezer: Freeze the assembled pies individually, then store them in an airtight container for up to 2 months. Thaw them in the refrigerator before serving.
- Serving: Serve chilled; these don’t need reheating. Microwaving can soften the filling before the cakes warm evenly.
Questions That Come Up While Making Whoopie Pies
Strawberries and Cream Whoopie Pies
Ingredients
Equipment
Method
- Heat the oven to 350°F.
- Line two 18x13-inch rimmed baking sheets with parchment paper.
- Grind the freeze-dried strawberries into a fine powder.
- Whisk the strawberry powder with the flour, baking powder, baking soda, and salt in a medium bowl.
- Beat the butter and granulated sugar in a large bowl until light and fluffy, about 2 minutes.
- Beat in the egg and vanilla until combined.
- Add the flour mixture in three additions, alternating with the buttermilk in two additions, mixing on low just until combined.
- Drop the batter in 1 1/2-tablespoon portions onto the prepared sheets, spacing them about 2 inches apart.
- Bake for 11–13 minutes, switching the sheets between oven racks halfway through, until the tops spring back when lightly touched.
- Cool the cakes on the sheets for 5 minutes.
- Transfer the cakes to a wire rack to cool completely.
- Beat the cream cheese and butter in a medium bowl until smooth.
- Beat in the powdered sugar and vanilla.
- Add the heavy cream and beat until fluffy.
- Spread or pipe the filling onto the flat side of half the cooled cakes.
- Top with the remaining cakes.
- Refrigerate the whoopie pies for 30 minutes to set the filling.
- Keep any leftovers refrigerated.