The butter and sugars should turn creamy and fluffy before anything else goes into the bowl. That little change in texture is easy to miss if you rush, but it gives these Thick Chocolate Chip Cookies a sturdy start before the flour and chocolate are folded in.
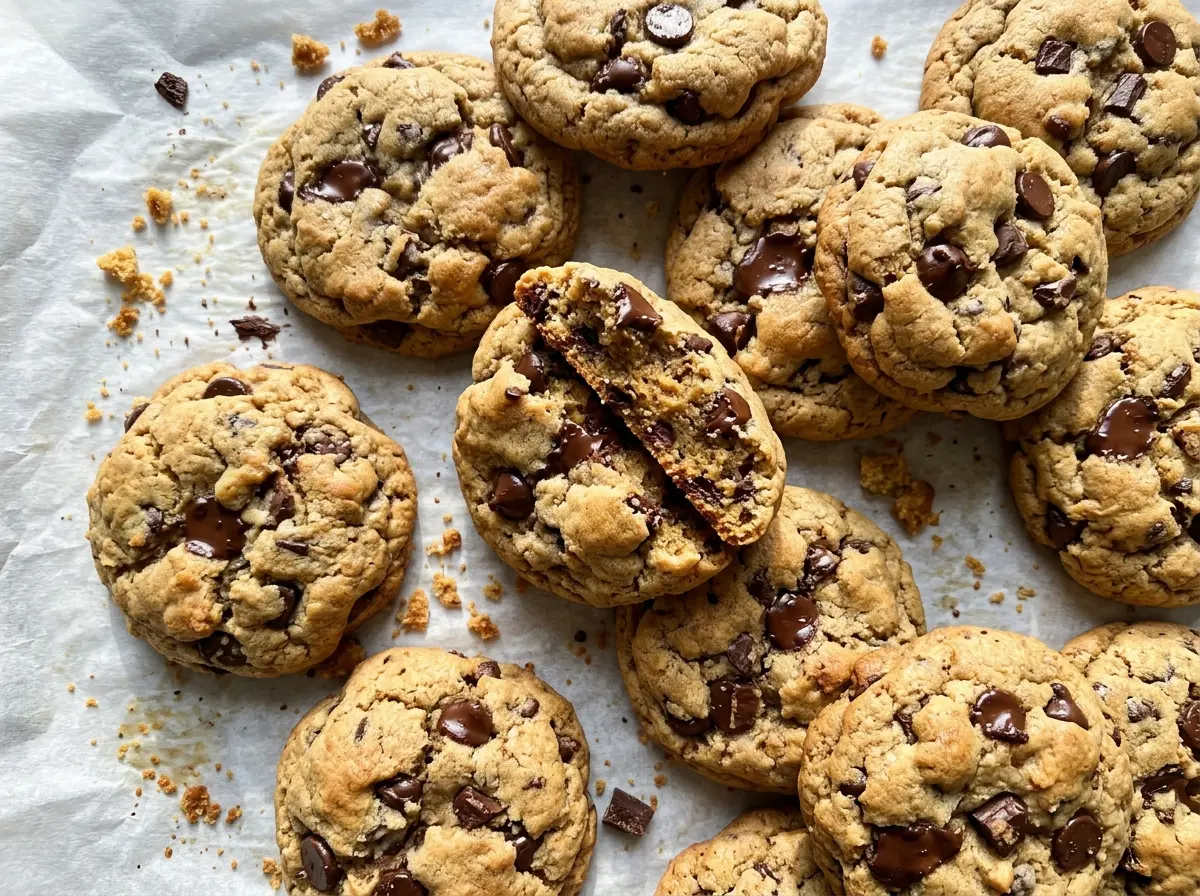
I like this dough because it makes thick cookies without complicated tricks: the dough gets a proper chill, and each portion is shaped into a tall mound before baking. The edges turn golden while the centers still look a touch soft, then the cookies settle as they cool. Break one open after it has cooled, and you get a tender middle with chocolate in every bite.
Kitchen Note
Give the cookies their full 10 minutes on the baking sheets before moving them. They’re delicate straight from the oven, and that short rest lets them firm up without losing their soft centers.
Save these Thick Chocolate Chip Cookies for their tall shape, golden edges, and soft, chocolate-filled centers.
Why the Extra Egg Yolk Makes These Cookies Thick but Tender
The extra yolk is doing more than adding another egg to the bowl. A yolk brings fat and richness without the additional white, which contributes more water and protein. That balance helps the centers stay tender instead of turning bready as the cookies bake.
It works alongside the brown sugar, which brings moisture and a gentle molasses note, while the granulated sugar helps the edges bake up with a little crispness. The result isn’t a cakey cookie or a thin, crunchy one. It lands in the middle: a substantial cookie with a soft bite and enough structure to hold its height.
Room-temperature eggs blend more smoothly into the creamed butter and sugars than cold eggs do. Scrape the bowl as you add them so the mixture comes together evenly before the flour goes in. Once the flour is added, stop mixing as soon as the dry streaks disappear; working the dough longer can make the finished cookies tougher.
What the Flour, Butter, and Chocolate Each Bring to the Dough

- All-purpose flour — Spoon it into the measuring cup and level the top rather than scooping straight from the bag. That keeps the dough from picking up excess flour and baking dry. A cup-for-cup gluten-free baking blend is the most practical swap; choose one formulated to replace wheat flour and measure it the same way.
- Cornstarch — This helps give the crumb a soft, tender quality without adding another flavor. If you leave it out, the cookies will still bake, but they won’t have quite the same delicate bite. It’s worth keeping for the texture this dough is meant to have.
- Unsalted butter — Use butter that’s softened enough to beat smoothly, but not melted or greasy. Unsalted butter also lets the fine salt stay in control. Salted butter can vary in saltiness from brand to brand, so unsalted is the more dependable choice here.
- Light brown sugar — Packed brown sugar adds moisture and a mild caramel-like flavor. Dark brown sugar works in the same amount if that’s what you have, though its stronger molasses taste will come through more.
- Semisweet chocolate chips — Chips hold their shape better than chopped chocolate, so you get distinct chocolate pockets throughout the cookie. Chopped semisweet chocolate is an easy swap; it melts into more uneven streaks and pools, with some smaller bits dispersing through the dough.
Mixing, Chilling, and Baking Without Losing the Height
Start with an Even Flour Mixture
Whisk the flour, cornstarch, baking soda, and fine salt together in a medium bowl. Break up any small clumps so the leavening and salt don’t collect in one spot. In a separate large bowl, beat the softened butter with both sugars on medium speed for 2 to 3 minutes, until creamy and fluffy. If butter is stuck to the sides or base, pause and scrape the bowl before continuing.
Bring the Dough Together Gently
Beat in the room-temperature egg, egg yolk, and vanilla until combined, scraping down the bowl as needed. Add the flour mixture and mix on low only until no dry flour remains. A few seconds too long at this point can build more gluten than you want, so don’t keep beating once the dough looks uniform. Fold in the chocolate chips until they’re spread through the dough.
Chill, Then Shape Tall Portions
Cover the dough and refrigerate it for at least 1 hour. While it chills, heat the oven to 375°F and line two 18×13-inch rimmed baking sheets with parchment paper. Scoop the dough into 18 portions of about 3 tablespoons each, then shape each portion into a tall mound rather than flattening it. Arrange 9 mounds on each sheet, leaving about 2 inches between them.
Bake Until the Edges Turn Golden
Bake for 11 to 13 minutes, swapping the sheets between racks and rotating them front to back halfway through. Look for golden edges and centers that still appear slightly underbaked; the centers will continue to set as the cookies cool. If you wait for the centers to look fully firm in the oven, they’re more likely to lose their soft middle. Let them rest on the baking sheets for 10 minutes, then move them to a wire rack to cool completely.
Three Easy Ways to Change the Chocolate or Flour
Go darker with bittersweet chips
Replace the semisweet chips with the same volume of bittersweet chocolate chips. The cookies will taste less sweet, and the chocolate flavor will stand out more against the brown sugar.
Use chopped semisweet chocolate
Swap the chips for the same volume of chopped semisweet chocolate. The pieces melt into irregular pockets and streaks rather than keeping the neat shape of chips, so the chocolate feels more varied from cookie to cookie.
Make a gluten-free batch
Use a cup-for-cup gluten-free baking blend in place of the all-purpose flour, measuring it by spooning and leveling. The texture may be a little more tender or slightly grainier depending on the blend, but the cornstarch and tall portions still help keep the cookies substantial.
Storage and Reheating
- Room temperature: Store completely cooled cookies in an airtight container for up to 4 days. The edges soften gradually, while the centers stay tender.
- Freezer: Freeze cooled cookies in an airtight freezer-safe container for up to 2 months. Separate layers with parchment so the chocolate doesn’t make them stick together.
- Reheating: Warm an individual cookie in the microwave for 8 to 10 seconds. Longer heating can melt the chocolate heavily and dry the cookie out.
Questions That Come Up While Baking Thick Chocolate Chip Cookies
Thick Chocolate Chip Cookies
Ingredients
Equipment
Method
- Whisk the flour, cornstarch, baking soda, and salt together in a medium bowl.
- Beat the butter, brown sugar, and granulated sugar in a large bowl with a hand mixer on medium speed for 2 to 3 minutes, until creamy and fluffy.
- Beat in the egg, egg yolk, and vanilla until combined, scraping down the bowl as needed.
- Add the flour mixture and mix on low just until no dry flour remains.
- Fold in the chocolate chips until evenly distributed.
- Cover the dough and refrigerate for at least 1 hour.
- Heat the oven to 375°F.
- Line two 18x13-inch rimmed baking sheets with parchment paper.
- Scoop the dough into 18 portions of about 3 tablespoons each.
- Shape each portion into a tall mound.
- Arrange 9 portions on each baking sheet with about 2 inches between them.
- Bake for 11 to 13 minutes, until the edges are golden and the centers still look slightly underbaked.
- Halfway through baking, swap the sheets between racks and rotate them front to back.
- Cool the cookies on the baking sheets for 10 minutes.
- Transfer the cookies to a wire rack to cool completely.