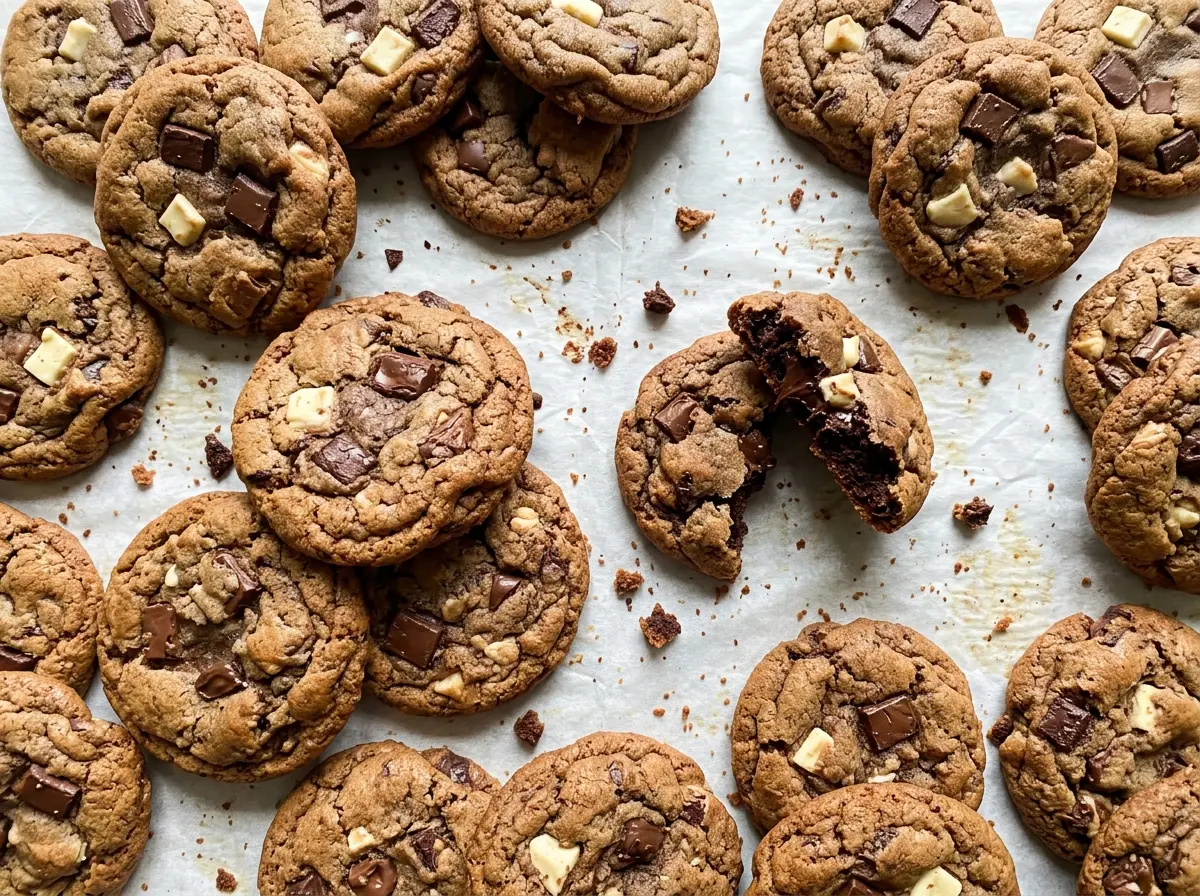
The edges look set before the middle does, and that’s exactly when I pull these cookies from the oven. Leave them on the hot baking sheet for a few minutes and the centers finish setting without losing that soft, fudgy bite. Triple Chocolate Chunk Cookies bring cocoa into the dough, then fold in three kinds of chocolate for a cookie that has a little contrast in every bite.
I chill the dough for 30 minutes before scooping. It gives the butter time to firm back up after mixing, so the portions are easier to handle and hold their shape better in the oven. The three chocolates each bring something different: semisweet cuts through the cocoa, milk chocolate adds sweetness, and white chocolate makes the pockets of melted chocolate feel extra creamy. The result is a rich, soft-centered cookie with plenty of chocolate in every bite.
Kitchen Note
Room-temperature eggs blend into creamed butter more smoothly than cold ones. I set them out while I measure everything else; it helps the mixture stay cohesive when the eggs go in.
Save these Triple Chocolate Chunk Cookies for the next time you want soft cocoa cookies with three kinds of chocolate in every batch.
Why Three Kinds of Chocolate Need a Cocoa Dough
With three chocolate varieties in the bowl, it would be easy for the cookie itself to fade into the background. Unsweetened cocoa powder gives the dough its deep chocolate base without adding more sweetness, which lets the chunks stay distinct instead of turning every bite into the same sugary note. You get a cocoa-rich cookie around pockets of chocolate that melt at different rates.
The balance comes from using semisweet, milk, and white chocolate together rather than relying on one variety. Semisweet gives the mix a more pronounced chocolate edge; milk chocolate is gentler and sweeter, while white chocolate brings a creamy contrast. Keep the chunks in separate varieties when you stir them in, so each scoop gets a mix instead of one section of the bowl holding all the white chocolate.
The cocoa also changes what to watch for while baking. The dough is dark before it goes into the oven, so browning isn’t a useful cue. Look instead for edges that have set and centers that still look a little soft; the color won’t tell you as clearly when these cookies are ready.
What the Cocoa, Sugar, and Chocolate Each Bring

- Unsweetened cocoa powder — This supplies the cookie’s chocolate base, so choose cocoa you enjoy tasting on its own. A standard unsweetened cocoa powder works here; sweetened drinking cocoa would add sugar and isn’t a like-for-like swap. Whisk it thoroughly with the flour so you don’t get bitter cocoa pockets in the finished dough.
- Brown and granulated sugars — Packed light brown sugar brings moisture and a softer chew, while granulated sugar helps keep the edges from feeling too cakey. The combination matters more than choosing a specialty brand; ordinary grocery-store sugars work well. Pack the brown sugar into the measuring cup before leveling it.
- The three chocolate varieties — Chunks create larger melted pockets than small chips, and the mix gives the cocoa dough varied sweetness and texture. Good-quality chocolate is noticeable in those pockets, but regular baking chunks are perfectly practical. Keep the semisweet, milk, and white chocolate distinct rather than chopping them together into a fine mix.
- Unsalted butter — Softened butter creams readily with the sugars and lets you control the salt separately. It should yield when pressed without looking shiny or melted; butter that’s too warm can make the dough greasy and harder to portion.
From Fluffy Butter to Soft-Centered Cookies
Cream the Butter and Sugars
Beat the softened butter with both sugars on medium speed until the mixture looks light and fluffy, about 2 minutes. Scrape down the bowl if you see butter clinging to its sides instead of blending in. Add the eggs one at a time, beating after each, then mix in the vanilla. If the mixture looks a little uneven just after an egg goes in, keep mixing until it comes together before adding the next one.
Mix the Cocoa Dough Gently
In a separate bowl, whisk the flour, cocoa powder, baking soda, and kosher salt so the leavening and cocoa are spread through the dry mixture. Add it to the butter mixture and mix on low only until no dry streaks remain. Scrape the bottom of the bowl once if flour is hiding there. Stop as soon as the dough looks uniform; extra mixing after the flour is incorporated can make cookies tougher.
Fold in the Chunks and Chill
Stir in the semisweet, milk, and white chocolate chunks until they’re distributed through the dough. Cover the bowl and chill the dough for 30 minutes. The dough should feel firmer and less sticky when it’s ready to scoop. Don’t skip the rest if you want portions that are easy to shape and cookies that don’t spread as readily.
Bake Until the Centers Still Look Soft
Heat the oven to 350°F and line a large rimmed baking sheet with parchment paper. Scoop the dough into 3-tablespoon portions, leaving about 2 inches between them, and bake in batches for 10 to 12 minutes. The edges should look set while the centers remain slightly soft; they’ll continue to settle as they cool. Let the cookies sit on the baking sheet for 5 minutes, then move them to a wire rack to cool completely.
Easy Ways to Change the Chocolate Balance
Make the Batch More Semisweet
For a less-sweet balance, use 1 1/4 cups semisweet chunks, 1/2 cup milk chocolate chunks, and 1/2 cup white chocolate chunks. The total amount of chocolate stays the same, but the semisweet flavor comes forward more clearly.
Use One Kind of Chocolate
Replace all three varieties with 2 1/4 cups of semisweet chunks for a straightforward, cocoa-forward cookie. You’ll lose the sweet contrast from the milk and white chocolate, but the chunks will melt into rich pockets that suit the dough.
Make Them Gluten-Free
Replace the all-purpose flour with the same volume of a measure-for-measure gluten-free baking blend made for cookies. The dough may feel a little different to scoop, and the finished texture depends on the blend, but this is the most direct way to adapt the flour without changing the chocolate balance.
Storage and Reheating
- Refrigerator: Store the cooled cookies in an airtight container for up to 1 week. Chilling firms the centers, so let them come back to room temperature for a softer bite.
- Freezer: Freeze completely cooled cookies in an airtight container for up to 2 months, separating layers with parchment. Thaw at room temperature before serving.
- Reheating: Warm a cookie in the microwave for about 5 seconds if you want the chocolate pockets soft again. Longer heating can make the cookie hot and tough, so use short bursts.
Questions That Come Up While Baking These Cookies
Triple Chocolate Chunk Cookies
Ingredients
Equipment
Method
- Heat the oven to 350°F and line a large rimmed baking sheet with parchment paper.
- Beat the softened butter, packed light brown sugar, and granulated sugar with an electric mixer on medium speed until light and fluffy, about 2 minutes.
- Beat in the eggs one at a time.
- Mix in the vanilla extract.
- Whisk together the all-purpose flour, unsweetened cocoa powder, baking soda, and kosher salt in a separate bowl.
- Add the flour mixture to the butter mixture and mix on low just until no dry streaks remain.
- Stir in the semisweet, milk, and white chocolate chunks.
- Cover and chill the dough for 30 minutes.
- Scoop the dough into 3-tablespoon portions, spacing them about 2 inches apart on the prepared baking sheet.
- Bake in batches for 10 to 12 minutes, until the edges are set and the centers still look slightly soft.
- Let the cookies cool on the baking sheet for 5 minutes.
- Transfer the cookies to a wire rack to cool completely.
- Let the baking sheet cool before baking the next batch.