When the onions are soft and turning lightly golden, the whole kitchen smells sweet and buttery, but the filling still needs a little patience before it goes into the oven. I learned that a crisp bottom matters just as much as those tender onions in Vidalia Onion Pie. A refrigerated crust gets a brief bake with weights first, then another few minutes uncovered so it looks dry before the filling goes in.
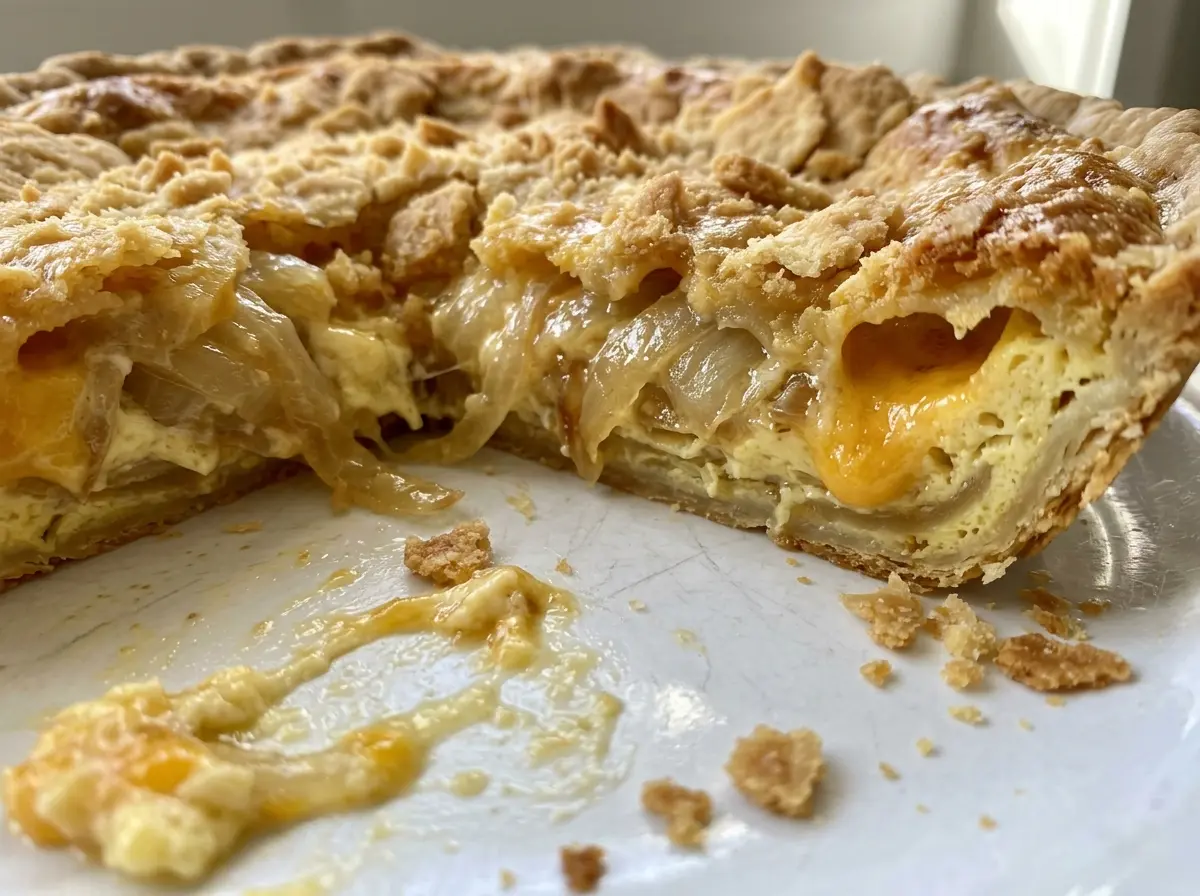
The filling is closer to a savory custard than a quiche packed with add-ins: eggs and sour cream hold the onions together, while sharp cheddar brings a salty edge. Let the cooked onions cool before folding them in, and the mixture stays smooth instead of beginning to set in the bowl. Once baked, each slice has a tender center, a flaky crust, and a delicate cheddar finish.
Kitchen Note
Don’t wait for the center to look completely firm before taking the pie out. The filling continues to settle as it cools, so I rely on the thermometer and the set edges rather than baking until the whole surface looks rigid.
Save Vidalia Onion Pie for its sweet onions, tender cheddar custard, and crisp par-baked crust.
Why a Dry-Baked Crust Makes All the Difference
Onion pie has a moist filling, and a raw crust under it doesn’t get the same chance to crisp as the exposed edges do. That’s where the short blind bake earns its keep. Baking the crust with parchment and weights helps it hold its shape; removing them for the final few minutes lets the bottom dry out instead of staying pale and damp beneath the custard.
Look at the base before you pour anything in. It should appear dry, not glossy or raw. If it still looks wet, the filling can cover that cue, and the bottom may bake up soft. Pricking the crust all over with a fork gives steam a way out, while the weights help keep the pastry from puffing as it bakes.
This extra step also gives the filling a head start in a separate way: the crust is already baked before it meets the egg mixture. The result is a slice that holds together when cut, with a pastry base that stays distinct from the soft onion filling rather than blending into it.
What the Sweet Onions, Sour Cream, and Cheddar Each Bring

- Vidalia onions — Their mild sweetness is the pie’s defining taste, and they soften into the creamy filling without the sharper bite of many storage onions. Choose firm onions without soft spots. If Vidalias aren’t available, regular yellow onions work, though the finished pie tastes more savory and less sweet.
- Sour cream — It gives the egg filling a gentle tang and a creamy texture. Full-fat sour cream makes the smoothest, richest custard; reduced-fat sour cream works but can make the filling less rich. Plain Greek yogurt is a practical substitute, though it tastes tangier and can make the custard slightly thicker.
- Sharp cheddar — Its pronounced flavor stands up to the sweet onions, so the pie tastes savory rather than bland. Pre-shredded cheddar is convenient; freshly shredded cheese melts more evenly and tends to leave a smoother filling.
- Refrigerated pie crust — A ready-made crust keeps the preparation focused on the onion filling. Keep it chilled until you fit it into the pie plate so it stays easier to handle and crimp. A homemade pastry crust can take its place if it’s sized for a 9-inch pie plate.
- Paprika — A small amount adds a mellow, earthy note and gives the filling a warmer color. Ground paprika that’s been sitting open for a long time loses aroma, so use one that still smells fragrant when you open the jar.
Build the Pie in Four Stages, Without a Soggy Bottom
Par-bake the pastry until the base looks dry
Heat the oven to 400°F and fit the refrigerated crust into a 9-inch pie plate, crimping the edge. Prick the bottom all over with a fork, then line it with parchment and fill it with pie weights or dried beans. Bake for 15 minutes, remove the parchment and weights, and return the crust to the oven for 5 minutes more. The bottom should look dry before it comes out; don’t pour in filling while the pastry still looks damp.
Cook the onions until tender and lightly golden
Melt the butter in a large skillet over medium heat, then add the sliced onions, kosher salt, and black pepper. Stir often as they soften over 12 to 15 minutes. You’re looking for onions that are very soft with just a little golden color, not browned or crisp at the edges. Take the skillet off the heat and let the onions cool for 10 minutes.
Make a smooth cheddar custard
Whisk the eggs and sour cream in a medium bowl until the mixture is smooth, with no streaks of sour cream. Stir in the shredded sharp cheddar and paprika. Fold in the cooled onions so they’re distributed through the custard instead of clumping in one spot. Spread the filling into the par-baked crust in an even layer.
Bake until the center is set
Lower the oven temperature to 350°F and bake the pie for 35 to 45 minutes. The edges should look set, and the center should no longer appear liquid; check that it registers 160°F on an instant-read thermometer. If the top is lightly colored but the center hasn’t reached that temperature, keep baking and check again rather than judging by color alone. Cool the pie for 15 minutes before slicing so the filling has time to settle.
Two Small Changes for a Different Onion Pie
A softer cheddar finish
Use mild cheddar in place of sharp cheddar for a gentler, less tangy cheese flavor. The filling will still bake into a savory custard, but the sweet onions will come through more clearly.
Leave out the paprika
Skip the paprika if you want the filling’s flavor to stay focused on onion, sour cream, and cheddar. The pie will lose a little earthy warmth and color, but the custard will still set as intended.
Storage and Reheating
- Refrigerator: Cover leftover pie and refrigerate it for up to 3 days. The crust softens as it sits, while the filling stays creamy.
- Freezer: Freezing isn’t my first choice for this pie. The sour-cream-and-egg filling can turn watery or grainy after thawing, and the crust loses its flaky texture.
- Reheating: Warm individual slices gently in the microwave until heated through. Use short bursts and stop as soon as the center is warm; prolonged heating can make the egg filling rubbery.
Questions That Come Up With Vidalia Onion Pie
Vidalia Onion Pie
Ingredients
Equipment
Method
- Heat the oven to 400°F.
- Fit the pie crust into a 9-inch pie plate and crimp the edge.
- Prick the bottom all over with a fork.
- Line the crust with parchment paper and fill it with pie weights or dried beans.
- Bake for 15 minutes.
- Remove the parchment and weights, then bake for 5 minutes more, until the bottom looks dry.
- Melt the butter in a large skillet over medium heat.
- Add the onions, salt, and pepper; cook for 12 to 15 minutes, stirring often, until very soft and lightly golden.
- Remove the skillet from the heat and cool the onions for 10 minutes.
- Whisk the eggs and sour cream in a medium bowl until smooth.
- Stir in the cheddar and paprika.
- Fold in the cooled onions and spread the mixture in the par-baked crust.
- Bake at 350°F for 35 to 45 minutes, until the center is set and registers 160°F on an instant-read thermometer.
- Cool the pie for 15 minutes before slicing.