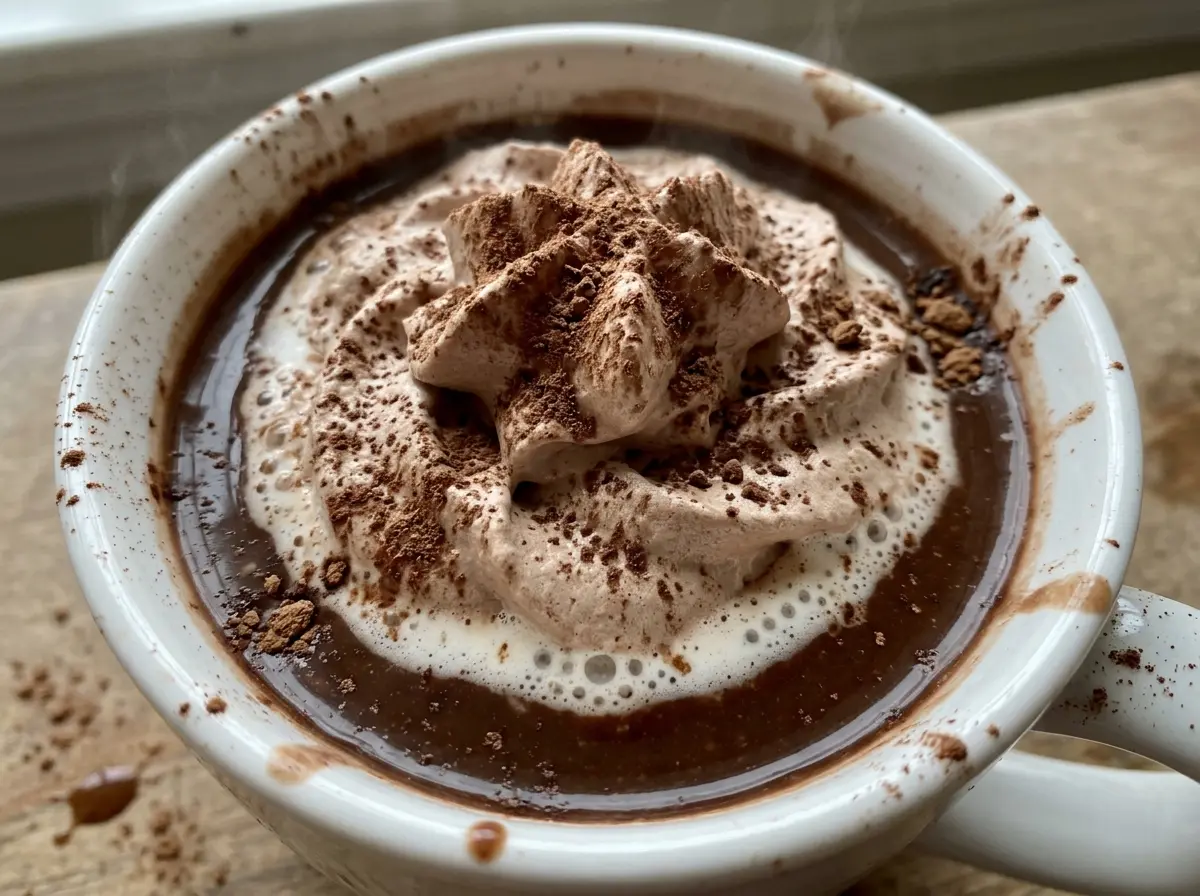
Tiny bubbles gather around the edge of the saucepan before the milk ever boils, and that’s the moment to take it off the heat. I like this whipped hot chocolate because the cocoa isn’t stirred into the milk; it’s beaten into a soft, chocolatey topping that sits right on top.
The topping comes together in two stages: a slow start to work the cocoa into the cream, then a faster beat until it holds its shape. That order keeps cocoa from puffing all over the counter and gives the cream time to turn thick and smooth. Keep the milk steaming rather than boiling, then spoon the topping over each mug while the contrast is still clear: warm, mild milk underneath and a cool, rich cocoa cap above.
Kitchen Note
Stop at medium-stiff peaks, while the topping still looks smooth and creamy. If you keep beating until it looks dry or clumpy, it won’t spoon onto the mugs as softly.
Save this whipped hot chocolate for a cozy mug topped with a thick, spoonable layer of cocoa cream.
Why the Chocolate Belongs on Top, Not Stirred Into the Milk
Whipping the cocoa into cream changes the mug in a way a spoonful of cocoa stirred into milk can’t. The air beaten into the cream makes a light cap, while the cocoa gives that cap a deep chocolate taste. Set over hot milk, it softens gradually from the bottom, so each sip shifts between creamy topping and warm drink instead of turning into one uniform mixture.
That contrast depends on keeping the topping thick enough to sit on the surface. If it’s loose, it sinks quickly and the mug loses its layered feel. Medium-stiff peaks give it enough body to mound on a spoon without turning dense or stiff. The milk plays a quieter role: whole milk keeps the drink underneath smooth and full, without competing with the more concentrated chocolate on top. This is why I serve the milk plain and let the cocoa topping do the chocolate-heavy work.
What the Cream, Cocoa, and Milk Each Bring to the Mug

- Heavy cream — Its fat content is what lets the topping hold air and form peaks. Heavy whipping cream works in its place in the same amount; lighter cream won’t whip into the same stable cap. Keep it cold so it thickens reliably.
- Unsweetened cocoa powder — Cocoa brings the topping’s chocolate flavor without adding sweetness. Natural cocoa tastes sharper, while Dutch-process cocoa is rounder; either unsweetened kind works here. Sweetened cocoa drink mix isn’t a direct swap because it already contains sugar and other ingredients.
- Powdered sugar — It sweetens the topping and blends into the cream without the gritty feel granulated sugar can leave. There isn’t a direct one-for-one granulated sugar swap that keeps the same smooth texture.
- Vanilla extract — A little vanilla rounds out the cocoa. You can leave it out if needed, though the topping will taste more plainly chocolatey; a different extract would give it a noticeably different character.
- Whole milk — Its richness gives the hot drink a soft, full texture beneath the topping. Two-percent milk works in the same amount, but the drink will be a little lighter. Use fresh milk, since its taste is easy to notice in such a simple base.
Whip the Cocoa Cap, Then Warm the Milk Without Boiling It
Blend the Dry Ingredients Into the Cream
Sift the cocoa powder and powdered sugar into a medium bowl, then add the cold heavy cream, vanilla, and kosher salt. Begin beating on low for about 30 seconds, just until the cocoa is incorporated; starting fast sends dry cocoa up the sides of the bowl. Once the mixture looks evenly chocolate-colored, increase to medium-high and beat for 2 to 3 minutes. Stop when medium-stiff peaks form.
Heat the Milk Until It Steams at the Edges
Pour the whole milk into a 2-quart saucepan and heat it over medium for 5 to 7 minutes, stirring occasionally. Look for steam rising from the surface and small bubbles gathering around the edges. Don’t let it boil; a rolling boil is hotter than you need and can leave a skin on the milk. Take the pan off the heat when it reaches that steaming stage.
Top Each Mug Just Before Serving
Divide the hot milk among four mugs, leaving room at the top for the cream. Add a generous scoop of whipped chocolate topping to each one. The topping should sit visibly above the milk rather than disappear into it. Serve while the milk is hot and the topping still holds its shape.
Easy Adjustments for a Sweeter or Lactose-Free Mug
Make the topping more bittersweet
Use less powdered sugar in the topping if you prefer cocoa to lead. The result will taste less sweet and may be a little less firm, so spoon it onto the mugs soon after whipping.
Use lactose-free dairy
Replace the whole milk with lactose-free whole milk and the heavy cream with lactose-free whipping cream, keeping the same amounts. Choose cream labeled for whipping; the topping needs cream that can form peaks.
Storage and Reheating
- Refrigerator: Store leftover topping and milk separately in covered containers. The topping is best within a day; it may soften as it sits. Refrigerate leftover milk for up to 3 to 4 days.
- Freezer: I don’t recommend freezing the whipped topping; thawing can leave it grainy and loose. Milk can separate after freezing, so freezing isn’t the best choice for a smooth mug.
- Reheating: Warm the milk gently in a saucepan over medium, stirring occasionally, until steaming. Don’t boil it, and add the topping after reheating rather than heating the assembled mug.
Questions That Come Up When Making Whipped Hot Chocolate
Whipped Hot Chocolate
Ingredients
Equipment
Method
- Sift the cocoa powder and powdered sugar into a medium bowl.
- Add the heavy cream, vanilla extract, and kosher salt.
- Beat on low until the cocoa is incorporated, about 30 seconds.
- Beat on medium-high for 2 to 3 minutes, until medium-stiff peaks form.
- Heat the milk in a 2-quart saucepan over medium heat for 5 to 7 minutes, stirring occasionally, until steaming with small bubbles at the edges; do not let it boil.
- Divide the hot milk among 4 mugs.
- Top each mug with a generous scoop of whipped chocolate topping.