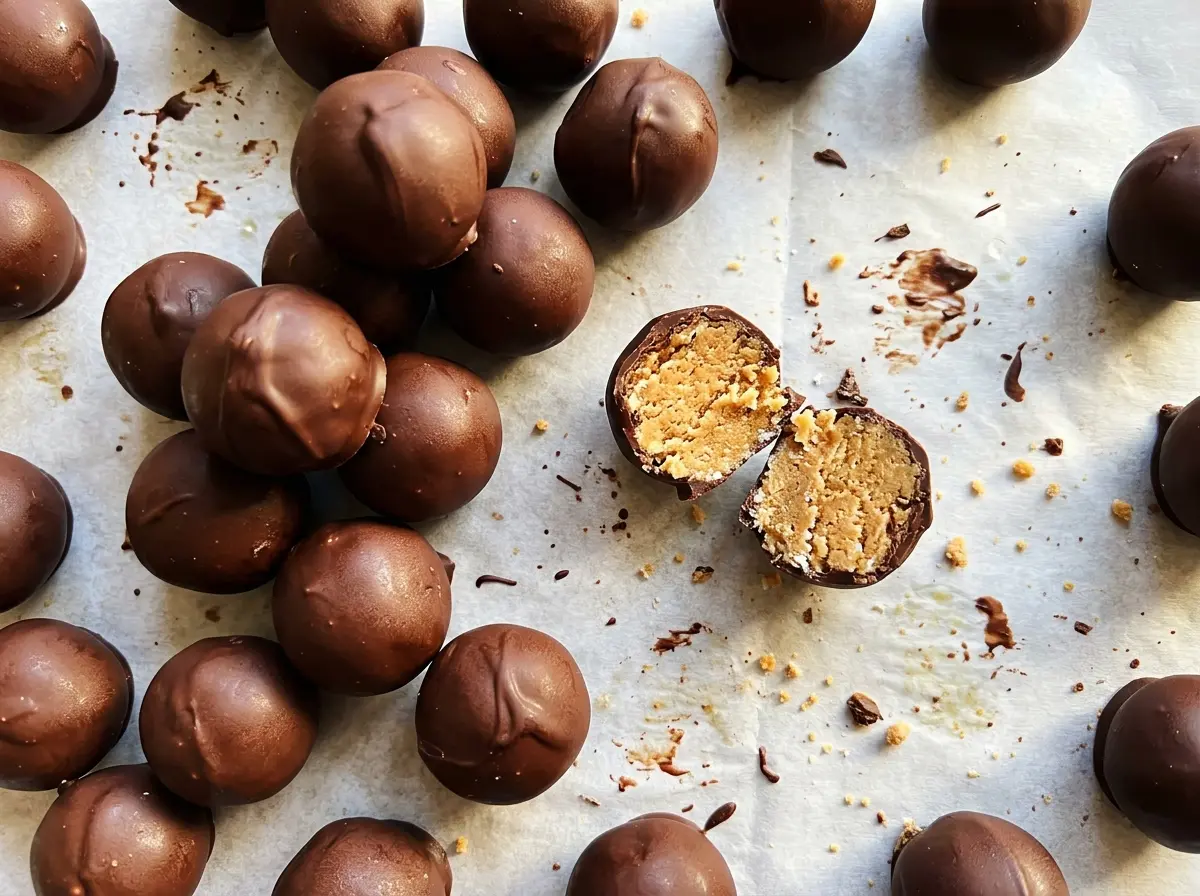
The first ball tells you whether the filling is ready for its chocolate coat: if it starts to smear as you dip it, the center needs more time to firm up. I chill the rolled centers before dipping, which keeps them neat and makes the whole process less fussy. These 4 Ingredient Peanut Butter Balls have a soft, sweet middle and a semisweet shell that sets in the refrigerator.
The filling gets its structure from creamy peanut butter, softened butter, and confectioners’ sugar—there’s no baking involved. Mixing the sugar in three additions helps it disappear into the fats instead of puffing out of the bowl, and the finished dough should feel firm enough to roll. Once the chocolate is smooth, let each ball shed its extra coating before it goes back on the parchment. The result is a tidy little candy with a clear peanut butter center under a crisp, chilled chocolate layer.
Kitchen Note
Set the parchment-lined baking sheet on a flat refrigerator shelf before you start rolling. The centers need room to stay separate while they chill, and a level sheet keeps them from drifting together.
Save these 4 Ingredient Peanut Butter Balls for a make-ahead treat with a firm chocolate shell and a soft peanut butter center.
Why the Chocolate Sets Firm Without Tempering
These are chilled candies, not room-temperature truffles. The chocolate chips melt gently in the microwave, then the refrigerator firms the coating around each peanut butter center. That cold set is what makes this method approachable: you don’t need a thermometer or a separate tempering process to get a shell that holds its shape when the balls are served chilled.
There is a tradeoff. A refrigerated coating won’t behave like carefully tempered chocolate if it sits warm for a long stretch, so keep the finished candies cold until you’re ready to serve them. The short interval melting method also gives you a chance to stop as soon as the chips turn smooth; chocolate can go from melted to scorched quickly when it stays under heat. For this recipe, a firm chilled shell is the goal, not a glossy finish that depends on precise crystal formation.
That distinction helps set expectations before you start. The coating should be smooth enough to cover the centers, and it will become firm as it chills. Keep the batch refrigerated for the cleanest bite and easiest handling.
What Each Ingredient Contributes to the Peanut Butter and Chocolate Balance

- Creamy peanut butter — It gives the centers their defining taste and a smooth texture. A conventional creamy peanut butter is the reliable choice here; natural-style peanut butter can separate and bring extra oil, which makes the filling less predictable. You don’t need a premium brand, but choose one that’s smooth and easy to stir.
- Unsalted butter — Softened butter blends into the peanut butter and helps the filling feel cohesive rather than sandy. A basic grocery-store butter works well; the useful prep detail is to soften it without melting it. Salted butter is a workable swap, though the centers will taste saltier.
- Confectioners’ sugar — Its fine texture sweetens and firms the filling without the grit you’d get from granulated sugar. A standard bag is fine, but keep it dry and measure it without packing it down. There isn’t a direct granulated-sugar swap that gives the same smooth, rollable center.
- Semisweet chocolate chips — They balance the sweet filling with a deeper chocolate taste and melt smoothly when heated gently. Store-brand chips work; choose another chocolate style only if you want to change the sweetness of the coating.
Mixing, Chilling, and Dipping Without Losing the Shape
Blend the Peanut Butter and Butter Until Smooth
Line a baking sheet with parchment paper before mixing so it is ready when the filling is rolled. Beat the creamy peanut butter and softened butter in a large bowl until the mixture looks even, with no visible streaks of butter. If the butter is still cold, small lumps can remain in the mixture, so give it time to soften before you begin. Don’t use melted butter; the source of structure here is softened butter worked smoothly into the peanut butter.
Add the Sugar in Three Batches
Beat in the confectioners’ sugar in three additions, letting each portion blend in before adding the next. The bowl may look powdery at first, but keep mixing until it comes together into a firm dough. If you add all the sugar at once, it is harder to incorporate evenly and more likely to puff out of the bowl. The finished dough should hold together when pinched, not flow like a soft spread.
Roll Even Centers and Chill Until Firm
Roll the dough into 36 balls, about 1 inch each, and arrange them on the lined baking sheet. Keeping the portions close in size helps them chill and coat at a similar pace. Refrigerate the balls for 30 minutes, until firm; the surface should feel set rather than sticky when you lift one. If a ball feels soft in your fingers, give the tray more time before dipping.
Melt, Dip, and Let the Coating Set
Put the semisweet chocolate chips in a microwave-safe bowl and heat them at 50% power in 30-second intervals, stirring after each interval. Stop when the chocolate is smooth, with no unmelted chips visible; don’t wait for it to bubble. Dip each chilled ball, let excess chocolate drip back into the bowl, and return it to the parchment-lined sheet. Refrigerate the coated balls for 20 to 30 minutes, until the chocolate is set.
Three Easy Ways to Change the Chocolate-Coated Centers
A darker, less-sweet shell
Replace the semisweet chips with the same amount of dark chocolate chips. The more intense coating gives the sweet peanut butter center a sharper contrast; the dipping and chilling method stays the same.
A sweeter milk chocolate coating
Use milk chocolate chips in place of the semisweet chips. The finished candies will taste sweeter and creamier, so this is a good choice if you prefer a gentler chocolate bite.
A dairy-free version
Use dairy-free stick-style butter in place of the unsalted butter and dairy-free semisweet chips for the coating, keeping the same quantities. The filling may be softer depending on the butter you choose, so a firm stick-style product is a better fit than a soft tub spread.
Storage and Serving
- Refrigerator: Keep the balls in an airtight container for up to 1 week. The filling stays soft, while the chilled chocolate shell stays firm.
- Freezer: Freeze the set balls in a single layer, then transfer them to an airtight container with parchment between layers for up to 2 months. Thaw them in the refrigerator.
- Serving: Serve chilled for the neatest shape and firmest coating. These are not a reheated treat; keep them cold until serving.
Questions That Come Up When Making Peanut Butter Balls
4 Ingredient Peanut Butter Balls
Ingredients
Equipment
Method
- Line a baking sheet with parchment paper.
- Beat the peanut butter and softened butter in a large bowl until smooth.
- Beat in the confectioners' sugar in three additions, mixing until a firm dough forms.
- Roll the dough into 36 balls, about 1 inch each, and arrange them on the baking sheet.
- Refrigerate for 30 minutes, until firm.
- Put the chocolate chips in a microwave-safe bowl.
- Microwave at 50% power in 30-second intervals, stirring after each, until smooth.
- Dip each chilled ball in the melted chocolate, letting excess chocolate drip back into the bowl.
- Return each ball to the lined baking sheet.
- Refrigerate the balls for 20 to 30 minutes, until the chocolate is set.