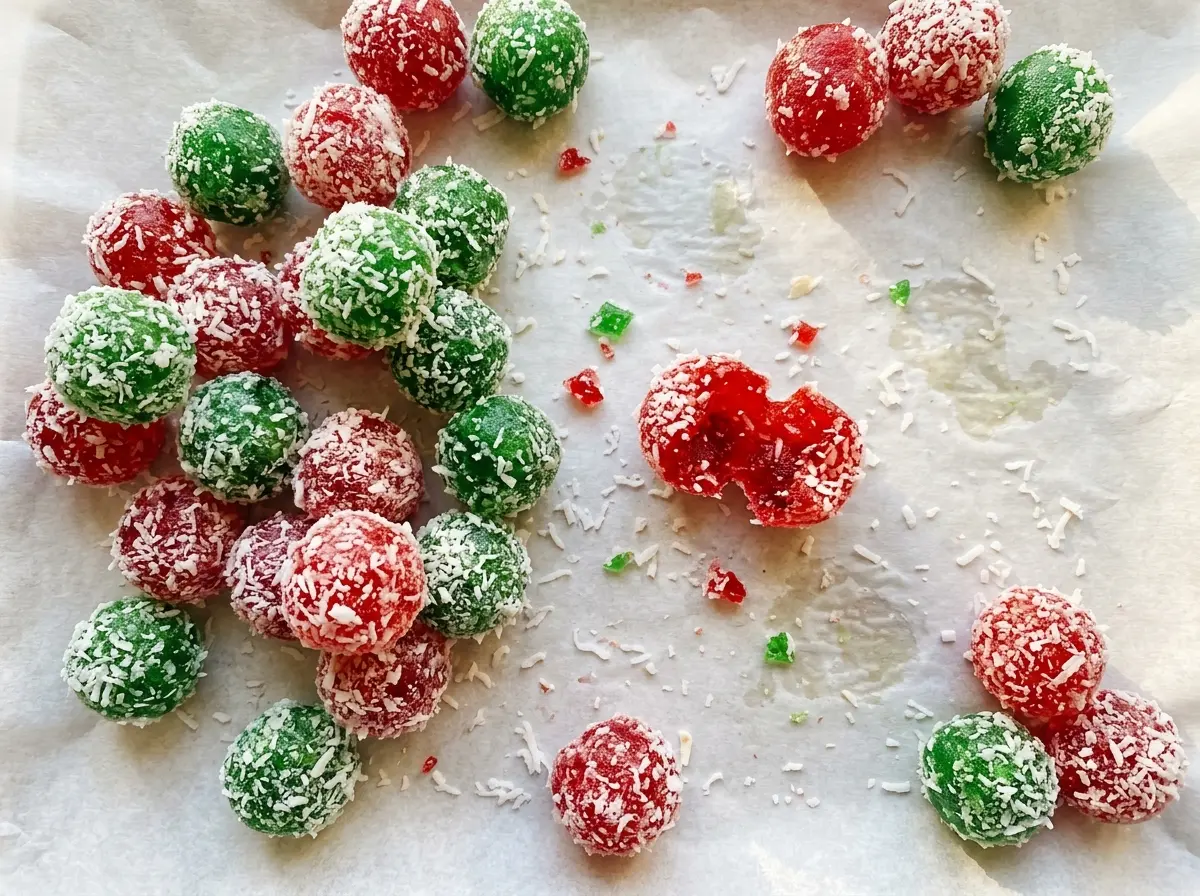
As soon as the condensed milk hits the cherry gelatin and powdered sugar, the bowl turns pink and thick, with coconut folding through every spoonful. The mixture looks soft at first, but a good chill makes it easy to portion and roll. Mom’s Christmas Jello Balls are a no-bake holiday candy with a cherry-sweet center and a second layer of coconut on the outside.
I like this recipe for the way its simple steps make a generous batch: 36 small treats from one bowl, with no oven or stovetop involved. The condensed milk brings the dry ingredients together, while the coconut gives each bite its familiar texture. Chill the mixture until it’s firm enough to shape, then give the finished balls time in the refrigerator before serving. They come out tender, sweet, and ready for a holiday tray.
Kitchen Note
Roll the portions between your palms with a light touch. Pressing too firmly packs the coconut into a dense bite, while a gentle roll keeps the balls tender.
Save Mom’s Christmas Jello Balls for a no-bake holiday tray: cherry-colored centers, a coconut coating, and 36 little bites from one batch.
Why the Cherry Gelatin Belongs in the Bowl Before the Condensed Milk
The dry ingredients need a head start. Whisking the cherry gelatin mix and powdered sugar together before adding anything sticky spreads the color and flavor through the sugar. If the condensed milk goes in first, it quickly turns the mixture thick, and dry pockets are harder to work out without over-stirring.
Take a moment to whisk until the dry blend looks even from edge to edge. That small bit of attention pays off in balls that look consistently pink instead of showing streaks or spots of concentrated gelatin. It also means the coconut gets folded into a more uniform base. Since this is a no-cook candy, there isn’t a later heating step to smooth out unevenly mixed ingredients; the bowl is where you get that consistency right.
Once the wet ingredients are added, stir only until the condensed milk and coconut are evenly incorporated. The finished mixture will be sticky before chilling, which is expected. It isn’t meant to feel like a dry cookie dough at this point; refrigeration firms it enough for shaping.
What the Cherry Mix, Condensed Milk, and Coconut Each Bring

- Cherry-flavored gelatin dessert mix — This is where the cherry taste and rosy color come from. Use a dessert mix rather than plain, unflavored gelatin; the latter doesn’t supply the sweetness or cherry flavor that defines these candies. A standard grocery-store brand works well.
- Powdered sugar — Its fine texture blends smoothly into the dry mix and helps build the sweet, soft center. Granulated sugar isn’t a like-for-like swap here; its crystals won’t blend into the mixture in the same way.
- Sweetened condensed milk — This thick, sweet milk binds the dry ingredients and coconut into a shapeable mixture. Don’t confuse it with evaporated milk, which is thinner and unsweetened; the two behave differently in this no-bake candy.
- Sweetened shredded coconut — Coconut gives the center its texture and forms the coating, so the recipe uses it in both places. Stick with sweetened shredded coconut for the closest result; finely shredded pieces may make a less textured coating, while large flakes are harder to roll the balls through evenly.
Chill the Mixture First, Then Roll While It’s Firm
Whisk the dry ingredients until evenly blended
In a large bowl, whisk the cherry gelatin mix and powdered sugar together. Work around the sides and bottom of the bowl, where dry ingredients tend to collect. You’re looking for an even blend without visible clumps or streaks. Doing this before the condensed milk goes in keeps the mixture easier to combine.
Stir in the condensed milk and coconut
Add the sweetened condensed milk and the coconut for the mixture, then stir until everything is evenly combined. Scrape through the bottom of the bowl so no dry mix is left underneath. Cover the bowl and refrigerate for 1 to 2 hours, until the mixture is firm enough to shape. If it still feels too loose to portion cleanly, let it chill until it reaches that workable texture.
Shape, coat, and chill the finished balls
Scoop the mixture into 1-inch portions and roll each one between your palms to form a ball. Roll each ball in the remaining coconut until coated. Arrange them in a single layer in an airtight container rather than piling them up. Refrigerate for at least 1 hour before serving so the finished candies are cold and set.
Two Easy Ways to Change the Batch
Swap the cherry for another gelatin flavor
Use another 3-ounce package of flavored gelatin dessert mix in place of the cherry mix. The color and taste will change, but the coconut and condensed milk keep the same candy-like texture. Choose a flavor you enjoy with coconut, and keep the package size the same so the dry-to-wet balance stays close to the original.
Make smaller, party-size bites
Scoop portions smaller than 1 inch for a petite candy tray. Keep the portions close in size so they chill at the same rate, and expect to get more than 36 pieces. The little bites have a higher ratio of coconut coating to center, which makes each one feel a bit less rich.
Make-Ahead and Storage
- Refrigerator: Keep the balls in a single layer in an airtight container for up to 5 days. The coconut may feel a little firmer after chilling, but the centers stay soft.
- Freezer: Freeze in a single layer, then transfer the firm balls to an airtight freezer container for up to 1 month. Thaw them in the refrigerator before serving.
- Serving: These are best served chilled, so there’s no reheating step. Keep the container closed between servings to protect the coconut coating and keep the candies cold.
Questions That Come Up When Making Jello Balls
Mom's Christmas Jello Balls
Ingredients
Method
- Whisk the gelatin mix and powdered sugar in a large bowl until evenly combined.
- Stir in the sweetened condensed milk and 2 cups coconut until evenly mixed.
- Cover and refrigerate for 1 to 2 hours, until firm enough to shape.
- Scoop the mixture into 1-inch portions and roll between your palms to form balls.
- Roll each ball in the remaining coconut.
- Refrigerate in a single layer in an airtight container for at least 1 hour before serving.