The first thing I watch is the chocolate: it needs to be smooth enough to dab, but not so hot that it runs across the cookie. Once that part is right, the candy pieces turn an ordinary chocolate sandwich cookie into a little turkey face without any baking. These Turkey Cookie Treats are a fun, hands-on project, and the decorating is simple enough to keep the focus on the small details instead of fussy technique.
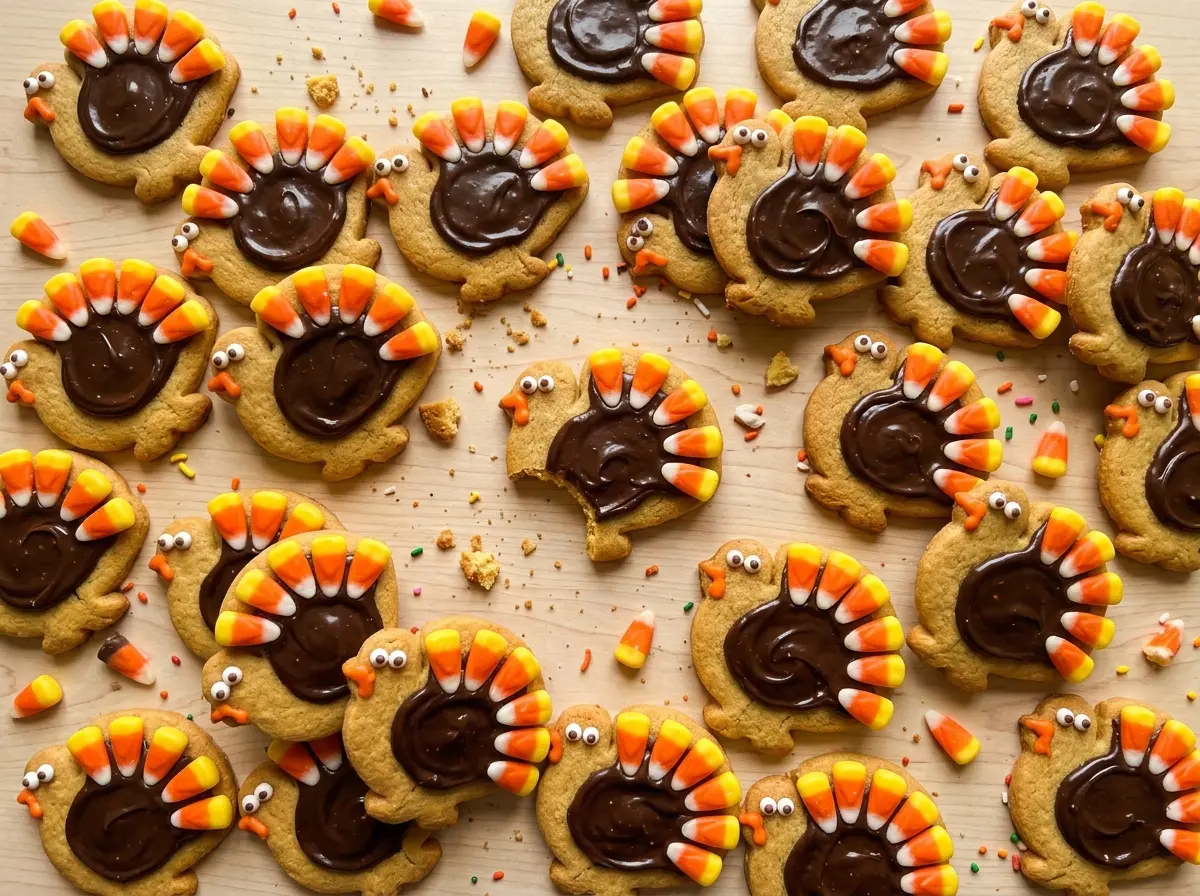
I like that the cookies stay whole, so there’s no dough to mix or oven timing to juggle. Each one gets a fan of candy corn along the top edge, then candy eyes and an orange candy-coated chocolate for the face. The contrast between the dark cookie and bright candies makes the turkey shape easy to recognize.
For a batch of 12, the decorating pattern is consistent and easy to repeat. Let the chocolate firm in the refrigerator before you move the cookies, and you’ll have neat little treats with crisp candy details and a chocolatey base.
Kitchen Note
Stir the chocolate after every 20-second microwave burst, even if the chips still look mostly whole. They can hold their shape while softening, and stirring helps you catch the moment they turn smooth before they get overheated.
Save these Turkey Cookie Treats for a cheerful cookie tray: chocolate sandwich cookies topped with candy corn feathers and bright little faces.
Why the Five-Candy-Corn Fan Makes the Turkey Shape Read Clearly
The decoration works because the feathers and face have separate jobs. Five candy corn pieces create a broad fan above the cookie, while the eyes and orange beak sit together as a smaller focal point. That difference in scale keeps the face from disappearing against the feather shape. It also gives each cookie a recognizable silhouette even before you notice the individual candies.
Consistency matters more than perfect symmetry here. Keep the fan close to the top edge and let the candy corn spread outward; a tight row can look more like a stripe than feathers. The face needs enough room below that fan to read as a face, so avoid crowding the eyes and beak against the top edge. A small dab of chocolate is enough to attach each piece, and a generous blob can spread beyond the candy and make the details look messy.
Because the cookies are already round and dark, they do much of the visual work for you. The candy corn adds a bright outline, and the orange candy-coated chocolate gives the face a clear center. Repeating that same layout across the batch makes the finished plate look intentional without requiring identical candy placement on every cookie.
What Each Candy Does in These Turkey Cookie Treats

- Chocolate sandwich cookies — These make a sturdy, ready-to-decorate base, with a dark surface that helps the bright candies stand out. Regular chocolate sandwich cookies are the straightforward choice; for a gluten-free batch, use gluten-free chocolate sandwich cookies in the same role. Cookie thickness and texture vary by brand, so choose a cookie that stays intact when handled.
- Semisweet chocolate chips — Melted chips attach the decorations and add a little chocolate between candy and cookie. Semisweet keeps the sweetness balanced against the candy corn and candy-coated chocolates, and ordinary baking chips work well here. Milk chocolate chips are the most useful swap if you prefer a sweeter, milder chocolate; the finished chocolate may set a little softer.
- Candy corn — Its tapered shape makes the feather fan recognizable without cutting or shaping anything. Fresh pieces with intact points are easiest to arrange neatly. There isn’t a direct replacement that keeps the same look, so changing this candy changes the feather design.
- Candy eyes — These give the cookies their little expressions and make the face legible at a glance. Use eyes that are small enough to sit beside the beak without taking over the front of the cookie. Leaving them off is possible, but the result reads more like a decorated cookie than a turkey face.
- Orange mini candy-coated chocolates — The small round shape gives the turkey a bright beak. Keep the orange candies whole so they’re easy to attach and don’t lose their candy coating. There’s no equally tidy swap among the listed decorations, so this is the piece that gives each face its orange focal point.
Decorating the Cookies Without Smearing the Faces
Set Up the Cookie Base
Line a baking sheet with parchment paper, then arrange the cookies in a single layer. Keeping them flat and separated gives you room to place the decorations without bumping neighboring cookies. The parchment also leaves the cookies on the same surface while the chocolate firms. Check that each cookie is stable before you start adding candy.
Melt the Chips Until Smooth
Put the semisweet chocolate chips in a microwave-safe bowl and heat them in 20-second increments. Stir after each increment, then return the bowl to the microwave if the chocolate isn’t smooth yet. Stop once the chips have melted into an even, glossy mixture. If you rush with a long burst, the chocolate can overheat before it looks fully melted.
Build the Feather Fan and Face
Use small dabs of melted chocolate to attach five candy corn pieces in a fan shape along the top edge of each cookie. Add the two candy eyes and one orange candy-coated chocolate to the front of each cookie for the face and beak. Work with a light touch so chocolate doesn’t squeeze out around the candies. Repeat the same arrangement on all 12 cookies.
Chill Until the Details Hold
Refrigerate the decorated cookies for 10 to 15 minutes, until the chocolate is firm. The candies should stay in place when you gently nudge a cookie, rather than sliding across the surface. If the chocolate still feels soft, give it a little more time in the refrigerator before handling the treats. Once set, the decorations are much less likely to shift as you move the cookies.
Two Easy Ways to Adapt the Cookie Base or Chocolate
Make a Gluten-Free Batch
Replace the chocolate sandwich cookies with gluten-free chocolate sandwich cookies, keeping the same count and decorating pattern. Choose chocolate chips and candy decorations labeled gluten-free as well, since ingredients and manufacturing practices differ among brands. The cookies may have a slightly different crunch, but the candy decorations and chocolate attachment work the same way.
Use Milk Chocolate for a Sweeter Finish
Swap the semisweet chips for the same amount of milk chocolate chips. They’ll make the attachment chocolate taste sweeter and less intense, which pairs well with the candy decorations if you like a sweeter treat. Keep the same short microwave intervals and stir between them, since milk chocolate can scorch if it gets too hot.
Storage and Reheating
- Refrigerator: Store the treats in an airtight container for up to 5 days. The cookies may soften slightly, and the chocolate will stay firm while chilled.
- Freezer: I don’t recommend freezing the assembled cookies; condensation after thawing can make the candy decorations sticky.
- Reheating: These treats aren’t reheated. Warmth softens the chocolate and can loosen the decorations.
Questions That Come Up While Decorating Turkey Cookies
Turkey Cookie Treats
Ingredients
Equipment
Method
- Line a baking sheet with parchment paper and arrange the cookies in a single layer.
- Place the chocolate chips in a microwave-safe bowl and microwave in 20-second increments, stirring each time, until smooth.
- Use small dabs of melted chocolate to attach 5 candy corn pieces in a fan shape along the top edge of each cookie, then attach 2 candy eyes and 1 orange candy-coated chocolate to the front of each cookie for the face and beak.
- Refrigerate the cookies for 10 to 15 minutes, until the chocolate is firm.